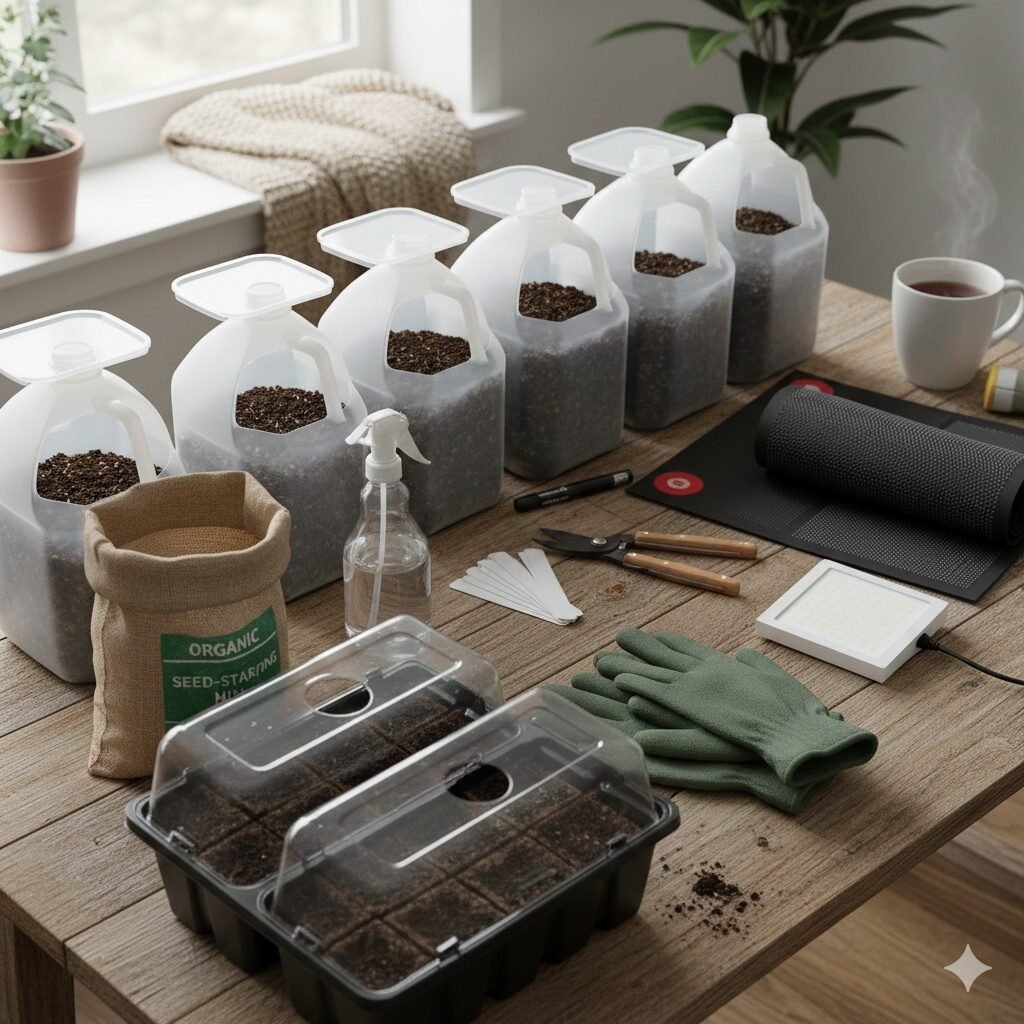
10 Must-Have Tools for Winter Sowing : So, winter sowing tends to be this a little magical thing where you toss seeds into simple containers and let cold weather do half the work for you, and honestly, it feels pretty calming. That said, you still need a few bits and pieces that, in a way, make the whole setup smoother. Ok, so I pulled together this list for new growers who want stuff that’s easy to use and pretty much ready to toss into the yard.
Quick List of Tools (Top Picks Chart)
As a gardener, these are the tools I recommend most for an easy and successful winter sowing setup.
| Tool | Why it matters | My Recommendation (Links) |
|---|---|---|
| Milk jugs / tubs | They’re, you know, a bit perfect for mini greenhouses. | Use any clean, empty milk jugs you already have—no purchase necessary! |
| Seed starting mix | Tends to be lighter, so seeds sprout easier. | Check Price on Amazon |
| Spray bottle | Keeps soil damp without flooding it. | Check Price on Amazon |
| Sharpie / markers | Labels that don’t fade in snow. | Check Price on Amazon |
| Garden shears | Helps cut vents and prep containers. | Check Price on Amazon |
| Mini greenhouse trays | Good for folks who want a tidier setup. | Check Price on Amazon |
| Gloves | Saves your hands when it’s cold and gritty. | Check Price on Amazon |
| Heat mats (optional) | Sometimes helpful for stubborn seeds. | Check Price on Amazon |
| Soil scoop | Makes filling jugs less messy. | Check Price on Amazon |
| Grow lights (optional) | Used later if seedlings stretch. | Check Price on Amazon |
10 Must-Have Tools for Winter Sowing: Detailed Product Descriptions
1. Milk Jugs or Plastic Containers
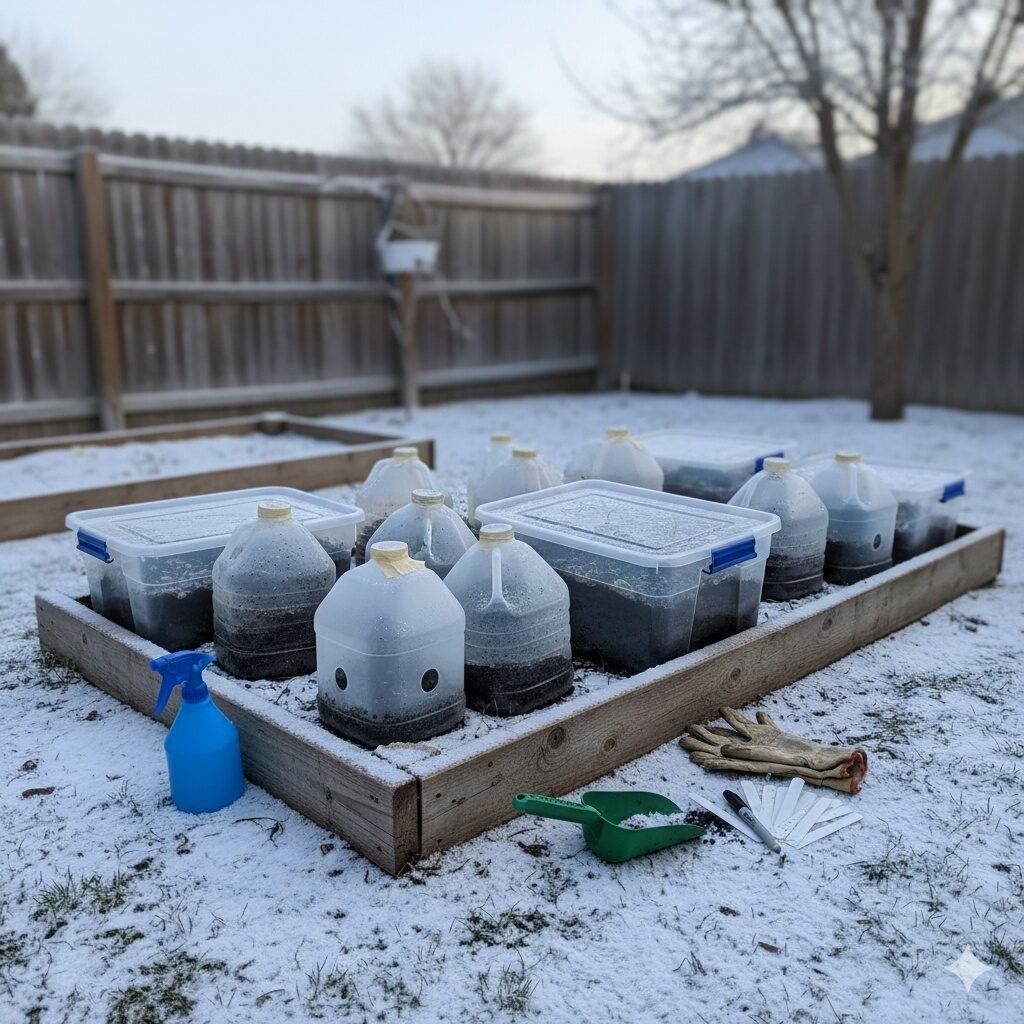
So these old jugs tend to be the heart of winter sowing, and in a way they act like little weather-proof shelters that sit outside without fuss. People usually slice them open, fill them with mix, and let the cold settle in like it’s doing half the job for them. You can pretty much use any clear-ish container as long as light sneaks in a bit. I’ve noticed that lifting the lid slightly helps air move through on warmer days. A small tip: cut a bit higher than halfway so the soil doesn’t spill everywhere. If you want to dive deeper, I have another article on this topic: Milk Jugs vs. Plastic Totes: Which Container Works Best for Winter Sowing? It might spark your interest.

2. Seed Starting Mix
This mix is, you know, a bit fluffier than normal soil and lets tiny roots wander around more freely without getting cramped. It tends to soak up water quickly but still stays loose, which keeps seeds from sitting in mushy stuff. Sometimes the bag comes with small lumps, so I just crush them with my fingers to make everything smoother. It’s almost funny how much easier seeds sprout when the mix feels light. You can add a little more water as you go until it’s nearly like damp cocoa powder.

3. Spray Bottle
A spray bottle tends to give gentle moisture instead of splashy puddles that wash seeds away. It’s actually nice for topping up the soil before sealing the jugs, since it spreads water more evenly. I sometimes add slightly warm water on colder days so the soil doesn’t feel icy. If the nozzle gets stuck, warm water usually helps loosen it. You might carry it around a bit because seedlings love that mist later too.
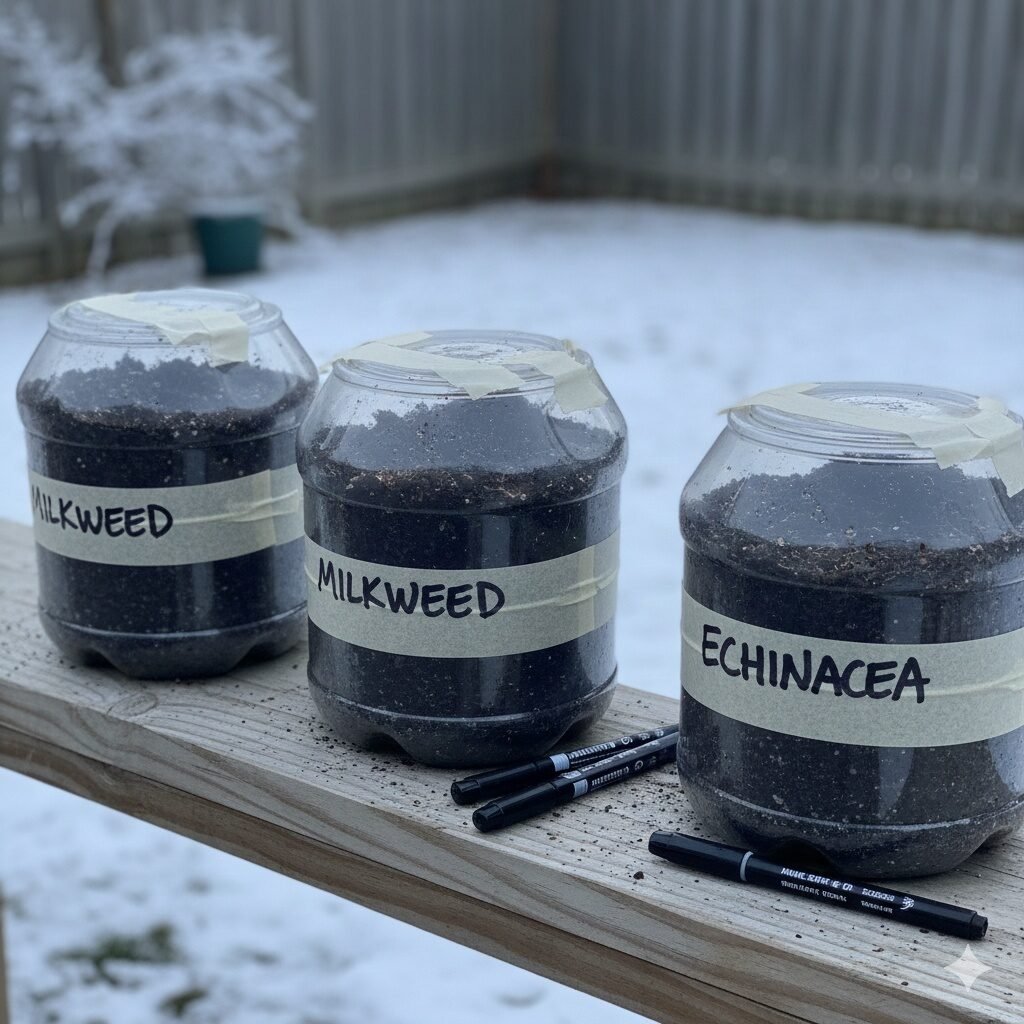
4. Sharpie or Weather-Safe Markers
This is that simple tool people forget, yet it’s extremely important because winter sunlight and wet snow make cheaper ink fade almost overnight. I usually mark lids and sides just in case snow covers stuff and shifts containers around. It’s a little funny how often labels save you weeks later when everything looks the same. Some folks double-label with tape, but I just press harder when I write. You’ll thank yourself later when spring chaos hits.
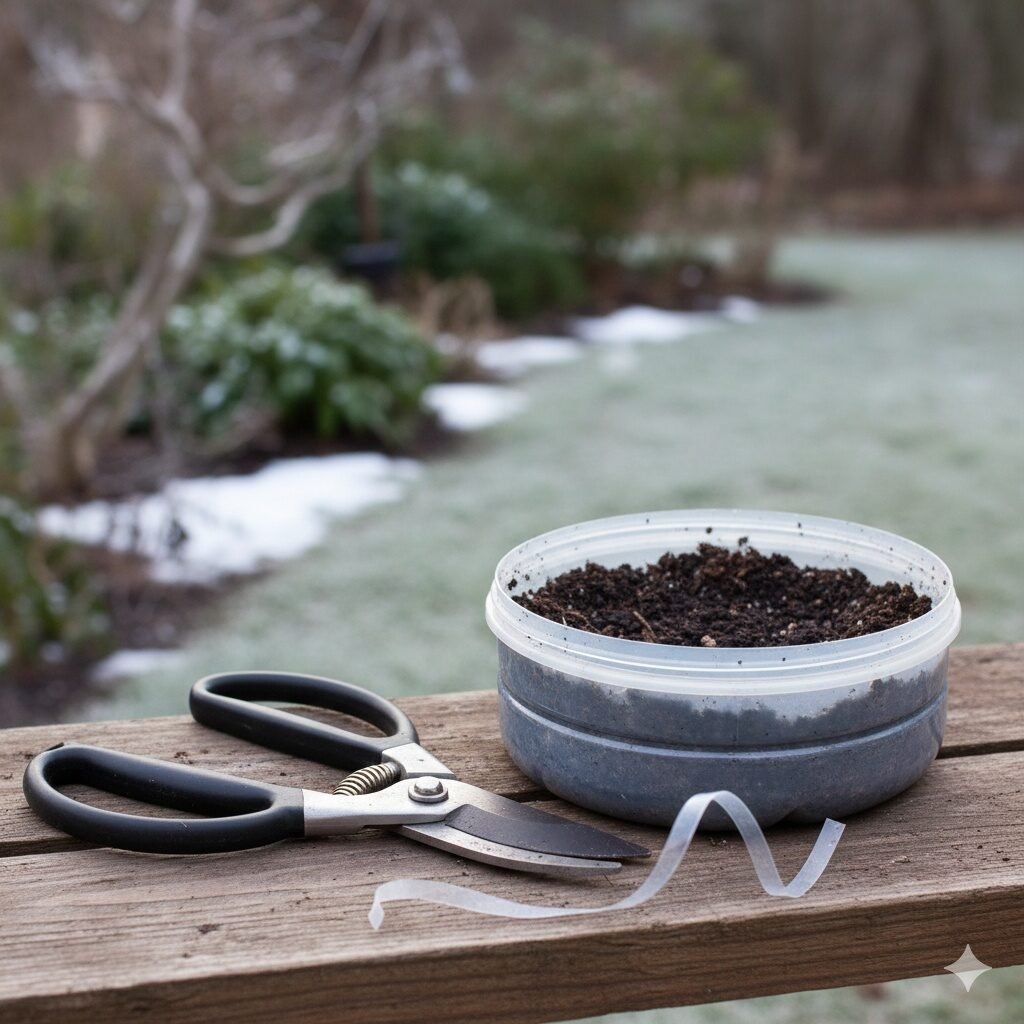
5. Garden Shears
Good shears make slicing containers a bit easier, and they typically stay firm even when your fingers feel stiff from the cold. I sometimes wipe the blades with a cloth so they don’t stick to damp plastic. Wrapping the handles with tape gives extra grip if they’re a bit slippery. They’re also handy for trimming roots or dead stems when you check things later. It’s one of those tools you grab without thinking once you get used to it.
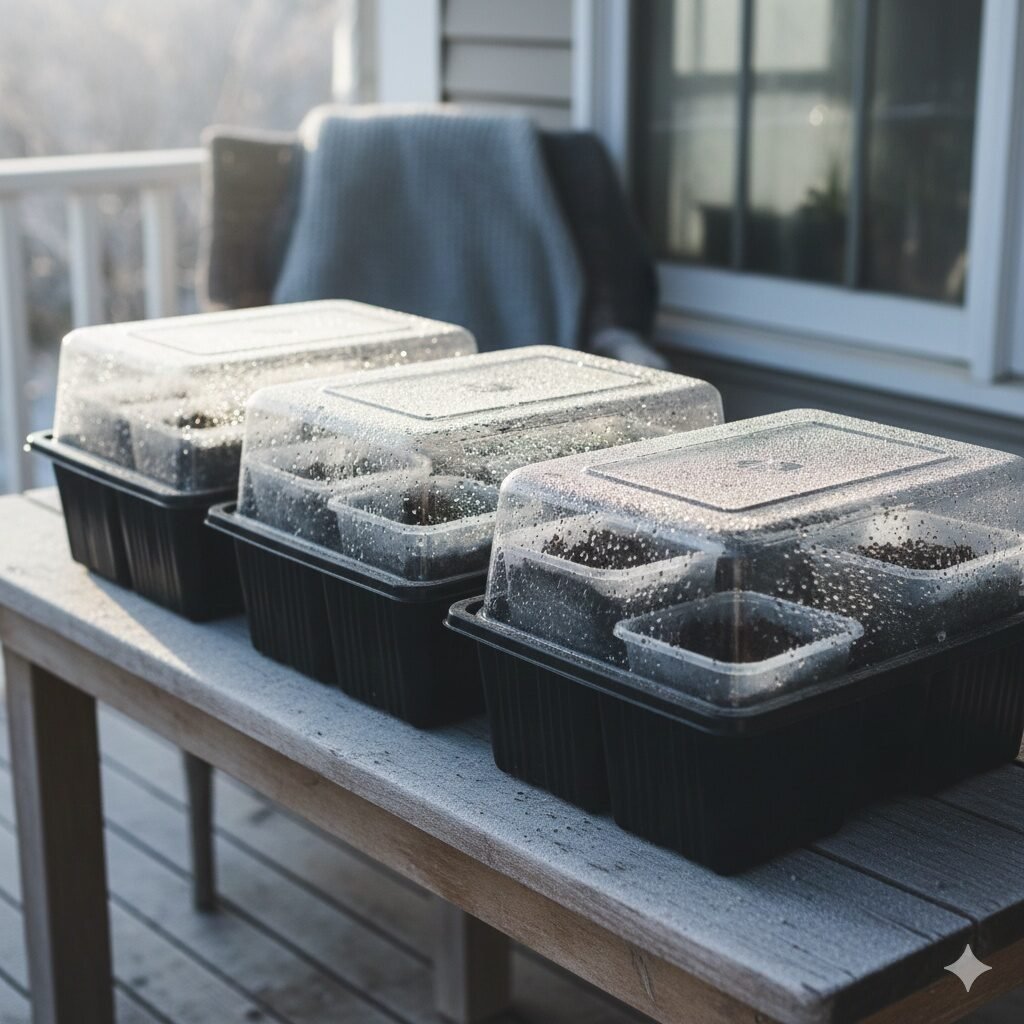
6. Mini Greenhouse Trays
These trays feel, in a way, neat for folks who want everything lined up instead of scattered around the yard. They also catch drips if you start things on a porch or near a doorway. I’ve seen people tuck several jugs into one tray so moving them outside becomes easier. They’re usually lightweight, so shifting them around doesn’t take much effort. It all keeps the setup looking a little less messy. Many gardeners choose an all-in-one seed-starting kit that comes with grow lights and heat mats—it’s often the more affordable and convenient route. For quick guidance on choosing the best container, check out the article—7 Container Types You Can Use to Winter Sow.
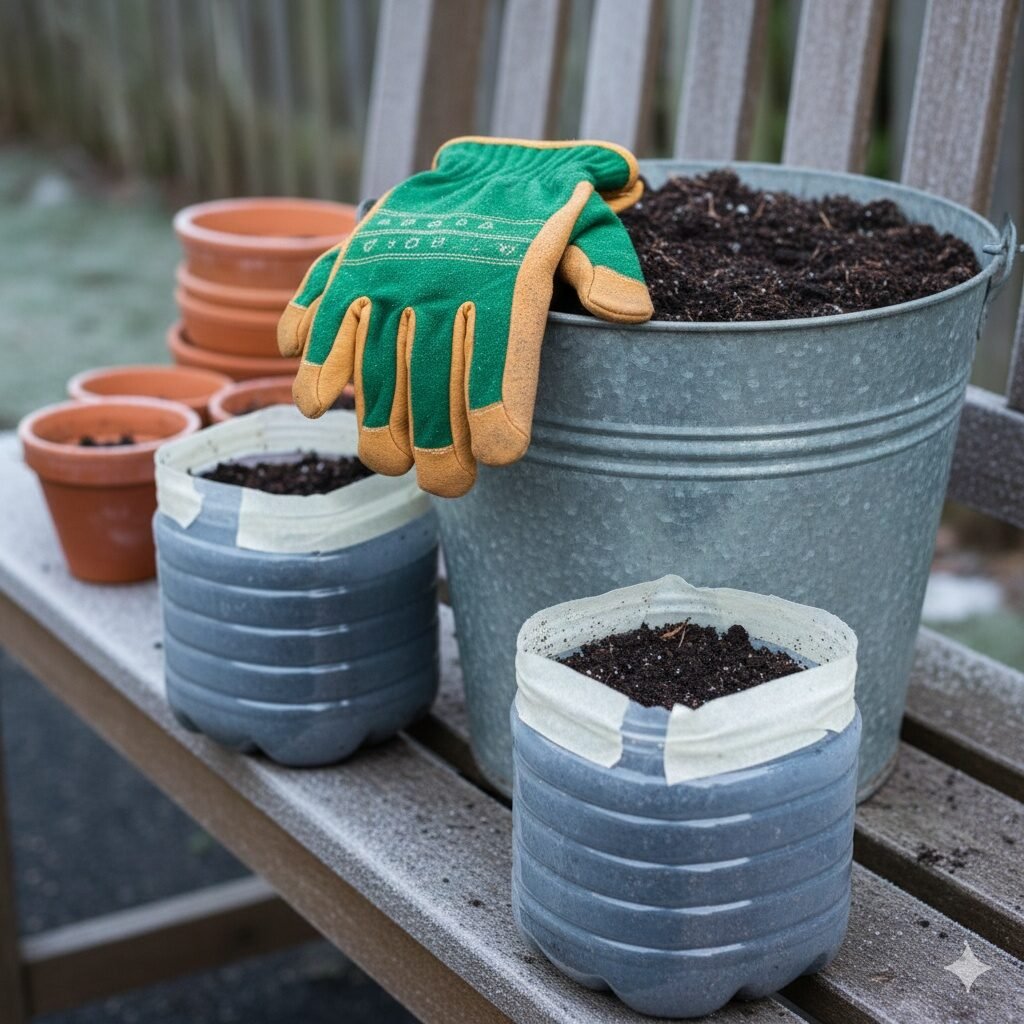
7. Gloves
You’d think gloves aren’t that big of a deal, yet cold plastic tends to bite at your fingers when you’re cutting and taping things. A snug pair makes filling containers much easier because you don’t lose grip. Sometimes I switch to a thinner pair when doing tiny work so I can feel what I’m doing better. They also keep soil from getting under your nails, which is nice. You might keep a dry backup pair nearby because moisture sneaks in sometimes.

8. Heat Mats (Optional)
Some seeds, especially slow ones, like that little extra warmth before heading outside, which helps them wake up early. You don’t need these often, but they’re sometimes good for tricky varieties you don’t want to risk. A mat can, in a way, nudge stubborn seeds into sprouting faster. I’ve seen people place them under just one tray instead of the whole batch. They’re nice to have but not something to stress about.
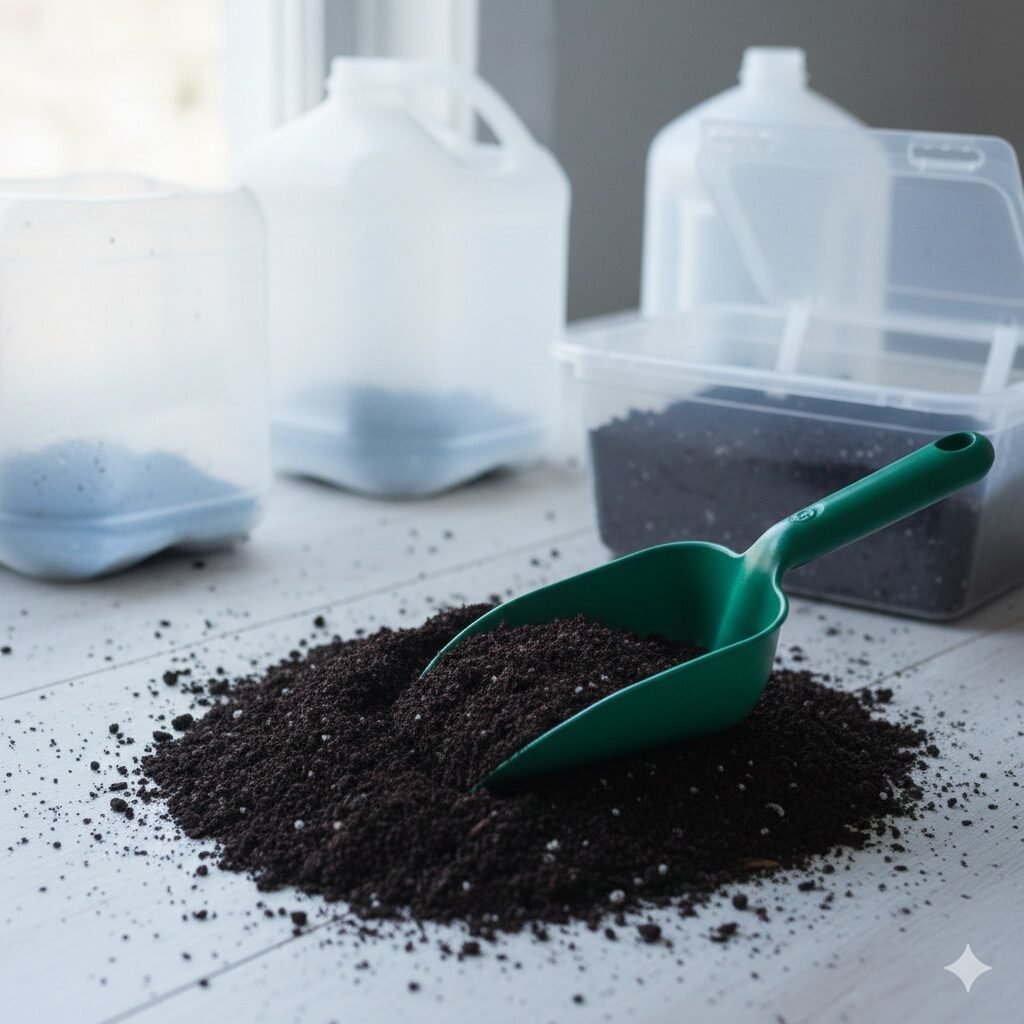
9. Soil Scoop
A scoop keeps the whole setup cleaner, and it pretty much saves your hands from freezing in damp soil. You can fill containers quicker this way without dropping clumps everywhere. I keep mine near the sink for quick refills since it dries fast. It’s one of those tools that feels like overkill until you try it once. After that, you kinda use it every season.
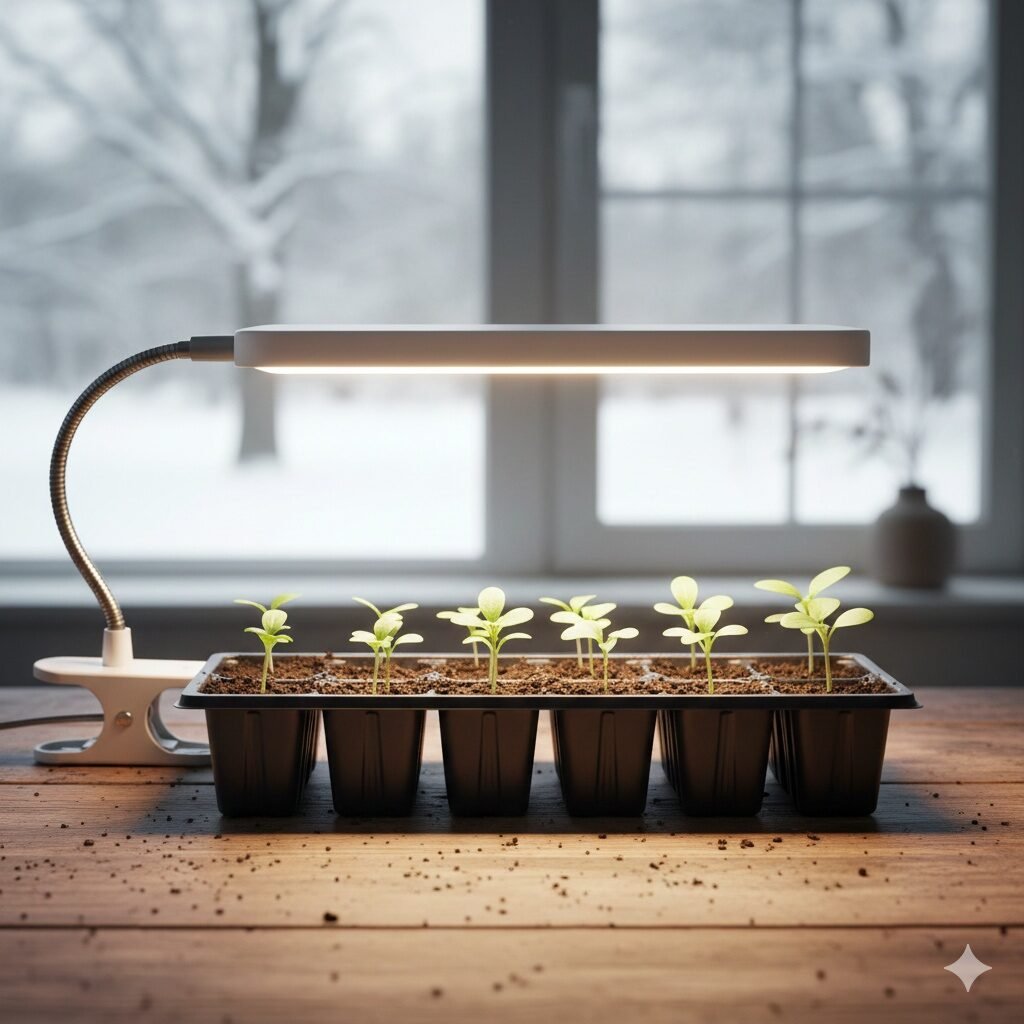
10. Grow Lights (Optional)
These lights tend to help if seedlings get leggy later on, especially during cloudy weeks. You might never need them, but newer growers sometimes add them when plants come inside and start stretching. They’re pretty easy to clip onto shelves or tables. A soft, steady glow helps keep stems a bit stronger. It’s not required, yet it can save you from floppy seedlings.
Beginner Tips to Save Money
So, one thing that’s actually helpful is grabbing free jugs from friends who drink a lot of milk or juice. You can, in some respects, reuse soil trays from supermarkets too, as long as they’re rinsed. Seeds usually go further than people think, so start small and save the extras. Reuse the shears and markers each year.
Final Thoughts
So winter sowing tends to shift a bit based on your zone, and it’s almost like each place has its own tiny rules. Folks in colder areas usually grab sturdier containers because they hold up better when temps swing a little wildly. People in warmer spots often go for lighter mixes since the soil dries out faster there. You might, in a way, pick tools that match how your weather behaves rather than copying someone else’s setup. If you want a bit more help choosing what to plant, you can check out my piece on The Best Vegetables for Winter Sowing (Beginner-Friendly List for Zones 3–10).