
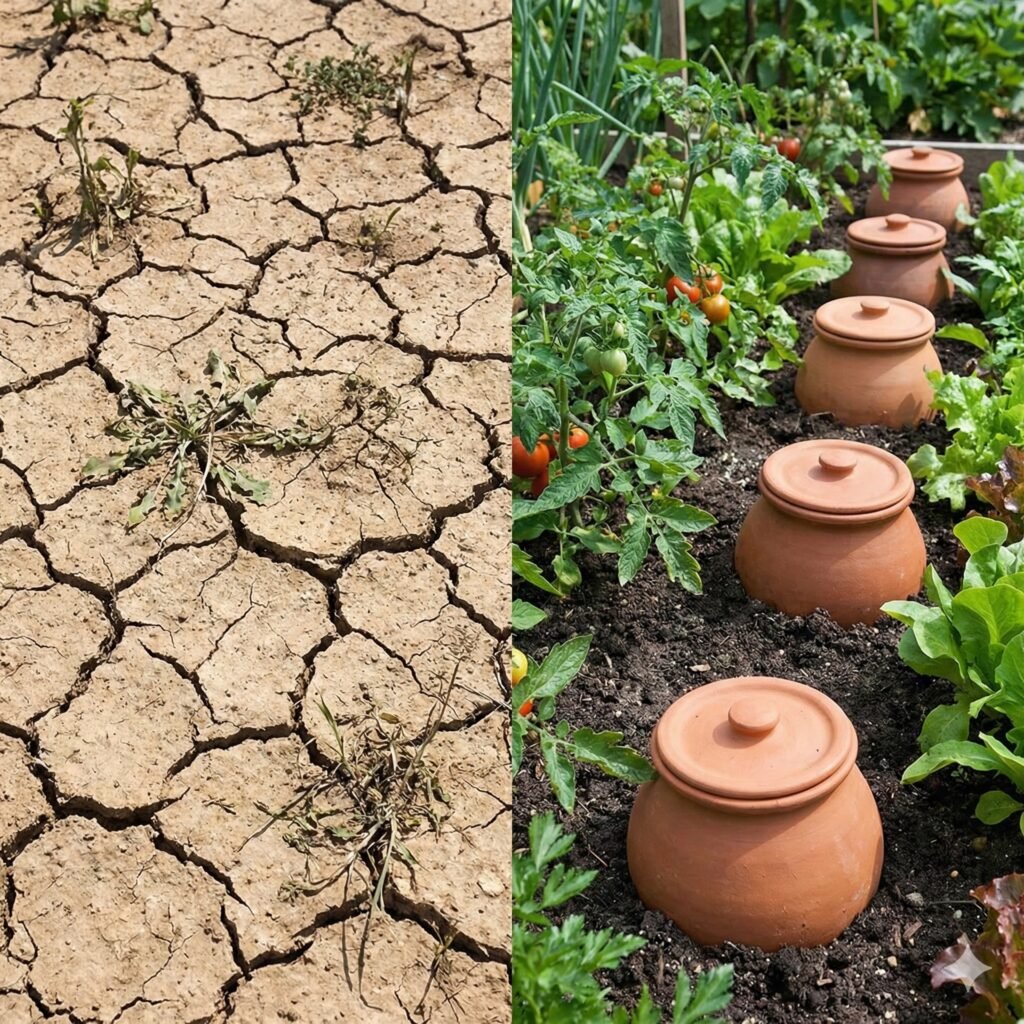
Clay Pot Irrigation: Water bills are rising, so many gardeners feel the pressure every time the dry season hits. The heat, especially in places that are nearly hot all year, tends to dry soil fast, and that can be very frustrating. Plants droop, leaves curl, and you stand there with a hose, basically guessing how much water is enough. So here’s the simple fix that is actually old, low-cost, and almost too easy to ignore.
A DIY clay pot irrigation system, sometimes called an olla irrigation system, is a buried pot that slowly seeps water into the soil, so plants drink only what they need. It’s a bit like giving your garden a quiet water tank under the ground. The best part, in some respects, is that you can build this whole thing for under $10. This guide walks you through every step, so you can set it up in raised beds, containers, or small backyard plots without stress.
What Is a Clay Pot Irrigation System?
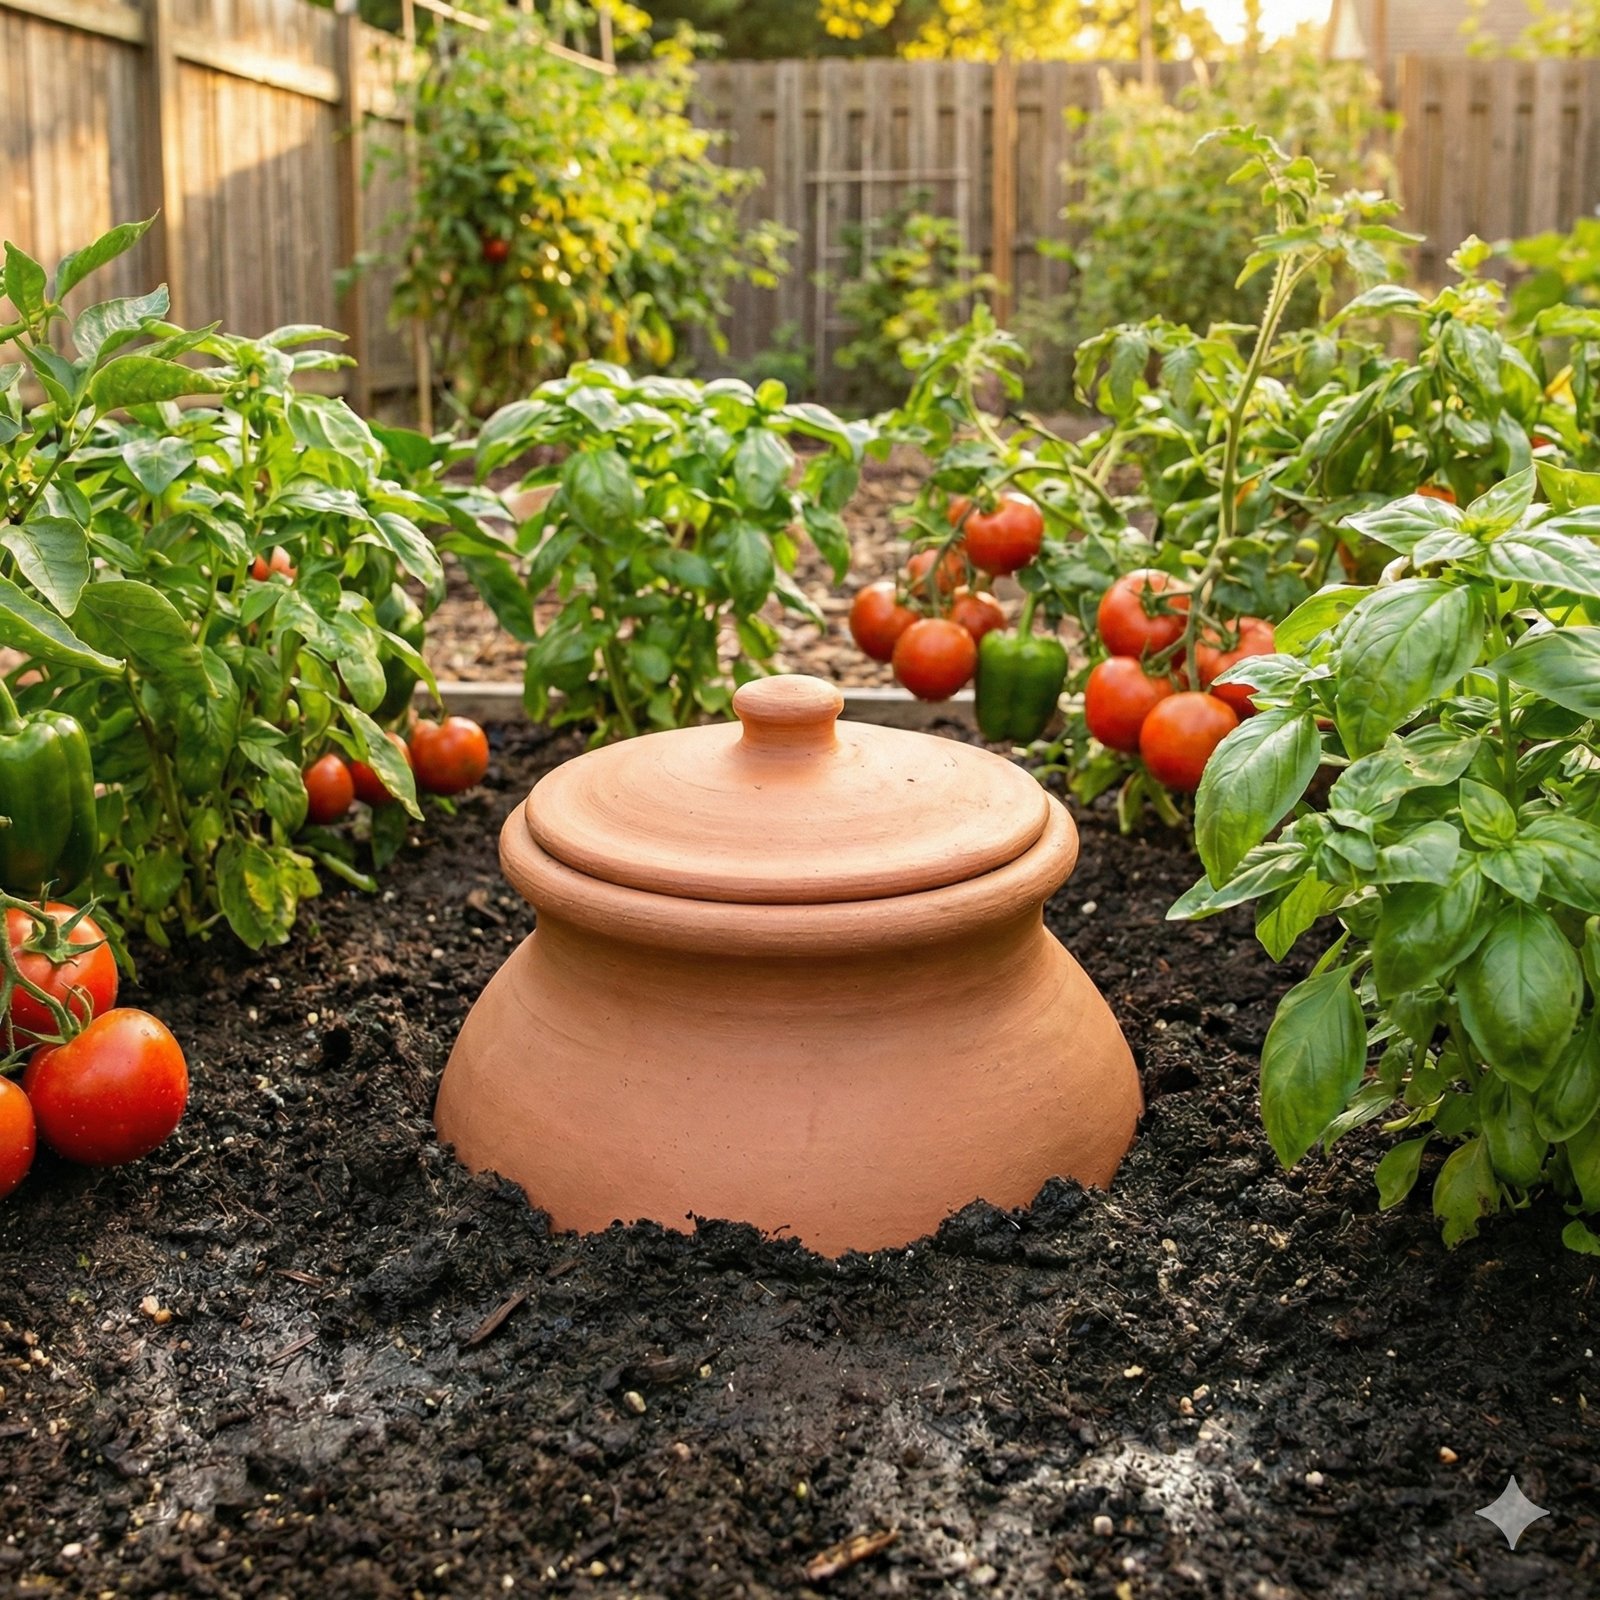
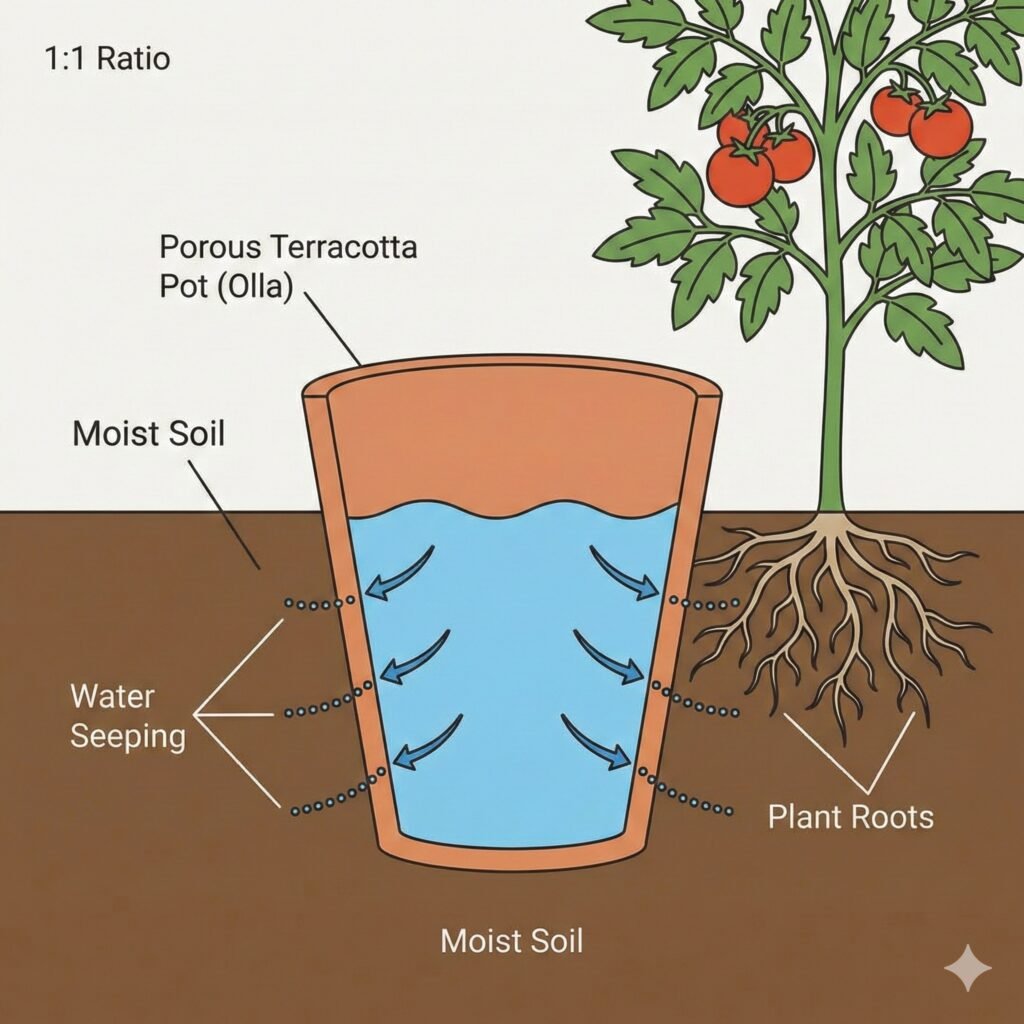
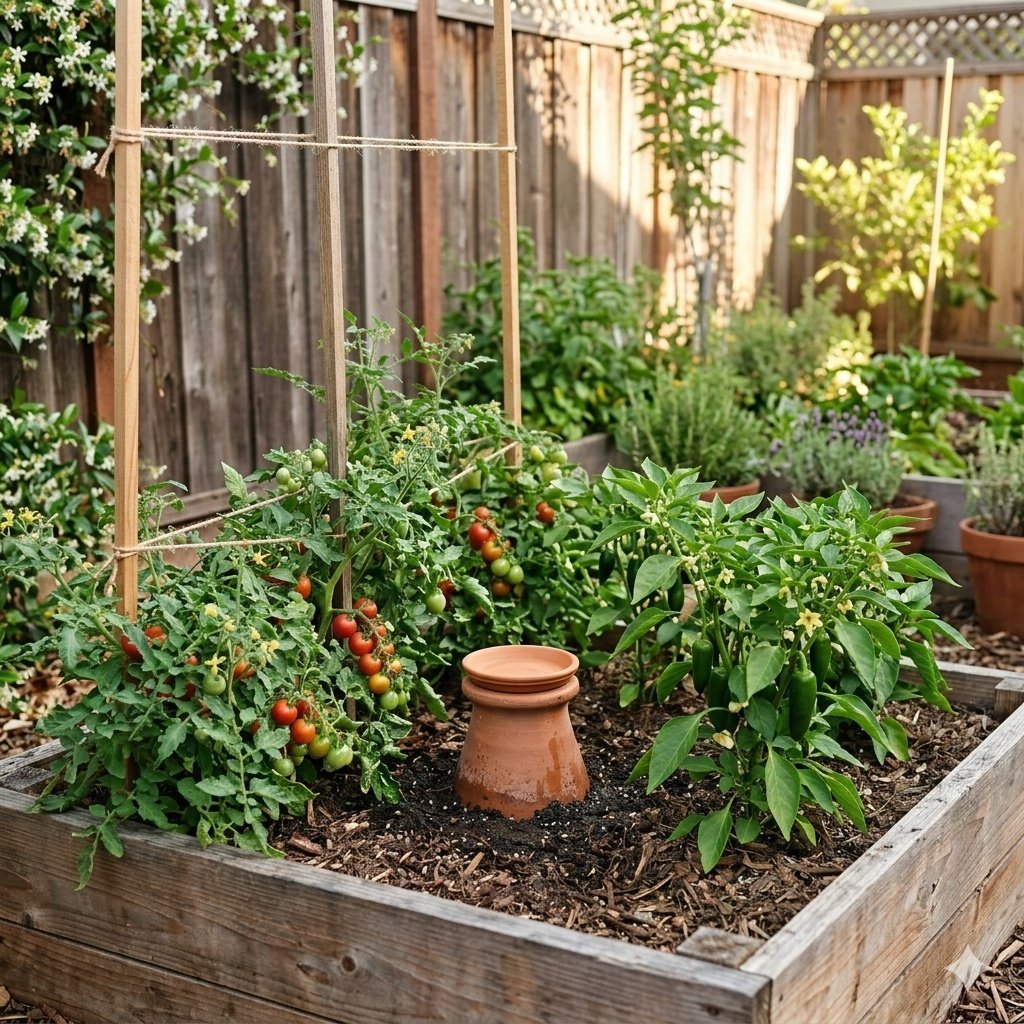
A clay pot watering system is basically an unglazed terracotta pot buried in soil, so only the neck stays above the ground. You fill it with water, and the porous clay slowly releases moisture into the surrounding soil. That slow seep, in a way, responds to how dry the soil is.
This article mainly focused on the
The History of Olla Irrigation
This method is not new, so it goes back more than 2,000 years. Farmers in ancient China used buried pots, basically to survive long dry spells. In North Africa, growers relied on similar clay jars, so crops could grow with limited rain. Pre-Columbian communities in the Americas used this idea too, and it kept fields alive in tough heat.
So what we call a DIY clay pot irrigation system today is really an old farming trick that still works.
I always enjoy sharing informative articles from other websites that are truly worth reading, such as this piece from the Food Gardening Network titled “How to Save Water with the Clay Pot Irrigation Method,” where you will learn more about Clay Pot Irrigation.
How It Works (Simple Science)
Unglazed clay is porous, so water seeps through tiny holes in the pot walls. When the soil around the pot is dry, it pulls moisture out, almost like a sponge. When the soil is wet, the flow slows down, so it’s nearly self-regulating.
This means plants develop deeper roots, because water sits below the surface. Surface soil stays dry, and that tends to cut down on waste and rot.
The Benefits of Clay Pot Irrigation System?
There are many water-saving gardening methods out there, yet this one is very simple and cheap.
1. Saves Up to 50–70% Water
Since water goes underground, evaporation is very low. In hot climates, especially where sun feels almost harsh all day, that matters a lot. You refill less often, and soil stays moist longer.
2. Encourages Deep Root Growth
Water sits below the top layer, so roots grow down instead of spreading near the surface. Deeper roots are usually stronger, and plants handle dry days better.
3. Reduces Weeds
Surface soil stays mostly dry, so weed seeds struggle to sprout. In some respects, that saves time pulling weeds later.
4. DIY clay pot irrigation system for raised beds & Small Gardens
Raised beds dry out fast, especially in warm regions. A self-watering garden system like this keeps moisture steady without daily watering.
5. Extremely Budget-Friendly
Compared to drip lines and timers, this is basically pocket change. One pot, a saucer, and sealant, so you are good to go.
6. Plastic Free
Ollas are made of earthen, unglazed clay, so you don’t have to use plastic in your garden.
7. Less fruit splitting
Crops like tomatoes and melons can split when they experience irregular watering or water stress. Ollas help prevent this by maintaining consistent soil moisture levels and can even reabsorb excess water when the soil becomes overly wet.
8. Adaptability
These clay irrigation pots are available in multiple sizes, making them suitable for in-ground beds, raised beds, and containers of various sizes.
Can You Really Build It for Under $10?
Yes, in most cases you can.
| Item | Estimated Cost |
|---|---|
| Unglazed clay pot | $3–$6 |
| Saucer or lid | $1–$3 |
| Waterproof sealant | $2 |
| Total | Under $10 |
Prices vary by location, so local markets might be cheaper or a bit higher.
Materials You’ll Need
Essential Materials
You need one unglazed terracotta pot, so skip anything shiny or coated. You need one saucer or flat stone, basically to cover the top. You need waterproof silicone or clay sealant, so water doesn’t leak from the bottom hole.
Optional Materials
A drill might help if you want a custom lid. Waterproof epoxy could give extra strength. A soil moisture meter, in some respects, helps beginners learn faster.
Before installing, fill the pot with water and wait one or two hours, so you can check if the outside feels damp.
Recommended Tools for a DIY Clay Pot Irrigation System
Setting up a DIY clay pot irrigation system does not need many tools, yet having the right items can make the installation easier and more reliable. The following picks are practical options many gardeners use for sealing pots, monitoring soil moisture, and installing underground watering systems in raised beds or containers.
| Product | Why It’s a Good Choice | Check Price |
|---|---|---|
| ⭐ Best Pick: 10-inch Unglazed Terracotta Pot | Porous terracotta allows slow water seepage into soil, which is exactly what makes an olla-style irrigation system work efficiently. | View on Amazon |
| 💰 Budget Pick: Waterproof Silicone Sealant (Outdoor Grade) | Helps seal the drainage hole completely so water releases only through the clay walls. Easy to apply and long-lasting. | View on Amazon |
| 🧰 Pro Pick: Soil Moisture Meter for Garden Beds | Lets you quickly check soil moisture around the buried pot, helping you decide when to refill the system. | View on Amazon |
These simple tools can help you build a low-cost underground watering system that saves water and keeps plants hydrated with minimal effort.
How to Choose the Right Clay Pot
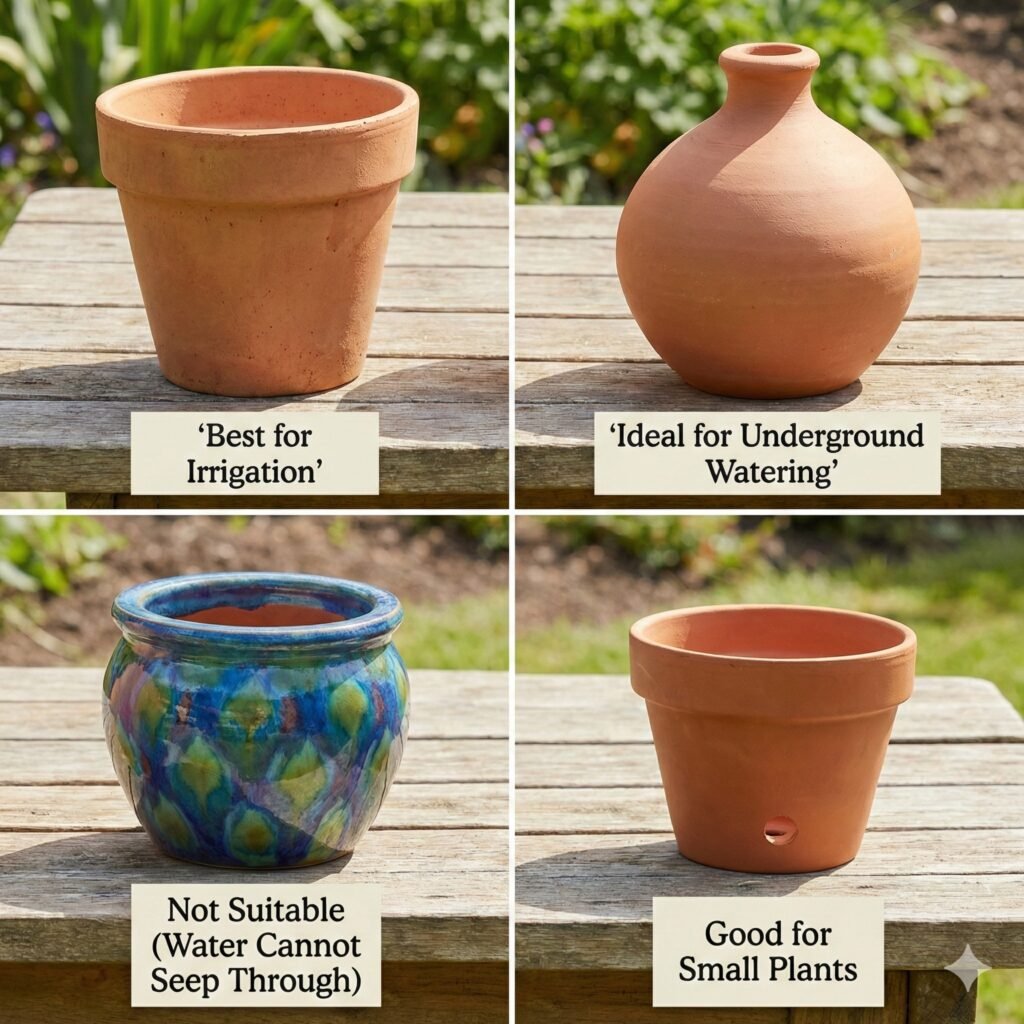
Why Unglazed Matters
Glazed pots are sealed, so water cannot pass through. Unglazed terracotta has tiny pores, and that’s what makes this system work.
Ideal Size Guide
A 6–8 inch pot usually supports 2–3 plants. A 10–12 inch pot can handle 4–6 plants, especially tomatoes or peppers.
Porosity Test (Simple DIY Test)
Fill the pot with water and set it on dry ground. After one to two hours, touch the outside, so you see if it feels slightly damp. If it stays completely dry, it may not be porous enough.

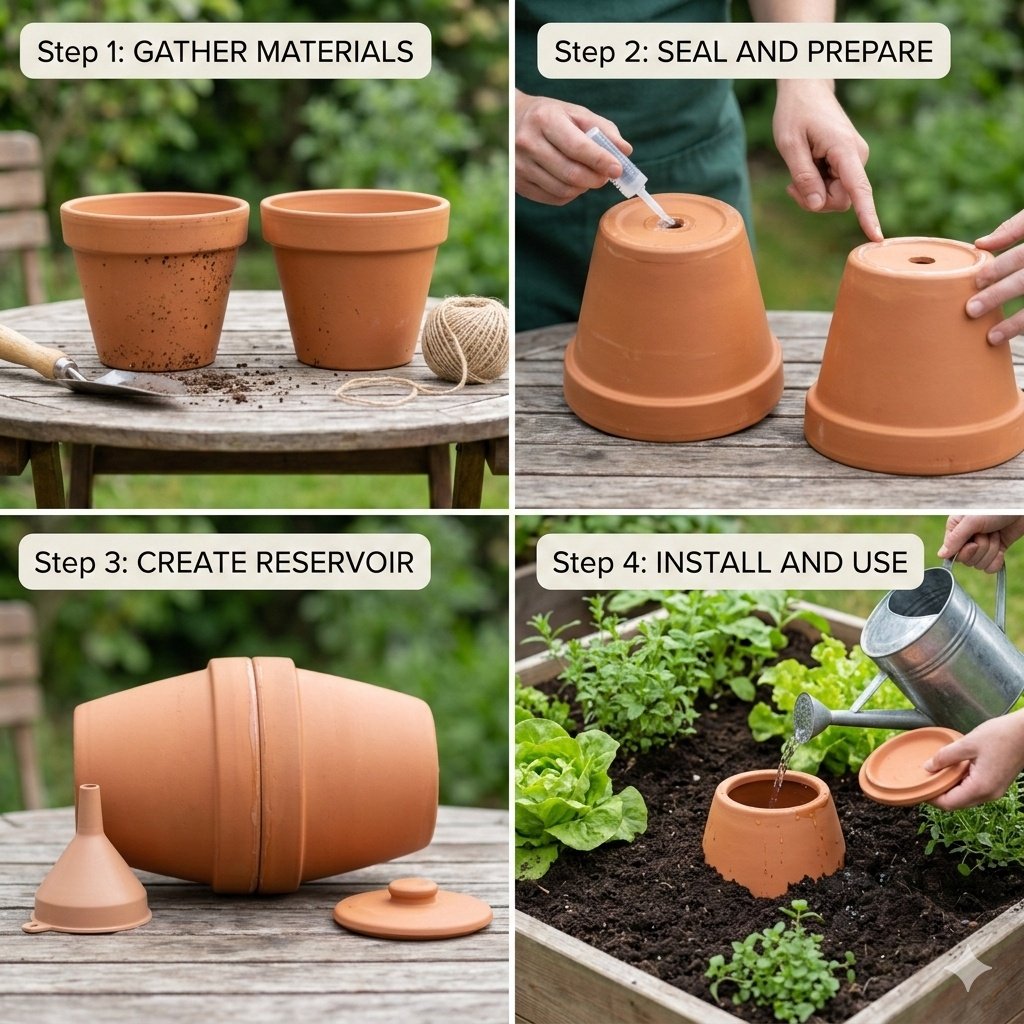
Step-by-Step: How to Build Your DIY Clay Pot Irrigation System
Step 1: Seal the Drainage Hole
Turn the pot upside down, so you can see the bottom hole clearly. Apply waterproof silicone over the hole, basically covering it fully. Let it dry for 24 hours, so it hardens properly.
Step 2: Dig the Installation Hole
Dig a hole deep enough so the pot’s neck stays just above soil level. Place it between plants, so roots can grow around it easily.
Step 3: Bury the Pot
Set the pot into the hole and pack soil tightly around the sides. Press the soil firmly, so there are no air gaps.
Step 4: Fill with Water
Pour water into the pot slowly, so it doesn’t splash out. Fill it to the top.
Step 5: Cover with Lid
Place the saucer or flat stone over the opening, so evaporation stays low. This lid keeps debris and mosquitoes out too.
How Many Clay Pots Do You Need?
Spacing depends on bed size, so a general rule is one pot every 2–3 feet. In a 10×4 foot raised bed, you might use three to four pots, depending on plant spacing. For container gardens, one medium pot usually works for a large planter.
Best Plants for Clay Pot Irrigation
Tomatoes respond very well, so they grow strong roots. Peppers, eggplant, cucumbers, and squash usually do great too. Herbs like basil, parsley, and mint often thrive with steady moisture.
Shallow-rooted leafy greens, like lettuce, sometimes struggle since they prefer surface moisture.
Looking for plants that thrive with less water? Check out our guide on 12 Best Drought-Tolerant Plants for Raised Garden Beds, featuring hardy vegetables and herbs that grow well even in dry conditions.
How Often Should You Refill the Pot?
In hot climates, you may refill every 2–3 days. In milder weather, 4–7 days might be enough. If plants look droopy and soil feels dry deep down, they might need more water.
Overwatering is rare, since the system self-adjusts, yet if soil feels soggy all the time, check drainage.
Pro Upgrade: The Double Clay Pot Method (A Simple Trick to Water More Plants)
If you want your clay pot irrigation system to water more plants with fewer refills, there’s a simple upgrade many gardeners use: the Double Clay Pot Method.
Instead of using a single terracotta pot, you connect two unglazed clay pots together to create a larger underground water reservoir. This increases both the water capacity and the watering radius, making the system more efficient for raised beds and vegetable gardens.
Why This Trick Works
When water is placed inside an unglazed clay pot, it slowly seeps through the porous walls into the surrounding soil. By joining two pots together, you create more surface area for water to escape, which means moisture spreads farther through the soil.
Gardeners who use this method often notice:
- Less frequent refilling because the reservoir holds more water
- A wider watering zone, allowing one pot to support multiple plants
- Better moisture retention in hot climates where water evaporates quickly
Watering Radius Comparison
| Clay Pot Setup | Approximate Watering Area |
|---|---|
| Small single pot | About 1 ft (30 cm) radius |
| Medium single pot | About 1.5 ft (45 cm) radius |
| Double clay pot system | Up to 2–3 ft (60–90 cm) radius |
This means one double-pot system can often supply water to 4–6 vegetable plants depending on spacing.
How to Build a Double Clay Pot Irrigation System
Creating one is surprisingly easy:
- Get two identical unglazed terracotta pots.
- Seal the drainage hole in one pot using waterproof silicone or epoxy.
- Apply waterproof adhesive around the rims of both pots.
- Press the rims together so the pots form a closed capsule shape.
- Allow the adhesive to dry for 24 hours.
- Bury the pot in the soil so the top opening remains slightly above the soil surface.
- Fill it with water and cover the opening with a lid or saucer.
Once installed, the pot will slowly release moisture underground, delivering water directly to plant roots.
Pro Tip: Add Mulch Around the Pot
After installing your clay pot irrigation system, add 2–3 inches of organic mulch around the surrounding plants. Mulch helps retain soil moisture, reduces evaporation, and allows the underground watering system to work even more efficiently.
When This Upgrade Works Best
The double clay pot method works especially well in:
- Raised garden beds
- Backyard vegetable gardens
- Dry or hot climates
- Gardens where you want low-maintenance watering
If you’re growing crops like tomatoes, peppers, eggplants, or cucumbers, this simple upgrade can make your DIY irrigation system even more effective.
Common Mistakes to Avoid
Using glazed pots is a common error, so avoid shiny finishes. Not sealing the drainage hole properly can waste water. Leaving the lid off increases evaporation and invites insects.
Installing the pot too far from plants limits root access. Not packing soil tightly around the pot can reduce efficiency.
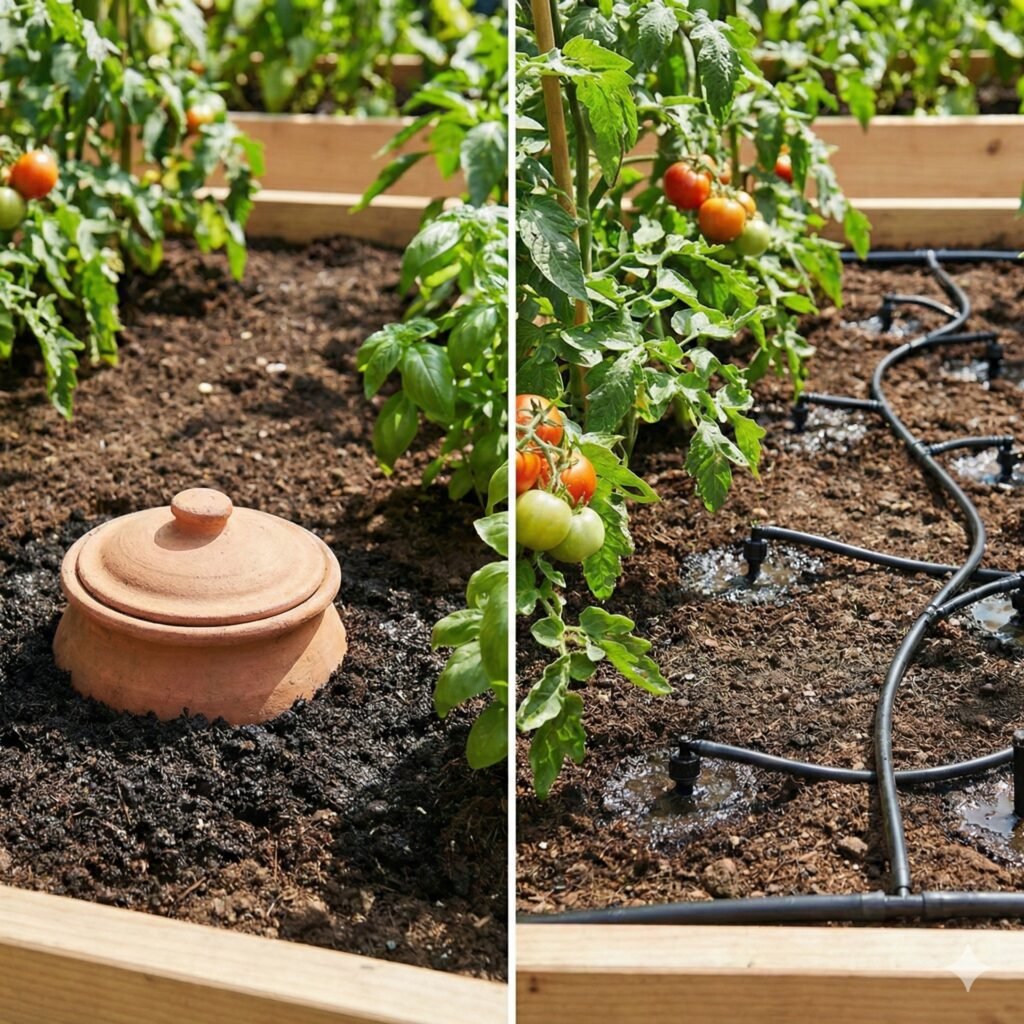
Clay Pot Irrigation vs Drip Irrigation
| Feature | Clay Pot | Drip Irrigation |
|---|---|---|
| Cost | Very low | Moderate |
| Installation | Easy | More involved |
| Maintenance | Low | Medium |
| Best for | Small gardens | Larger areas |
For beginners, clay pots are usually easier and cheaper. Drip systems suit larger plots, especially if you want automation.
If you enjoy simple systems that make gardening easier, you might like our guide on Smart Gardening Tools: A Practical Guide to Modern Plant Care, where we explore modern tools that help monitor soil, watering, and plant health with less effort.
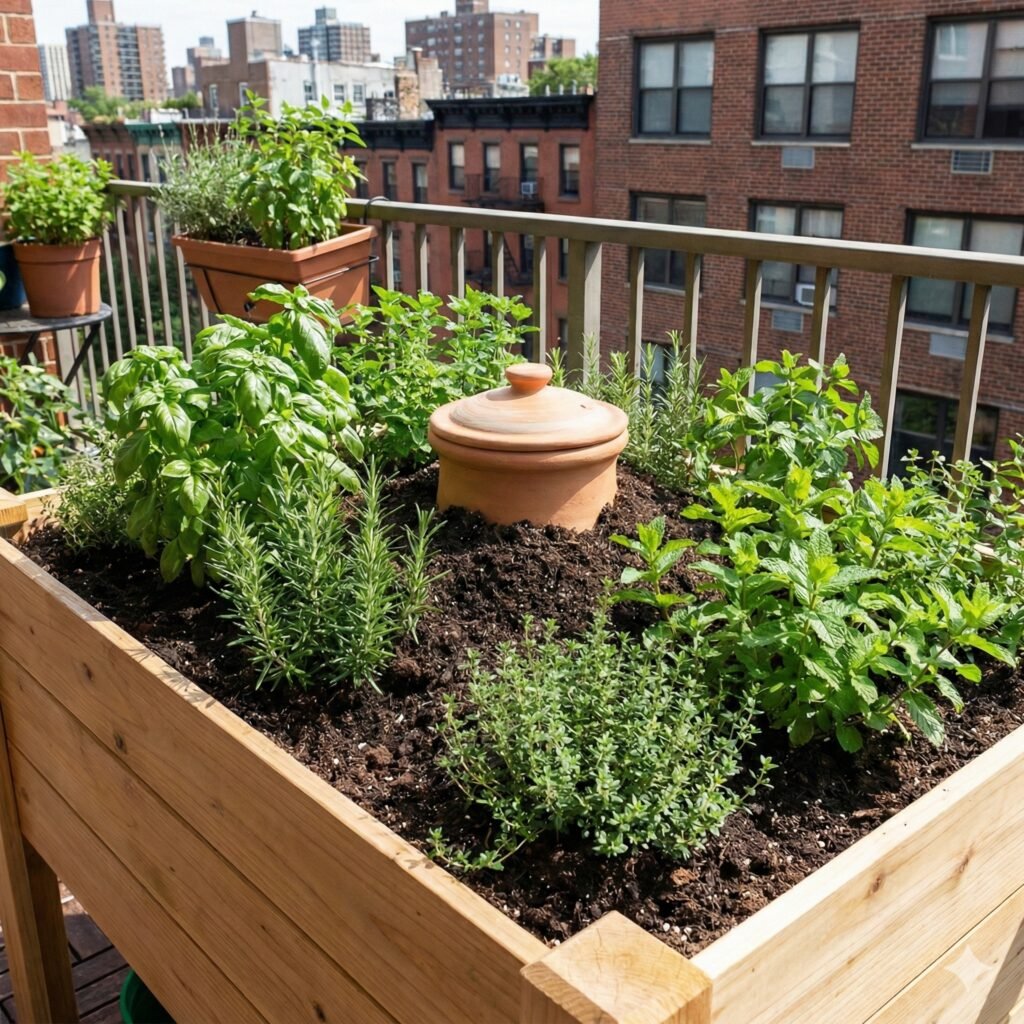
Can You Use This in Containers or Raised Beds?
Yes, it works very well in raised beds. Large containers benefit too, especially in balcony gardens. Busy gardeners like this system, since it reduces daily watering stress.
How Long Do Clay Pots Last?
Most clay pots last 1–3 years, depending on soil and climate. If cracks appear or seepage slows down, it might be time to replace. Avoid hitting the pot with tools, so it stays intact longer.
Is Clay Pot Irrigation Worth It?
For beginners, this system is simple and forgiving. It supports water-saving goals, especially in dry regions. It fits raised bed gardening very well. It costs little, needs no electricity, and works quietly underground.
FAQs
How long does an olla irrigation system last?
Usually 1–3 years, depending on quality and care.
Can I use a glazed pot for irrigation?
No, since glazed surfaces block water movement.
Does clay pot irrigation attract mosquitoes?
Not if you keep the lid on tightly, so water stays covered.
How deep should I bury the pot?
Bury it so only the neck stays above soil level.
Is this better than drip irrigation?
For small gardens and beginners, it is often easier and cheaper.
Final Thoughts
At the end of the day, a DIY clay pot irrigation system is basically one of those simple garden tricks that just makes sense. So if you live somewhere hot and dry, this setup pretty much gives your plants a steady drink without you standing there with a hose every evening. In a way, it feels almost old-school, yet it works better than many modern tools that cost a lot more. You know, when water goes straight to the roots, plants tend to grow stronger and handle heat a bit better.
Actually, the best part is that you don’t need fancy gear or special skills, so even a first-time gardener can set it up in an afternoon. Of course, saving water matters more and more, and this method more or less cuts waste without extra effort. Pretty much anyone with a raised bed or a few containers can try this and see results within weeks.
Right, it’s cheap, it’s low effort, and it fits small gardens really well, so there’s very little risk in testing it this season. Seriously, sometimes the simplest systems are the ones that stick around for thousands of years, and this is definitely one of them.


Pingback: Drip Irrigation System: Complete Guide from Invention to Modern Smart Gardening (7 Top Picks)