

How to Extend Edible Garden Through Winter: Ok, so why let your garden go to sleep in winter?
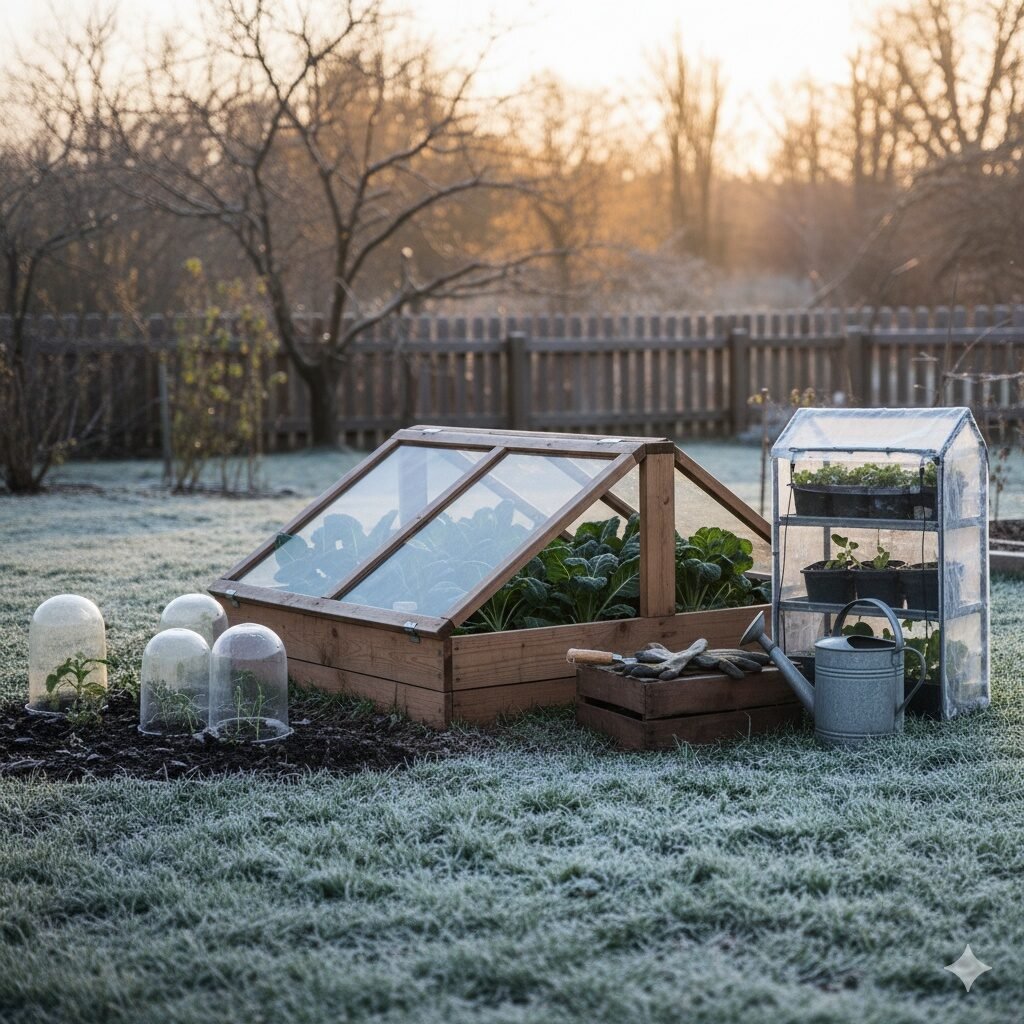
Most folks see the first frost and think, “Well, that’s it till spring.” But that’s not the end of the story. Winter doesn’t have to mean empty beds or shriveled herbs. In fact, with just a little setup — cold frames, cloches, or even a mini greenhouse — your edible garden can keep producing greens, roots, and herbs long after your neighbors have packed up their tools.
Winter gardening in the U.S. might sound tricky, but it’s actually about creating tiny, protected microclimates that trick your plants into thinking it’s still fall. Once you get the hang of managing that bit of warmth and shelter, you can eat homegrown kale, spinach, or carrots in January without much fuss.
Basically, what are cold frames, cloches, and mini greenhouses?
They all do a similar thing — hold in heat, block harsh wind, and keep frost off tender leaves — but they come in different shapes and costs.
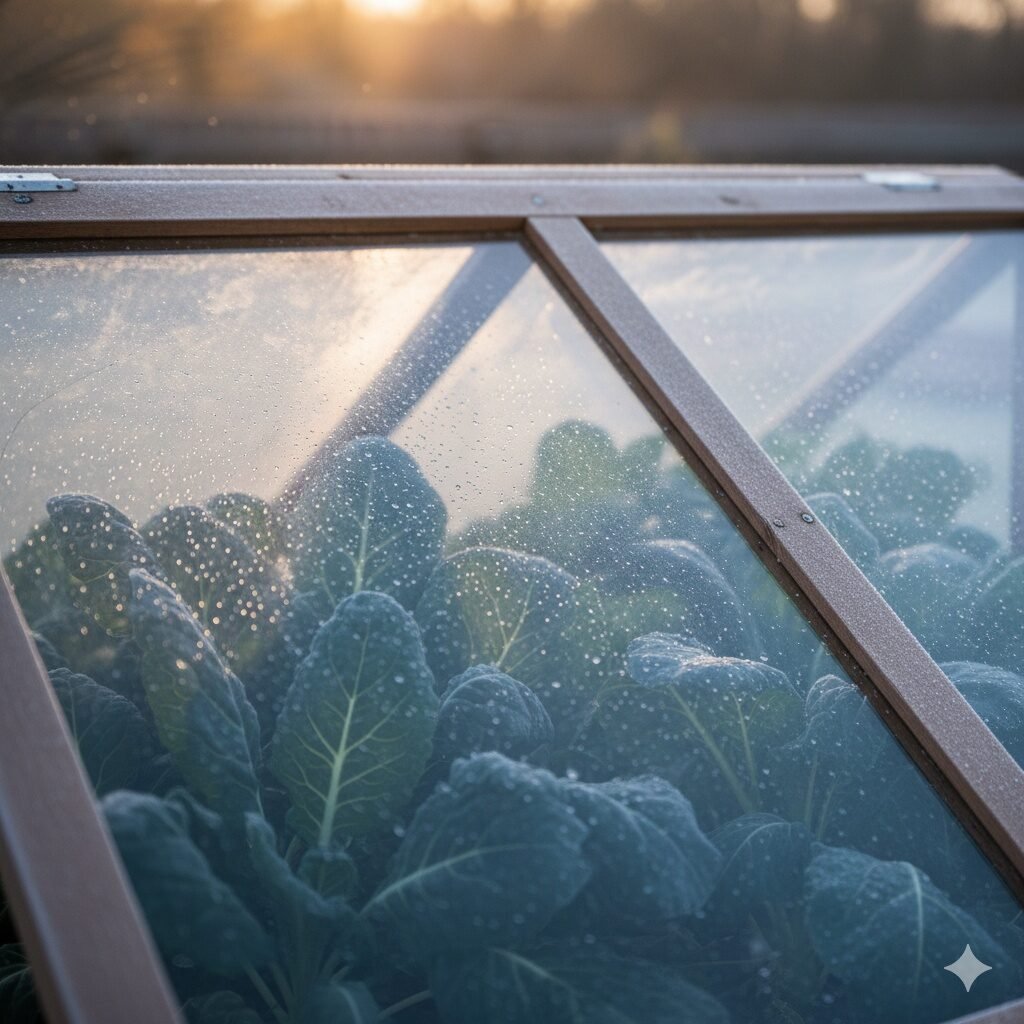
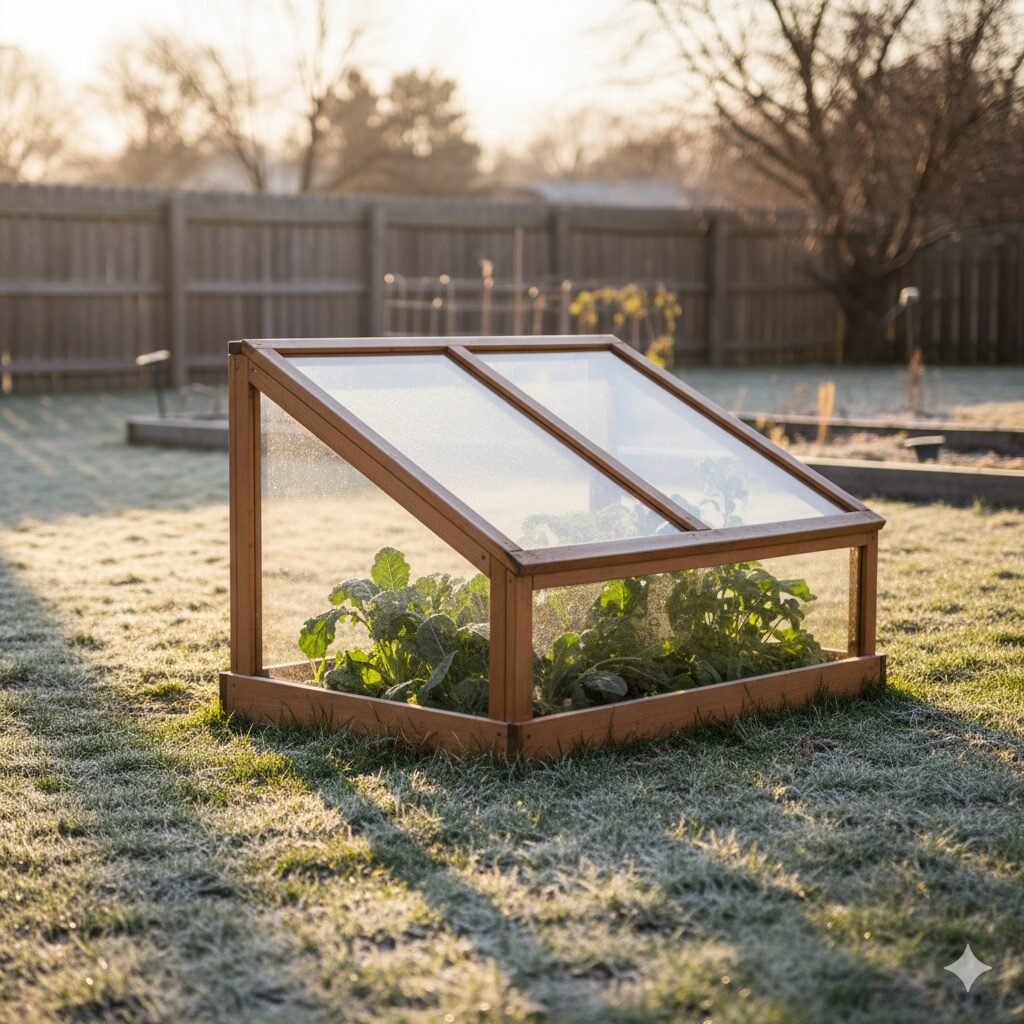
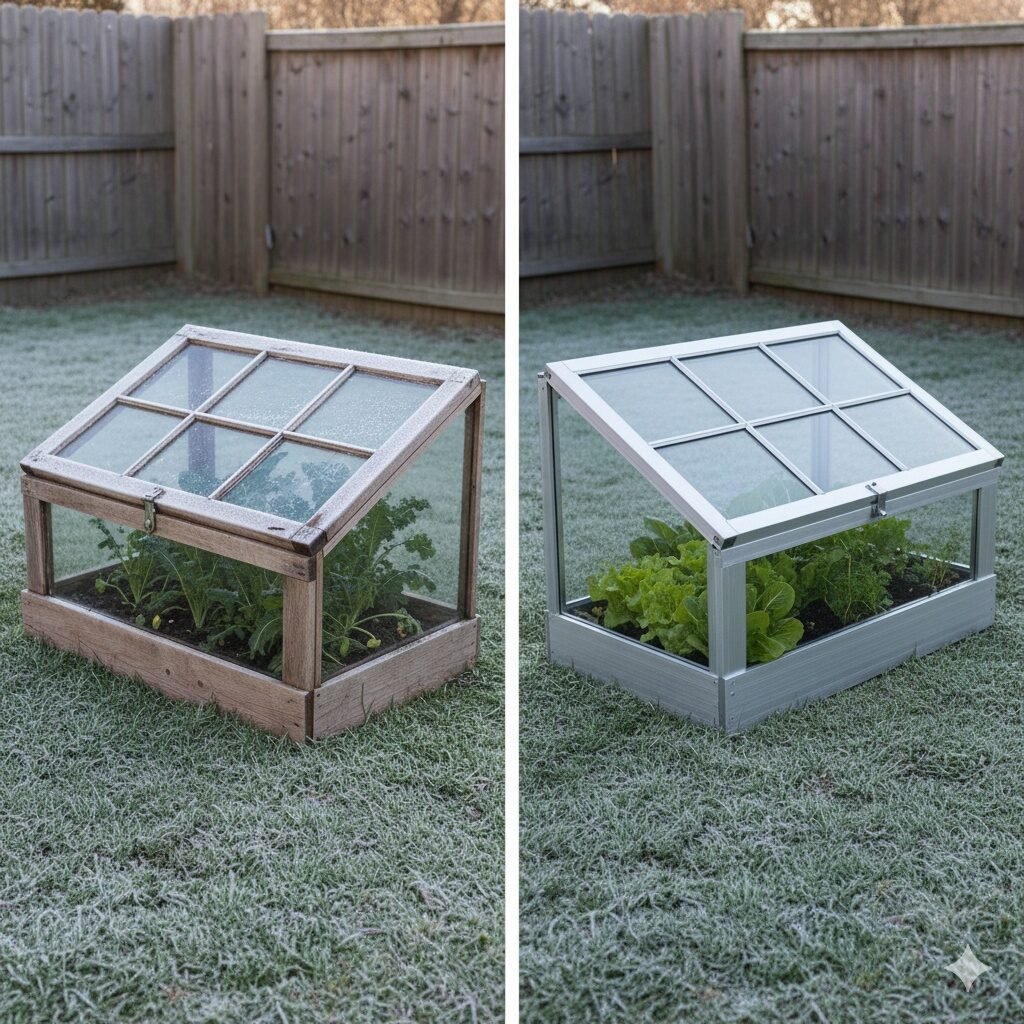
Cold frames are like low, box-shaped mini greenhouses. Usually, they’re built from wood, with a clear top made of old windows or polycarbonate sheets. They sit right on the soil, letting sunlight in while trapping warmth. Think of them as a cozy sunroom for your lettuce.
Cloches are smaller and simpler — they’re like clear domes or covers that sit directly over individual plants or rows. Some gardeners use old milk jugs or plastic bottles cut in half as DIY cloches. They’re great for shielding a few prized plants when a sudden frost hits.
And then there are mini greenhouses, which are taller, often made of plastic sheeting over a lightweight frame. You can buy them pre-made or assemble your own from PVC and greenhouse film. They’re ideal if you want to overwinter herbs or salad greens without going full-scale greenhouse.
How these setups actually work
Here’s the trick — it’s not about heating the plants directly. It’s about holding onto the solar warmth the soil collects during the day. That heat slowly radiates out overnight, keeping the air inside the structure a few degrees warmer than the outside.
When the lid or cover is closed, it traps that warmth and keeps cold air out. On sunny days, the inside temperature can climb quickly, even if it’s freezing outside — which is why venting becomes the secret weapon of every successful cold-frame gardener.
If you forget to vent it, your spinach might cook instead of chill. A simple stick to prop the lid open or a small automatic vent opener can make a big difference.
Get to know more about Raised Bed Greenhouse Gardens: Tips & Tricks Here.
Which crops play nice with winter setups
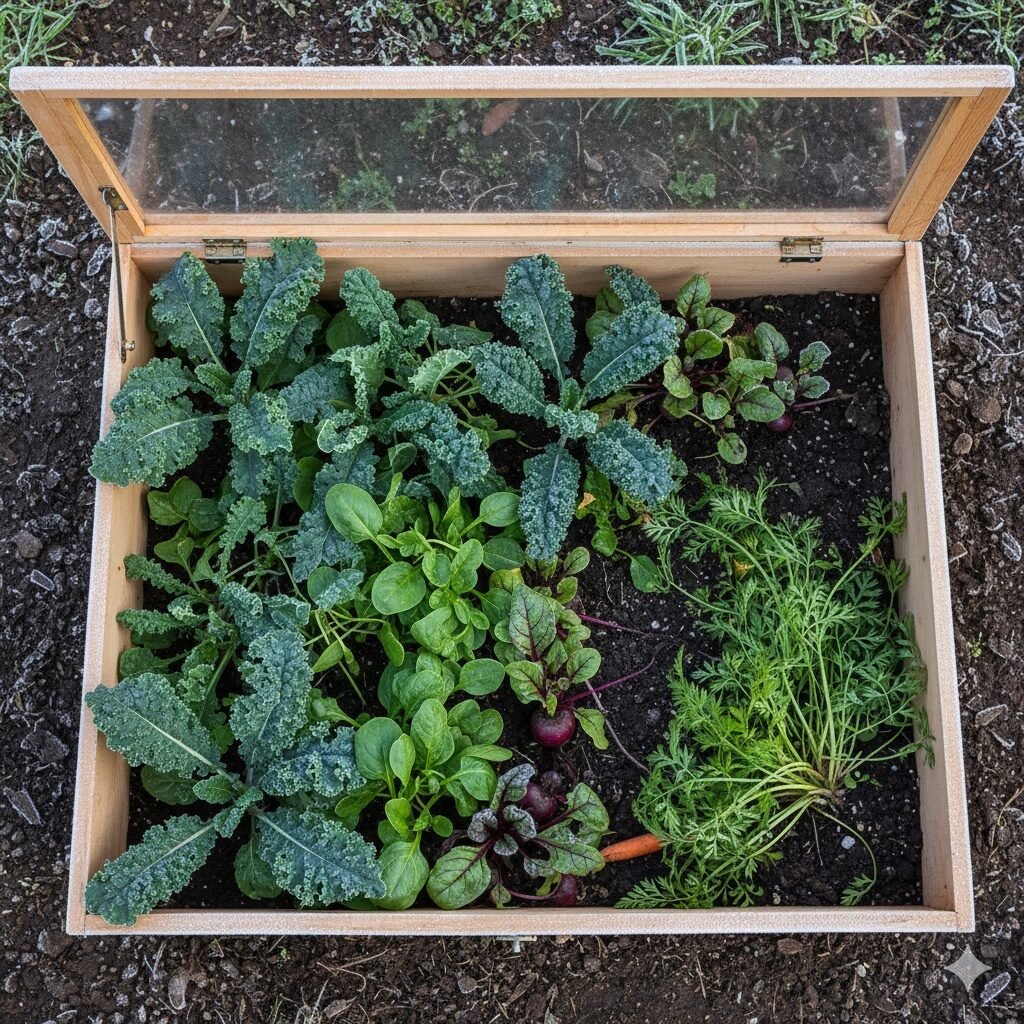
Some plants just love the cool season and actually taste better after a light frost. In most U.S. regions (zones 4–8), the following work well inside cold frames or under cloches:
- Leafy greens: kale, spinach, arugula, chard, mustard greens
- Root veggies: carrots, beets, radishes, turnips, parsnips
- Herbs: parsley, chives, thyme, mint, cilantro
- Brassicas: small cabbages, bok choy, tatsoi
If you’re farther north (zones 3–5), stick to hardier greens like spinach and kale. In milder areas (zones 7–9), you can even keep lettuce or green onions going most of the winter.
A good rule: if it’s something you’d plant in early spring or late fall, it’ll likely do fine in a cold frame through winter.
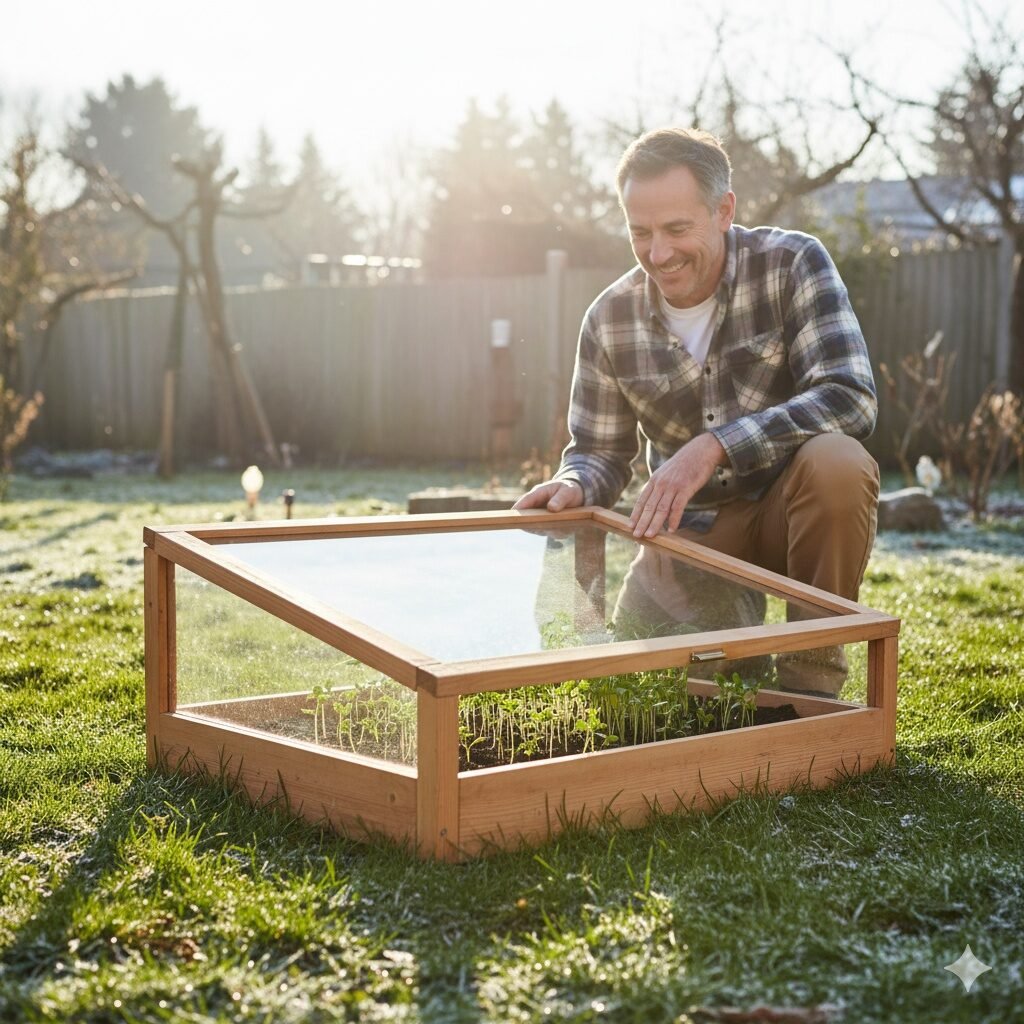
Step-by-step: how to build a cold frame on a weekend
You don’t need fancy carpentry skills for this. In fact, you might already have everything lying around.
Materials:
- Four wooden boards (2x8s or 2x10s work fine)
- Old window sash or clear polycarbonate sheet for the lid
- Screws or brackets
- Optional: hinges for easy opening, a prop stick, and some insulation
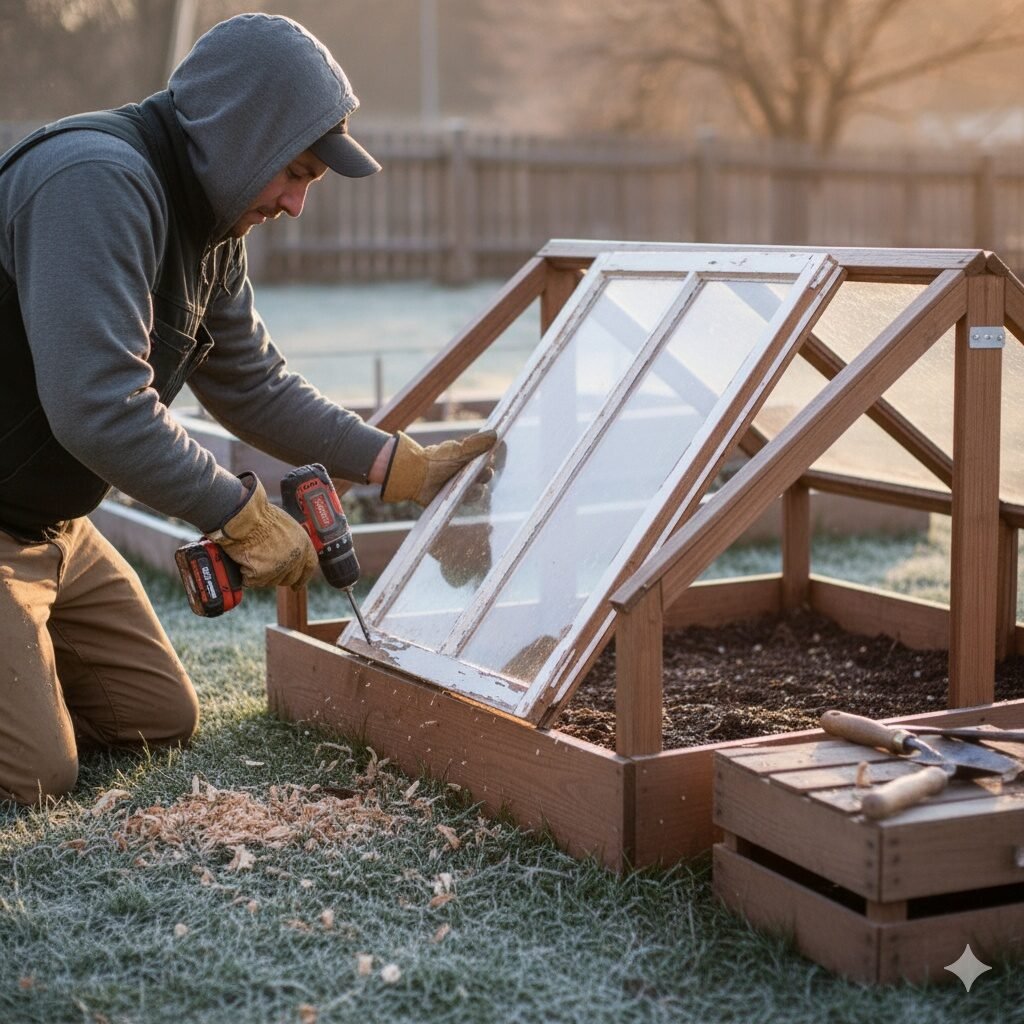
Steps:
- Pick the right spot. South-facing, full sun, with good drainage. Avoid shady corners or windy spots.
- Assemble your frame. Form a rectangular box and screw the sides together. Make the back slightly taller (about 2–3 inches higher) than the front so the lid slopes toward the sun.
- Add the lid. Attach your old window or clear sheet to the top with hinges so it opens easily.
- Seal the gaps. You can add a strip of weather tape around the edges to keep drafts out.
- Add insulation if needed. Straw bales around the outside or a layer of bubble wrap inside helps hold in heat if you live somewhere extra cold.
It’s that simple — and once it’s set, it can last for years with small repairs. Get to know more about making cold frames from Here.
Managing temperature & moisture
So, here’s the part that takes a little feel. On a sunny day, the inside of a cold frame can hit 80°F while it’s freezing outside. That’s too much for cool-season veggies.
You’ll want to vent the lid during sunny afternoons — even just a few inches — to let some hot air escape. Then, close it back up around sunset to trap the day’s warmth.
Check moisture levels, too. Plants in enclosed setups don’t dry out as fast, but they can get moldy if you overwater. A light, occasional watering is enough through the cold months.
A bit on Cloches & Row Covers
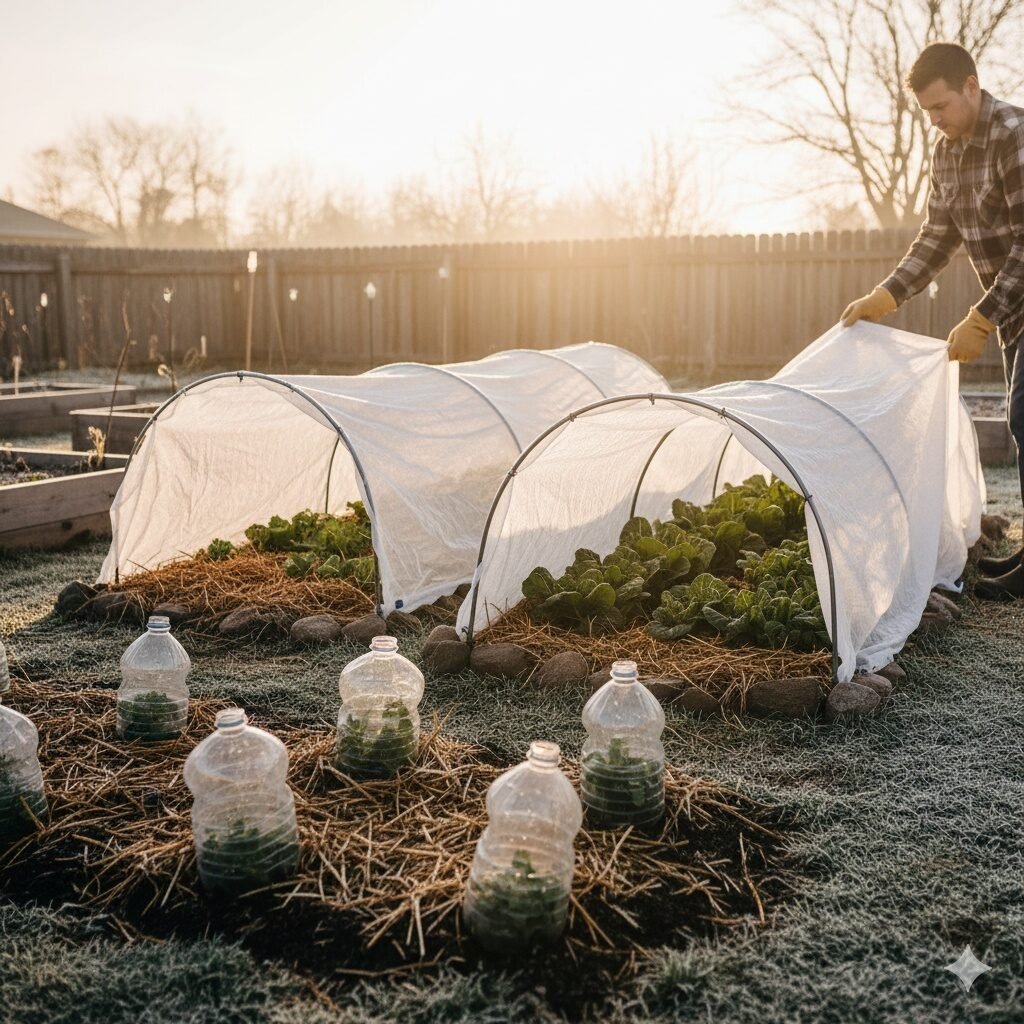
Cloches are perfect if you’re short on time or space. You can buy them, but most gardeners make their own. Cut the bottom off clear plastic bottles, set them over plants, and poke small holes on top for ventilation.
For longer rows, use floating row covers or frost cloths stretched over hoops. These lightweight fabrics add just a few degrees of protection and work well for covering entire beds.
When a sudden cold snap is coming, layering helps — row cover + cold frame, or cloche + mulch around the base.
Using Mini Greenhouses for larger setups
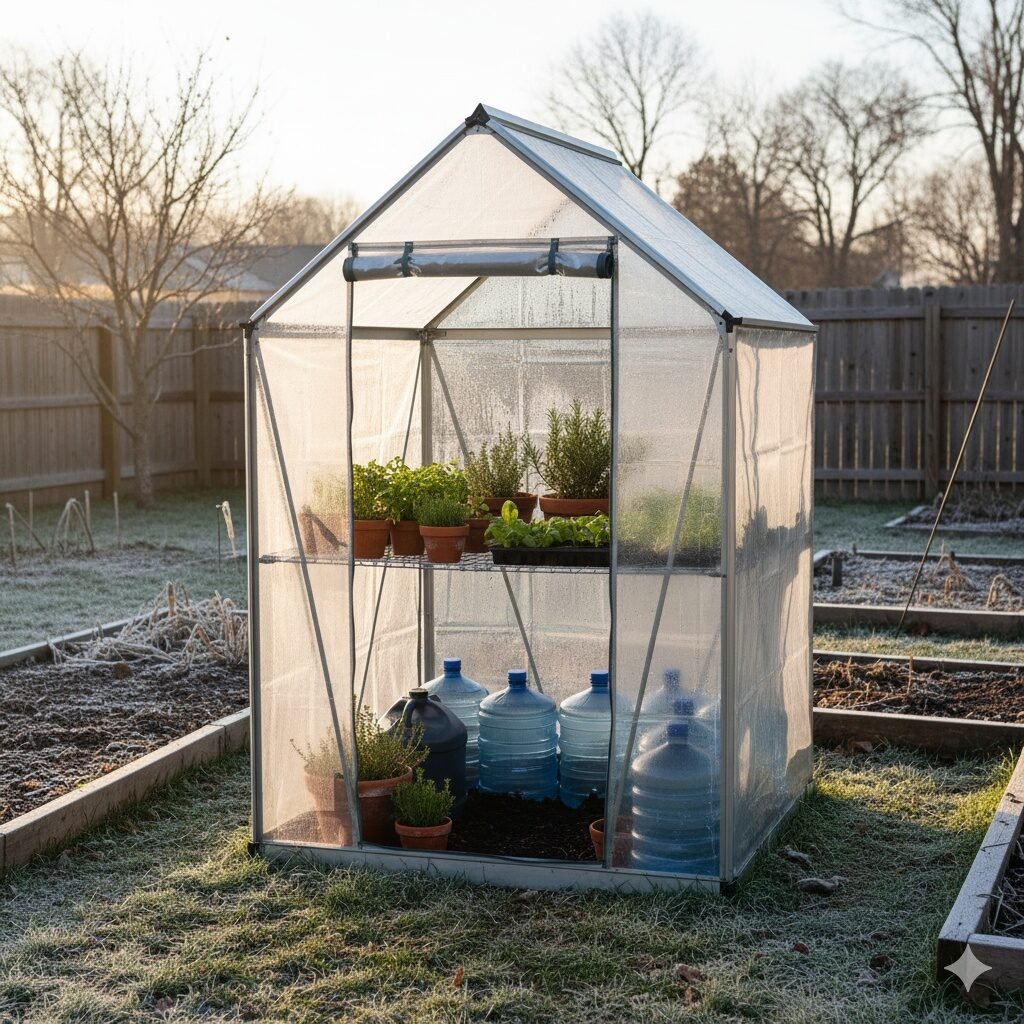
If you want something taller for overwintering herbs or growing greens in containers, a mini greenhouse works great. You can find portable ones that zip up like little tents or build one with a few PVC pipes and clear plastic sheeting.
To keep it from overheating, leave the door open slightly during mild days, then zip it tight when night temperatures drop. You can even add a few gallon jugs of water inside — they absorb heat during the day and release it at night, balancing the temperature.
Some folks use string lights or a small soil heating cable for extra warmth, but usually that’s not needed unless you’re in a very cold region.
What about the soil and prep work?
Winter gardening starts in late summer or early fall — that’s when you prep the beds and get seeds or seedlings in the ground.
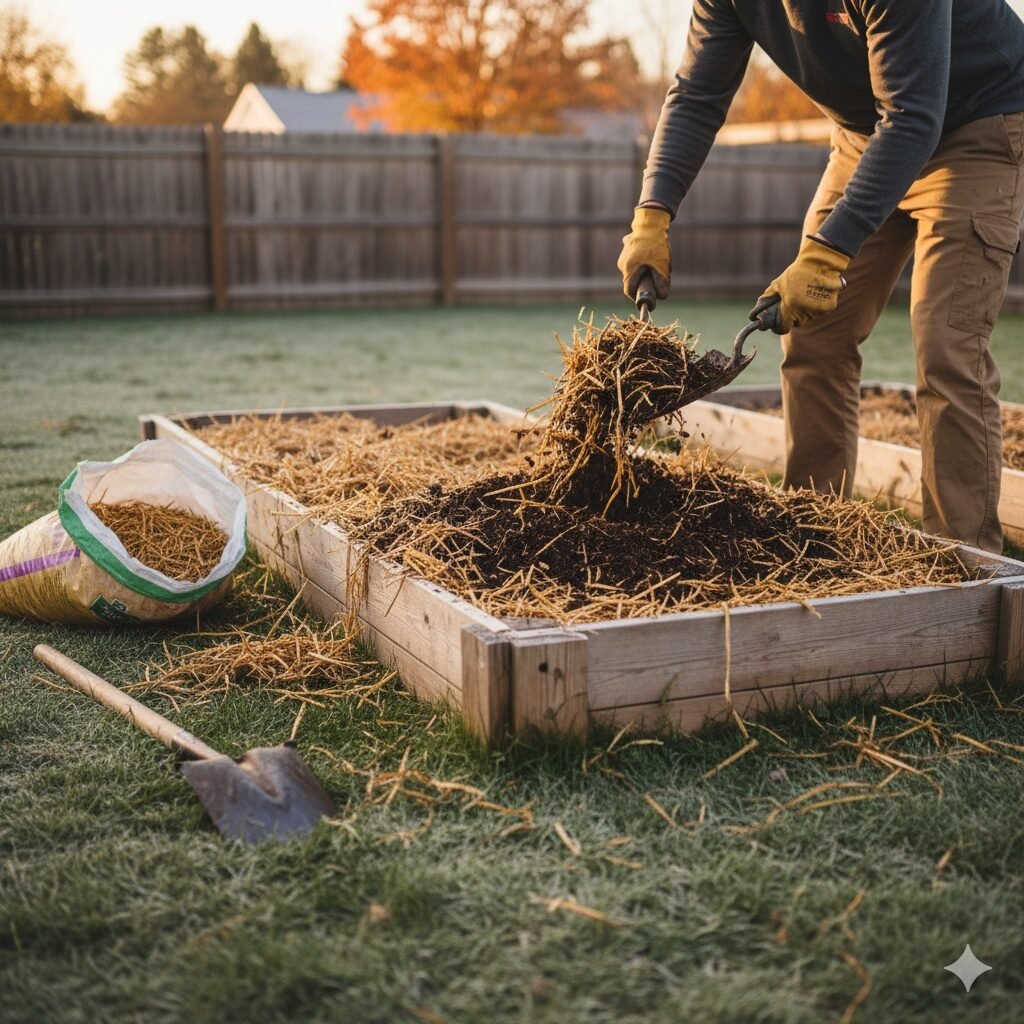
- Test and amend your soil. Add compost or aged manure before setting up the frame — this helps store nutrients for the season.
- Mulch heavily. A thick layer of straw or shredded leaves holds in soil warmth.
- Plant early. Crops like spinach and carrots need to get some growth in before short days arrive. Aim to plant about 6–8 weeks before your area’s first frost date.
If you missed that window, no worries — you can still use the setup to protect overwintering greens or start early spring seeds in January or February.
DIY vs. Store-Bought options
Homemade cold frames are cheap and satisfying, but if you’re short on time, ready-made kits are fine too.
- Budget setups often use plastic panels and aluminum frames.
- Premium ones may have automatic vents or insulated walls.
A good middle ground: reuse materials like storm windows, old lumber, or even hay bales with a clear top sheet. The key is just that it’s sturdy, gets sun, and keeps out wind.
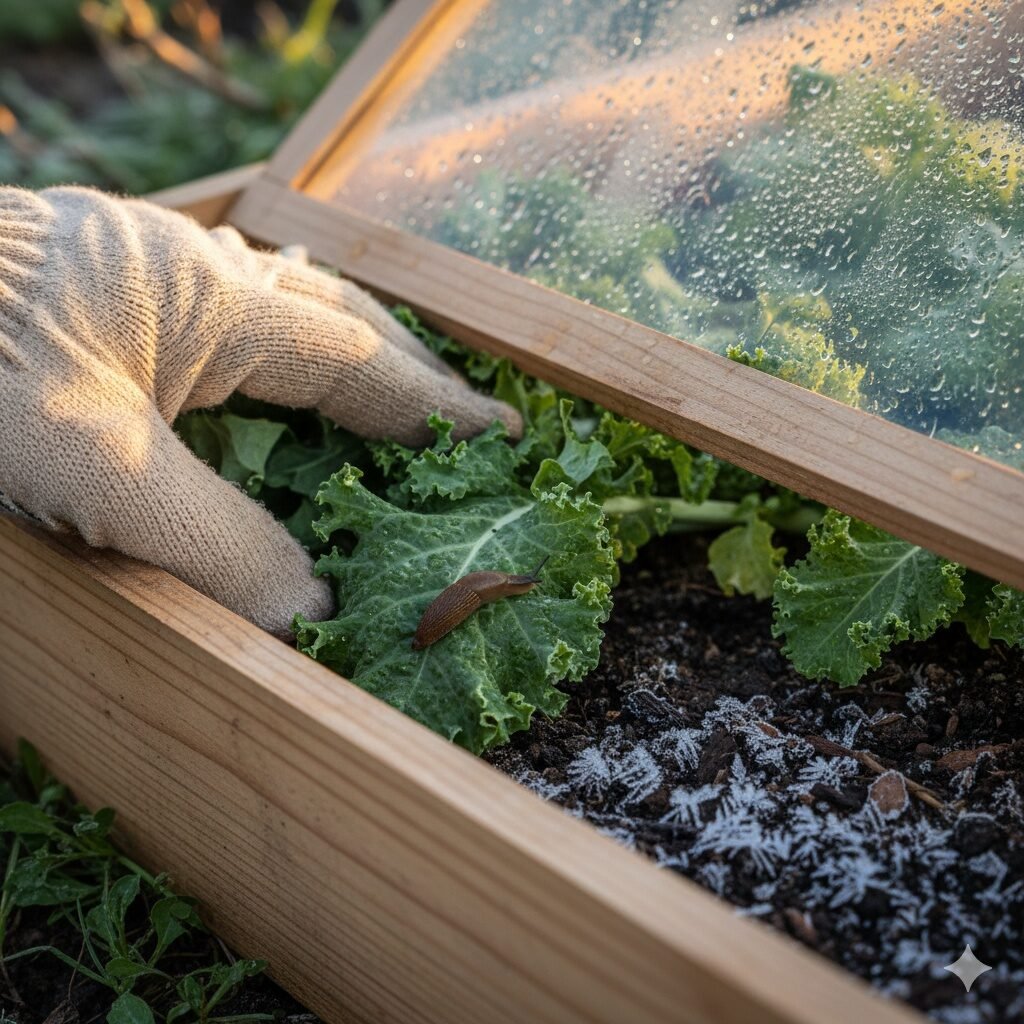
Keeping Pests & Problems in check
It might sound odd, but pests don’t totally disappear in winter. Slugs and aphids can hang around inside warm covers. Check under leaves occasionally and remove any unwanted guests by hand.
Condensation is another thing — if you see too much moisture building up, it means you need more airflow. Crack open the lid a bit more on sunny days.
Mold on soil surface? Sprinkle a thin layer of dry sand or perlite to absorb extra moisture.
Quick maintenance checklist
- Open lid for venting on sunny days
- Close at sunset or before frost
- Water lightly only when soil feels dry
- Watch for pests under leaves
- Add straw or old blankets over the top during deep freezes
With these small habits, your setup can handle most weather swings.
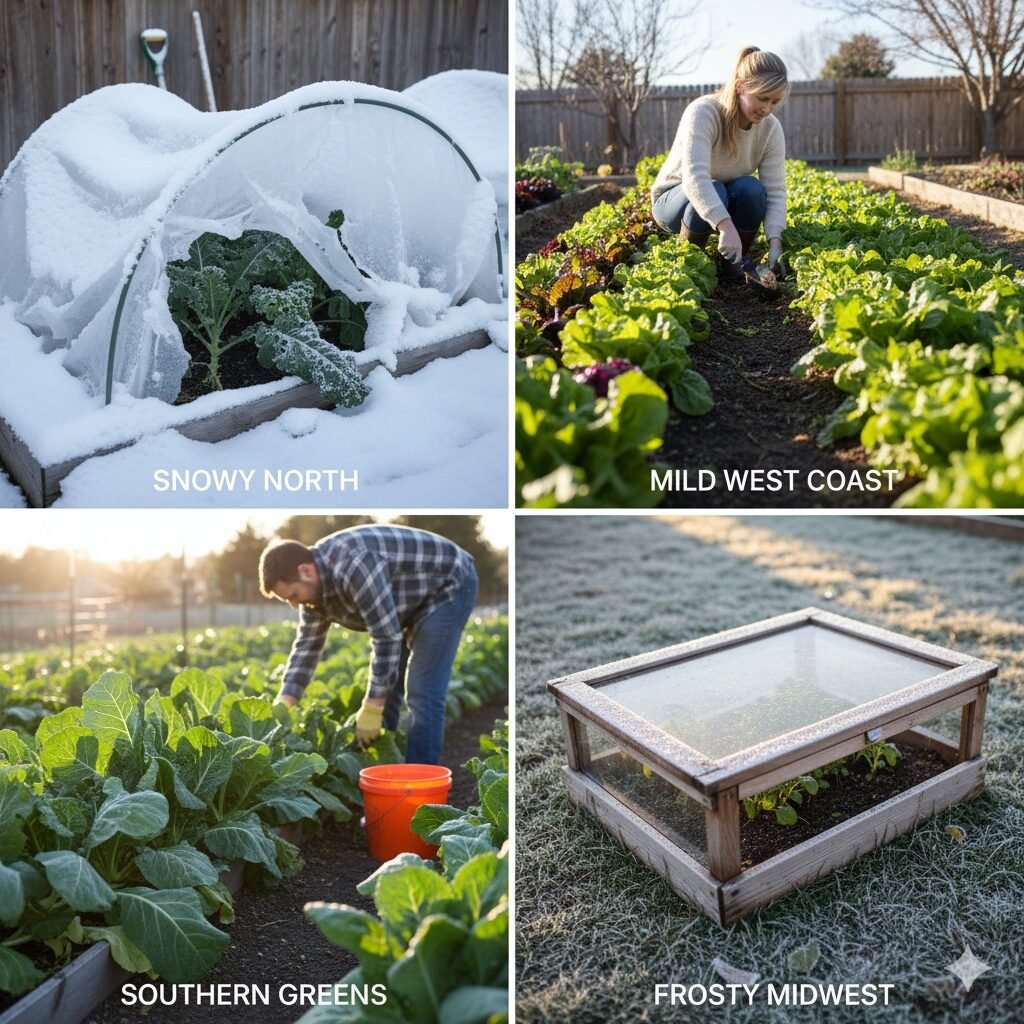
By U.S. Zone: What tends to work best
Here’s a rough guide — always adjust based on your own frost dates:
| Zone | Best Use | Typical Winter Crops |
|---|---|---|
| 3–4 | Heavy insulation, add straw bales | Spinach, kale, carrots, parsnips |
| 5–6 | Standard cold frames, row covers | Kale, chard, lettuce, herbs |
| 7–8 | Light protection, vent often | Lettuce, radish, beets, cilantro |
| 9–10 | Occasional frost cover only | Tomatoes (late), herbs, greens |
A quick note on light
Even though these covers trap heat, they don’t fix low daylight. In winter, days are short and the sun is weak. That’s fine — most greens still grow, just slower.
If you’re using a mini greenhouse near a wall or shaded area, try to angle it south so it gets the most daylight hours possible. Some gardeners use reflective panels or white-painted boards to bounce light inside, which helps too.
Small extras that help a lot
- Thermometer: stick one inside your frame so you can keep tabs on the temperature swings.
- Automatic vent openers: these pop open when it gets warm and close when it cools. Handy if you’re not home during the day.
- Jugs of water or bricks: act like natural heat batteries.
- Mulch mats or old blankets: perfect for emergency frost nights.
These small tweaks can stretch your harvest window by several extra weeks.
How to plan for next year
Once spring rolls around, keep that cold frame in place — it becomes the perfect nursery for early seedlings. Start lettuces, herbs, or even tomatoes a few weeks before your neighbors can.
Then, by the time summer hits, you’ll be harvesting twice as much. That’s the magic of these low-tech season extenders: they don’t just save your winter greens — they set up your next growing season ahead of schedule.
Frequently Asked Questions
Q: Can you put Raised Beds in a greenhouse?
Absolutely! Adding raised beds inside a greenhouse gives you extra growing space, better drainage, and easier access to your plants. It’s a great setup if you like to garden without bending too much or want tidy, organized rows under cover.
Q: How deep should greenhouse raised beds be?
If you can only reach from one side, make the bed about 2–3 feet deep — that’s usually comfortable for tending the soil and harvesting. The exact depth depends on what you plan to grow; root vegetables need a bit more space, while herbs or greens are fine in shallower beds.
Q: Are raised garden beds warmer?
Yes, a bit! Since the soil in raised beds catches sunlight from the top and sides, it warms up faster than ground-level soil. Just remember, that same design makes it cool down quicker in winter — which is why pairing raised beds with a greenhouse cover is such a smart combo.
Q: Can I turn a raised bed into a greenhouse?
You sure can. Many gardeners build a simple frame or hoop structure right on top of their raised bed and cover it with clear plastic or frost cloth. It works like a mini greenhouse, protecting plants from wind and frost while letting in sunlight.
Q: How do I keep my raised bed warm in winter?
A few easy tricks help a lot. Pile on organic mulch or dry leaves to insulate the soil, or stretch greenhouse plastic or frost cloth over the bed to trap warmth. You can cover the whole bed or just certain rows — whichever suits your setup.
Q: What can I grow in a raised bed greenhouse?
Plenty of cold-tolerant crops love that environment. Try spinach, kale, lettuce, beets, carrots, or herbs like parsley and thyme. A raised-bed greenhouse is perfect for extending your growing season into late fall and winter.
Q: How deep do greenhouse beds need to be?
Aim for at least 8 to 12 inches of depth. That’s enough space for roots to spread comfortably while keeping the soil warm and easy to manage.
Q: Does a homemade greenhouse need ventilation?
Yes — absolutely! Proper airflow keeps plants healthy and prevents heat from building up. For simple DIY setups made from PVC or wood, you can vent by cracking open the cover during the day or drilling a few small holes for steady air exchange.
In short
Cold frames, cloches, and mini greenhouses are like little insurance policies for your garden — cheap, practical, and surprisingly easy to manage. They keep your food growing, let you experiment through winter, and give you a taste of spring while everyone else is stuck buying store lettuce.
It’s not high-tech farming; it’s just smart, steady gardening.
Watch this step-by-step guide on how to build a DIY cold frame for your winter garden. It’s a simple, budget-friendly project that helps you extend your harvest well into the colder months.
Once you’ve built yours, try growing kale, spinach, or carrots inside — they love the extra protection.” This helps transition readers back into the written guide and keeps engagement flowing.
If you’ve tried something similar, drop a comment below — I’d love to hear how your setup handled the cold!


Pingback: What to Grow in the Greenhouse in January–February
Pingback: Frost-Resistant Plants to Brighten Your Winter Garden
Pingback: Late-Season Edible Crops: Garlic, Mustards & Greens