
Ok, so growing mushrooms at home might sound like a complicated science experiment at first, but in reality, it’s more or less one of the easiest and most satisfying food-growing hobbies you can pick up. Whether you’re in a city apartment or have a small garden in your backyard, mushroom growing fits almost anywhere — literally, sometimes just a box in a dark corner can do the trick.
It’s no wonder mushroom growing has become one of the fastest-growing home gardening trends across the U.S. in 2025. People are realizing they can get fresh, organic, and healthy mushrooms right at home without paying grocery store prices or worrying about supply-chain issues. Plus, you don’t need acres of land, fancy tools, or even much sunlight — just a little patience, moisture, and the right setup.
How to Grow Mushrooms at Home: Why Growing Mushrooms Is Catching On Everywhere
Now, here’s the thing: mushrooms aren’t just trendy — they’re genuinely practical. The U.S. mushroom market has crossed $3 billion and is still climbing every year, and home-grow kits are selling out fast. Apparently, more people are starting small basement or garage mushroom setups as side hustles, and some are even turning them into full-time small farms.
In short, people love that mushrooms:
- Grow fast (some types fruit in less than a month)
- Don’t need sunlight like other plants
- Use up waste materials like straw or sawdust as growing media
- Provide nutritious, high-value food packed with protein, vitamin D, and antioxidants
So yeah, growing mushrooms isn’t just eco-friendly — it’s like having a mini indoor farm that keeps producing healthy food all year long.
If you enjoy learning about homegrown produce and sustainable food ideas, you might like my other guide on How to Harvest Figs — it shares more simple, hands-on tips to grow fresh Figs right where you live.
Step 1: Choosing the Right Mushroom Species
Alright, first things first — not all mushrooms grow the same way. Some prefer logs, others like straw, and a few grow on sawdust blocks. Choosing your species is kinda like picking your gardening mood: do you want something easy and quick or something gourmet and slow?
Here’s a breakdown that’s perfect for U.S. home growers:
| Type | Difficulty | Growth Time | Flavor & Use | Growing Medium |
|---|---|---|---|---|
| Oyster Mushrooms | Easy | 3–4 weeks | Mild, great for stir-fries | Straw or coffee grounds |
| Shiitake Mushrooms | Medium | 2–3 months | Earthy, meaty | Hardwood logs or sawdust |
| Lion’s Mane | Medium | 4–6 weeks | Seafood-like taste, brain-boosting | Sawdust or blocks |
| Button/White Mushrooms | Easy | 4 weeks | Classic taste | Compost or manure substrate |
| Reishi (Medicinal) | Hard | 2–4 months | Used for tea/supplements | Hardwood logs or sawdust |
Pro Tip: For your first try, oyster mushrooms are your best bet. They’re super forgiving, grow fast, and you can literally start with straw and a plastic bag.
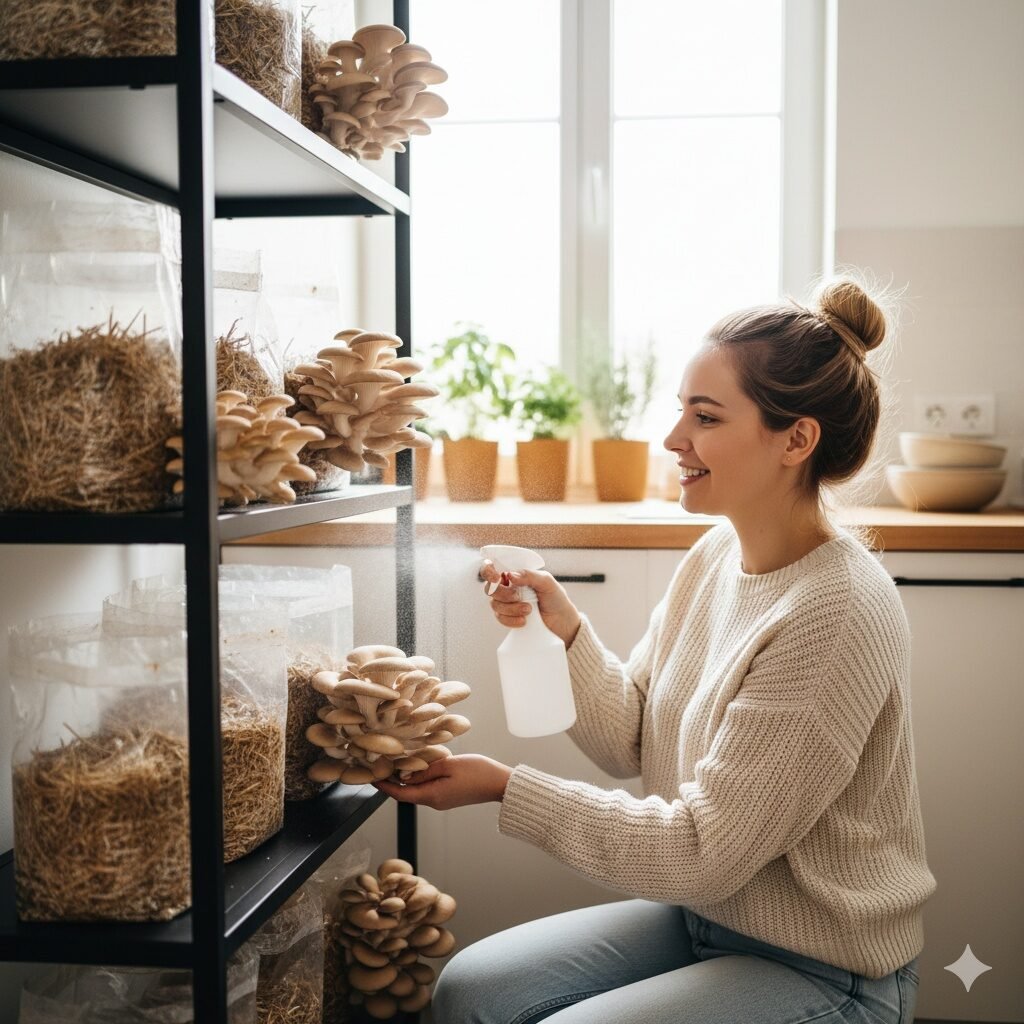
Step 2: Setting Up Your Growing Space
So, where do mushrooms actually grow best? Basically, they like it dark, cool, and damp. A basement, closet, garage, or even a shaded shed works perfectly fine.
👉 Ideal Growing Conditions
| Condition | Ideal Range |
|---|---|
| Temperature | 60–75°F (depending on species) |
| Humidity | 80–90% |
| Light | Low or indirect light |
| Airflow | Gentle air exchange |
| Cleanliness | Keep dust & mold away |
If your area feels too dry, just spray water around once or twice daily to keep humidity up. You can use a small humidifier or simply hang a damp towel nearby — it works surprisingly well.
Pro Tip: Use a cheap digital hygrometer to keep track of humidity and temperature. Mushrooms can get fussy if things get too dry or too warm.
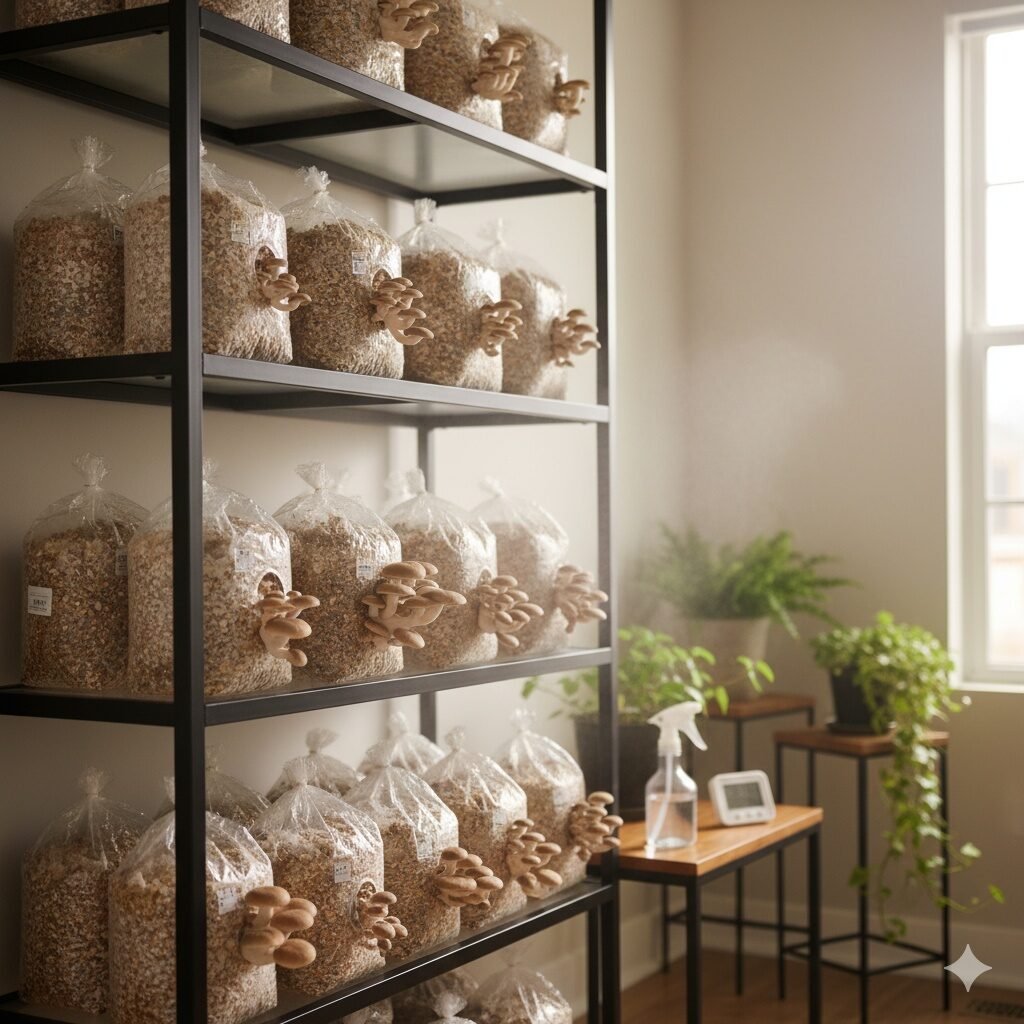
Step 3: Preparing the Substrate
This part might sound fancy, but it’s pretty straightforward. The substrate is the “food” for your mushrooms — it’s what they grow on. Common options are straw, sawdust, coffee grounds, cardboard, or logs.
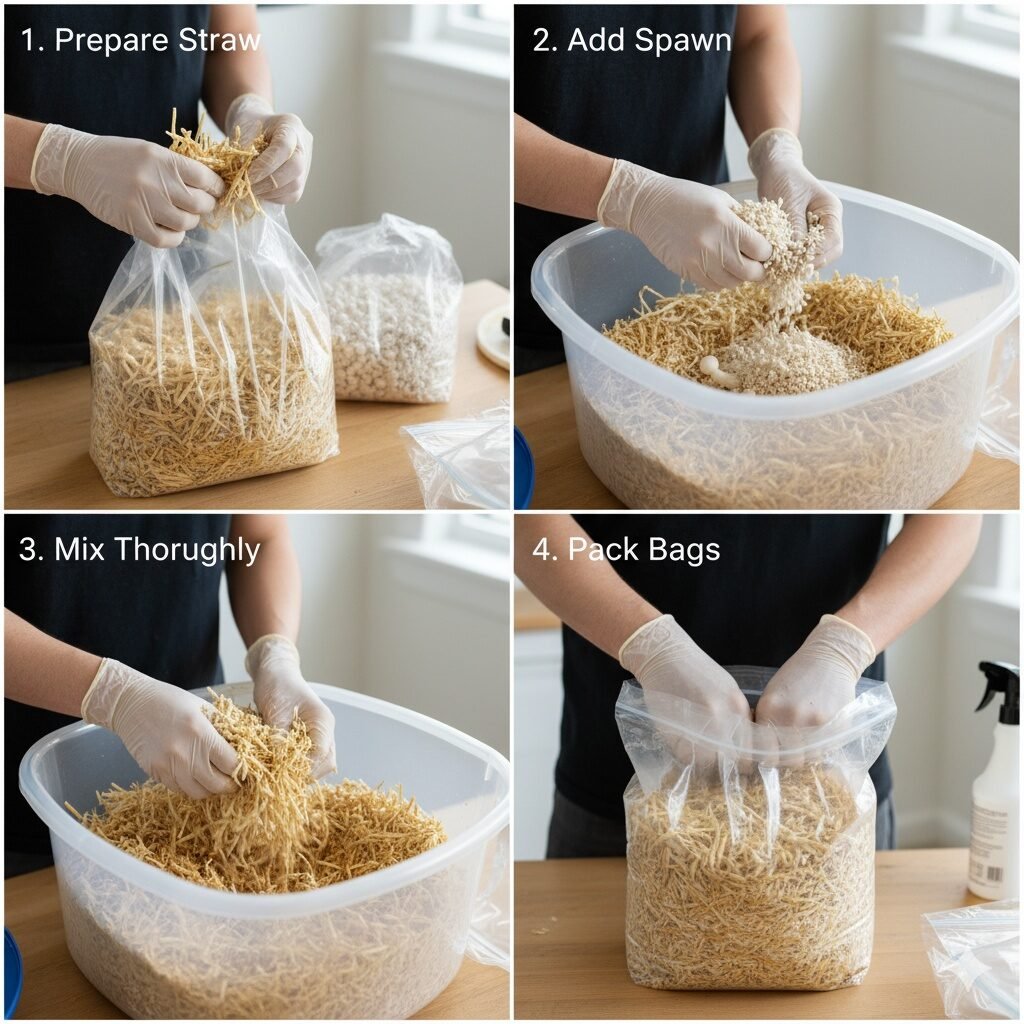
Basic Straw Substrate Setup
- Chop straw into small pieces (around 3–4 inches).
- Pasteurize it by soaking in hot water (160°F) for 1 hour — this kills unwanted molds.
- Drain well and let it cool completely.
- Mix in spawn (think of it like mushroom seeds).
- Pack into bags or containers with small air holes.
Once it’s all packed, keep it in a warm, dark spot for 2–3 weeks while the white mycelium spreads through the straw. That’s when the magic happens.
Pro Tip: Don’t over-wet the straw. It should feel like a damp sponge, not a soaked towel.
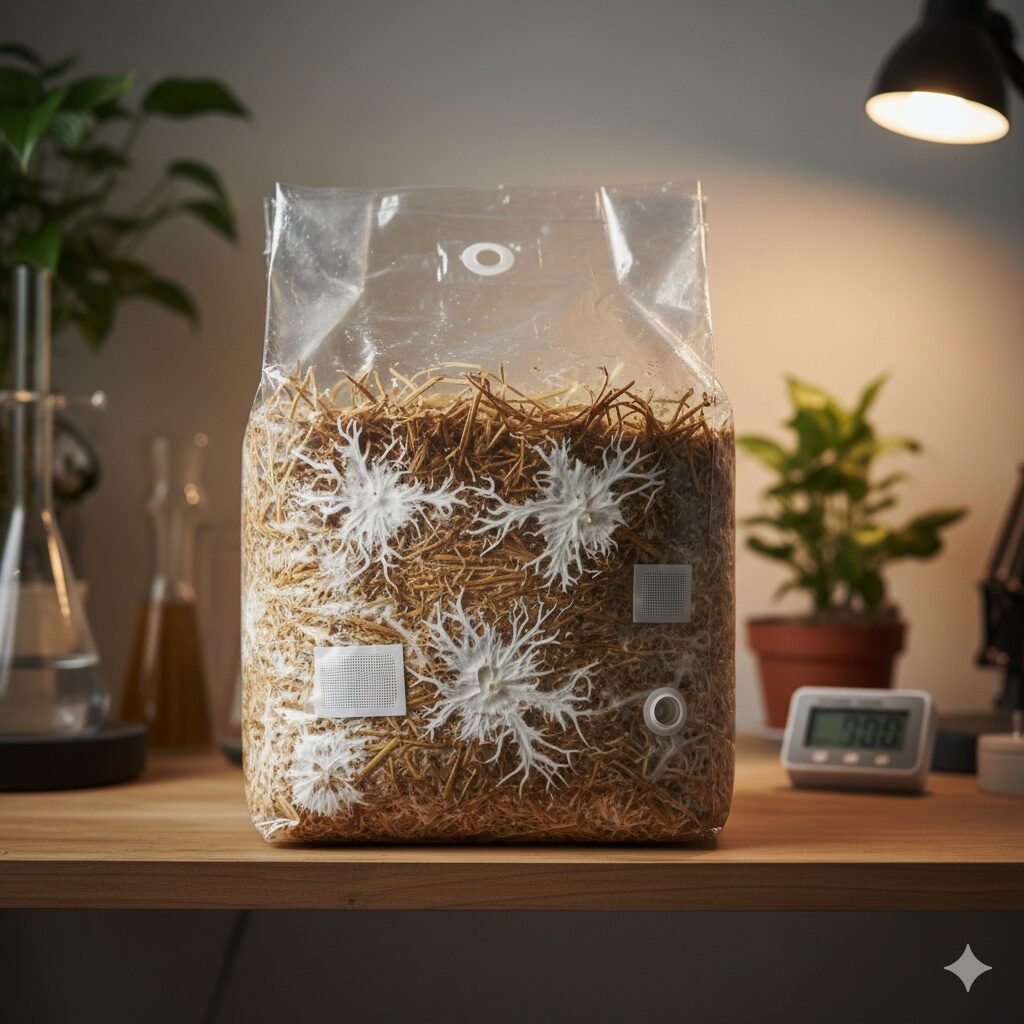
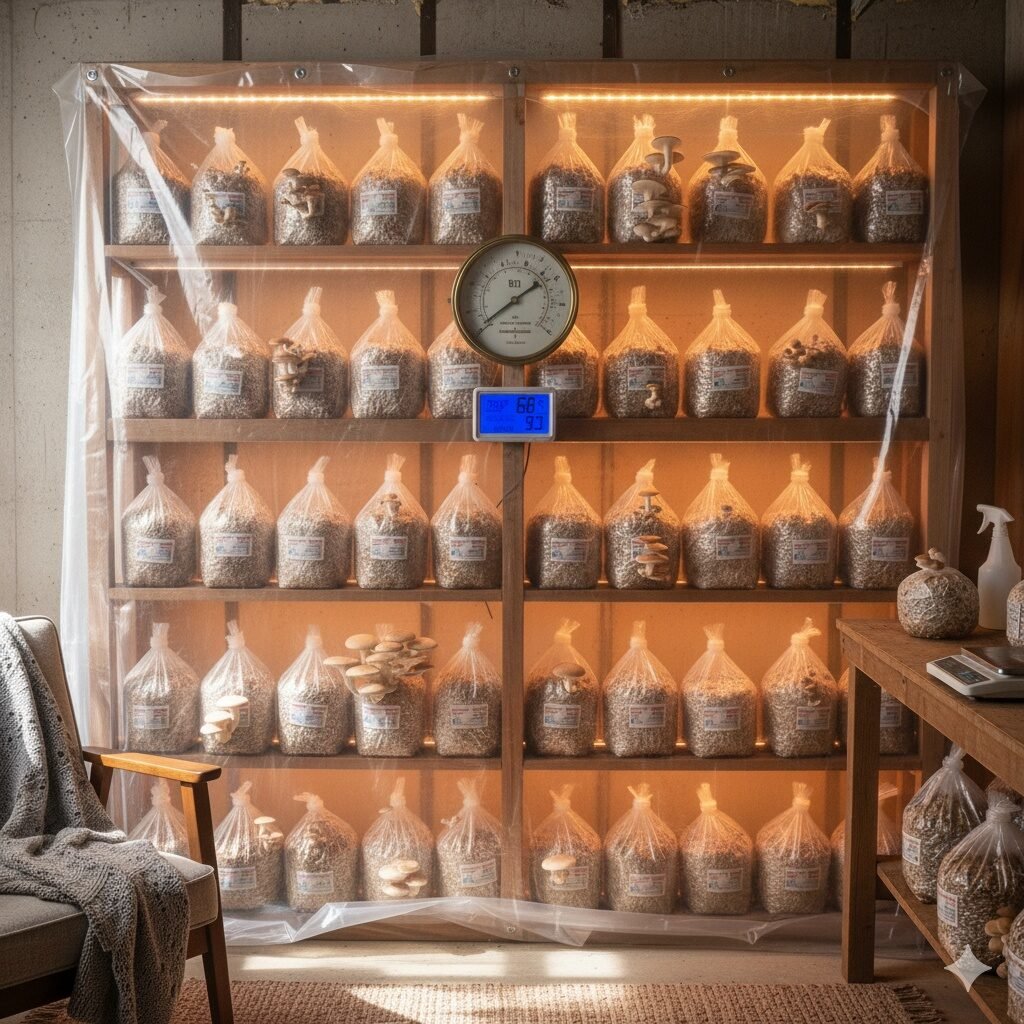
Step 4: Inoculation & Colonization
Alright, so this is the science-y bit — but don’t worry, it’s easy. When you add the spawn to your substrate, the mushroom mycelium starts to “colonize” it, spreading like roots through the material. It usually takes 2–4 weeks depending on temperature and type.
Keep it dark and warm during this stage. Once you see white fuzz everywhere (that’s healthy mycelium), it’s time to move to the fruiting stage.
Pro Tip: Avoid opening your bags or containers too often during colonization — this invites contamination from other fungi or mold.
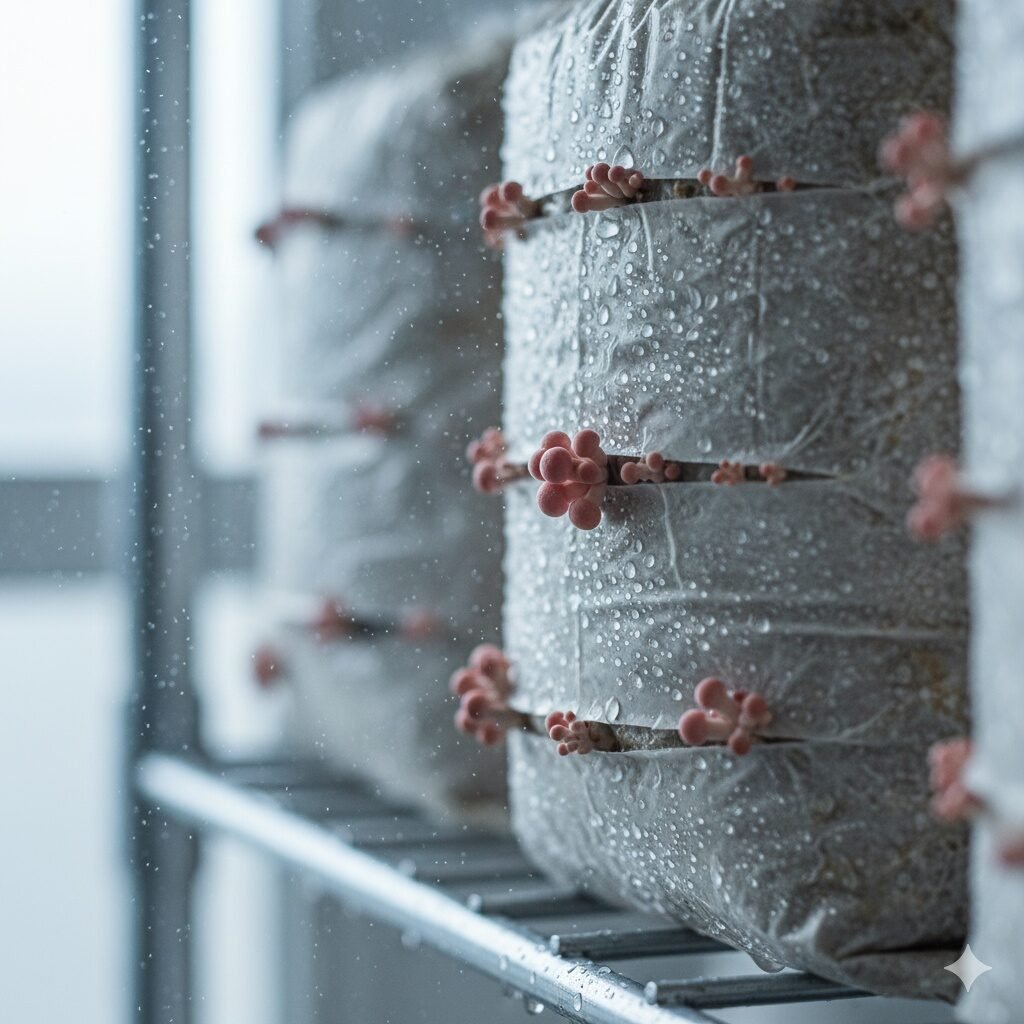
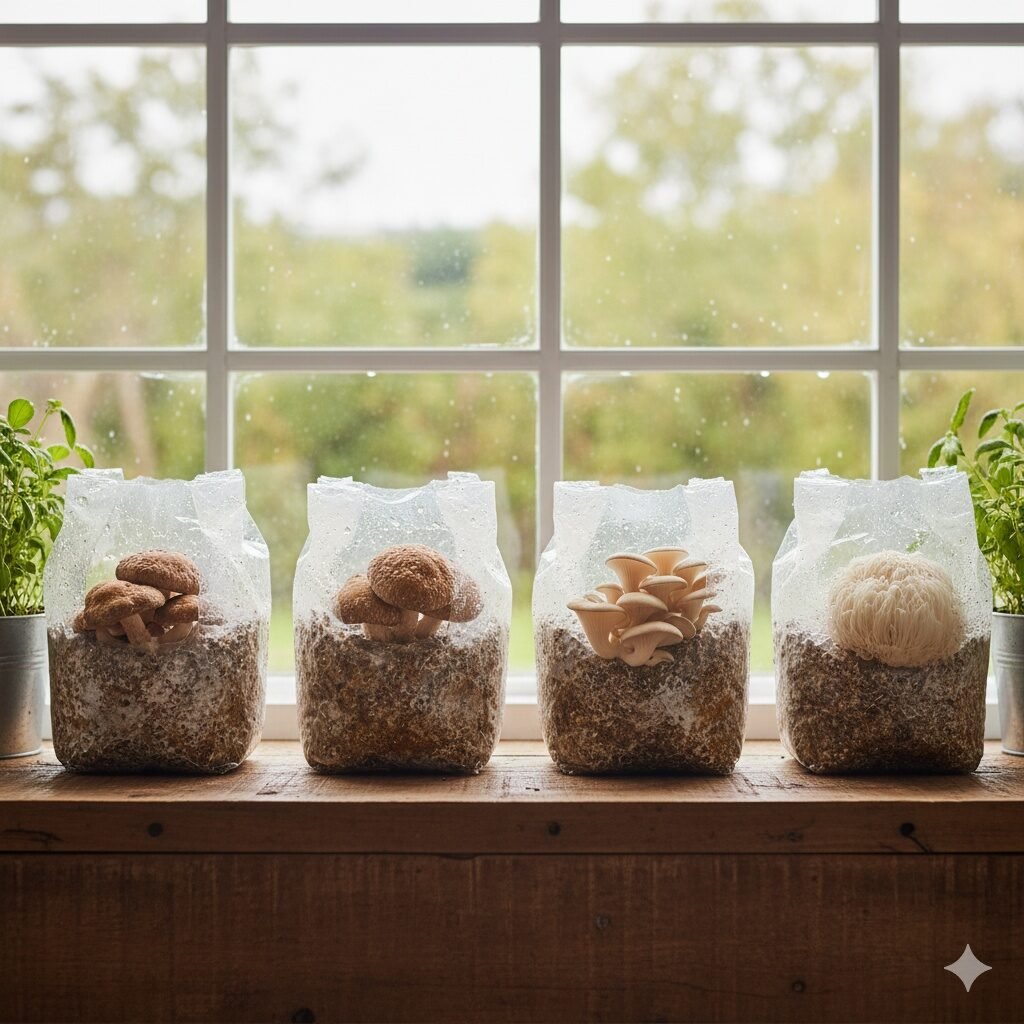
Step 5: Fruiting – Watching the Mushrooms Grow
Once your substrate looks completely white, shift it to a slightly cooler, light, and humid place. Gently cut holes in the bag if you’re using one — mushrooms will pop out through these holes in just a few days.
Mist daily and give them fresh air. Within a week, you’ll start seeing small baby mushrooms — called pins. A few days later, they’ll mature into full-grown mushrooms ready to harvest.
Pro Tip: Harvest just before the mushroom caps flatten out. That’s when the flavor and texture are at their best.

Step 6: Harvesting & Storing
You’ll know it’s time to harvest when the caps open slightly, and the edges are still curled down. Just twist them off gently or cut them at the base.
Fresh mushrooms can be stored in the fridge for about a week. Don’t seal them in plastic — use a paper bag so they stay dry and firm.
Pro Tip: Drying mushrooms is a great way to store extras. Use a dehydrator or oven at low heat, and they’ll last months in an airtight jar.
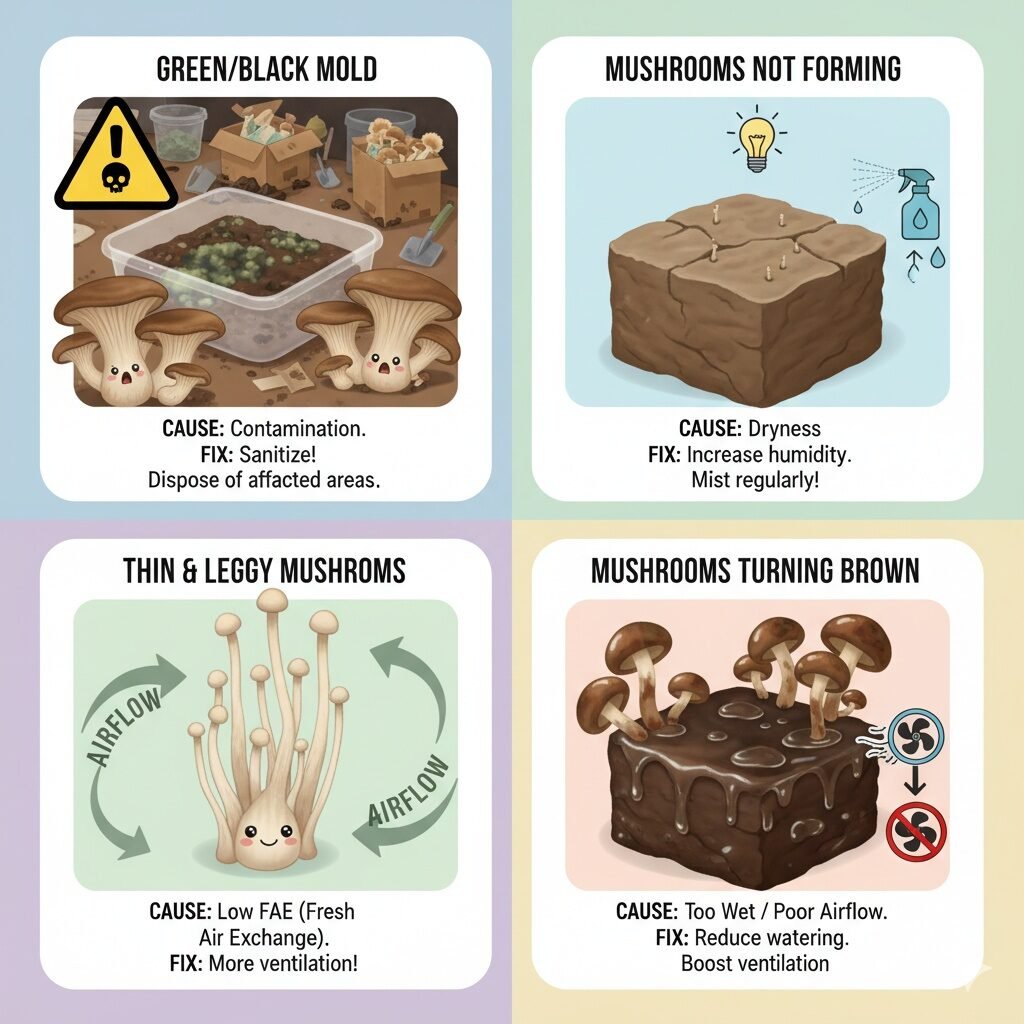
Common Problems & Fixes
Even though mushrooms are low-maintenance, a few things can go wrong. Here’s a quick rundown of what to watch out for:
| Problem | Cause | Quick Fix |
|---|---|---|
| Green or black mold | Contamination | Clean tools & work area, restart batch |
| Mushrooms not forming | Too dry or too hot | Mist more often, lower temp |
| Thin or leggy mushrooms | Lack of airflow or light | Give gentle air exchange & indirect light |
| Mushrooms turning brown | Overwatering or poor air | Reduce misting, improve ventilation |
Pro Tip: Wipe down your workspace with diluted vinegar or alcohol before starting any new batch. Clean setup = healthy mushrooms.
The Eco & Economic Side
You know what’s really cool? Mushroom growing uses waste that would otherwise go to landfills — things like sawdust, wood chips, and coffee grounds. So, it’s both sustainable and low-cost.
Many small U.S. growers now sell their extra mushrooms at farmers markets or to local restaurants. Oysters and shiitakes, for example, can sell for $10–$15 per pound. Even a tiny home setup can yield a few pounds a week, easily covering your costs.
Pro Tip: Start small, then scale up once you get consistent results. Even 2–3 bags can supply a steady stream of fresh mushrooms every month.
DIY Mushroom Grow Kits: A Shortcut for Beginners
If you don’t feel ready to prepare substrates or handle sterilization, just buy a mushroom grow kit. They come pre-inoculated with mycelium and are ready to fruit — you literally just mist them daily.
Popular kits in the U.S. right now include:
- Back to the Roots Mushroom Grow Kit
- North Spore Oyster Kit
- Field & Forest Lion’s Mane Block
Pro Tip: Once your kit finishes fruiting, don’t throw it away. Sometimes a second or third flush grows again after a few weeks if you keep it moist.

Pro Tips for Long-Term Mushroom Success
- Keep things clean — 90% of mushroom issues come from contamination.
- Track your humidity — mushrooms thrive around 85%.
- Use natural light — not direct sun, just daylight near a window.
- Rotate species — once you master one, try others like lion’s mane or shiitake.
- Join mushroom groups — online communities like r/MushroomGrowers on Reddit are gold for troubleshooting.
Wrapping Up: Start Small, Learn Fast
So yeah, growing mushrooms at home isn’t some big science project — it’s a fun, rewarding hobby that puts real food on your table. Start small, learn as you go, and before long, you might be harvesting more mushrooms than you can eat.
It’s almost funny how simple it can be: a bag of straw, a bit of moisture, and some mycelium can turn any corner of your home into a mini indoor farm.
If you still would like to know more about How to Grow Mushrooms at Home, the following Article may help you.
If you’re more of a visual learner, this short video breaks down the process of mushroom cultivation step by step. It’s a really helpful walk-through showing how mushrooms go from simple grain spawn to full harvest. The presenter covers the same basics we just talked about — substrate prep, colonization, fruiting, and harvesting — but seeing it in action makes everything click faster. Go ahead and hit play below to see the 7 key stages of how mushrooms are grown in real life.


Pingback: 10 Best Mushrooms You Can Grow at Home (Beginner-Friendly)
Pingback: Ultimate Mushroom Substrate Guide: Top 4 Growing Media