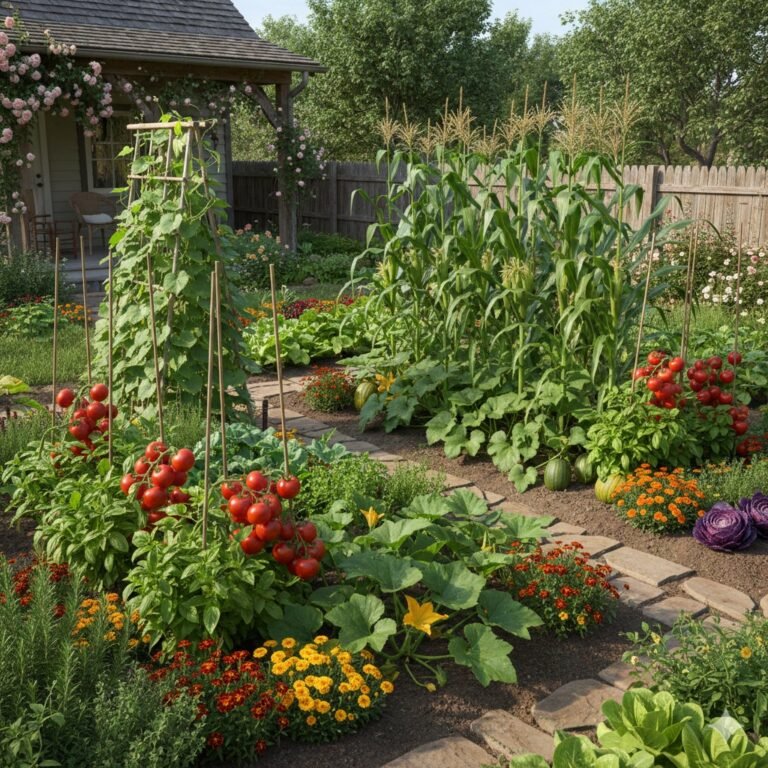

Ok, so mushroom growing often looks simple at first glance, yet that early view hides how much the substrate really does, that is, it feeds the mycelium and gives it a physical home in a way that quietly shapes the whole harvest. A substrate, in some respects, works as both dinner plate and mattress for mushrooms, and that mix of food plus structure tends to be what sets peoples’ minds back to why some grows explode with life and others stall out early. Choosing the right base, actually, can be the line between thin, sad flushes and heavy clusters that nearly fill a room.
This Mushroom Substrate Guide, in fact, walks through five popular mushroom substrate types that growers usually lean on, whether you grow in a small apartment or a larger shed. You’ll see straw, hardwood sawdust, used coffee grounds, and a few bonus growing media that often surprise people. By the end, you should, pretty much, have a clear sense of which mushroom growing substrates match your goals, your space, and your patience level.
My Recommendation of Mushroom Substrate & Beginner Supplies
Before getting into the table, just a quick note, that is, mushroom substrate success often depends on a small set of tools used the right way. These recommendations focus on prep, moisture control, and cleanliness, which, in fact, tend to be the areas where most grows either work smoothly or fall apart.
| ITEM NAME + BUYING TIPS | WHY IT MATTERS | MY RECOMMENDATION (LINKS) |
|---|---|---|
| Pressure Cooker (23-Quart, with pressure gauge) – Go for a large size that holds steady pressure, since volume and consistency usually matter | It allows proper sterilization of sawdust and supplemented substrates, which nearly eliminates most contamination issues | Check current price → Recommended Pressure Cooker |
| Mushroom Grow Bags with Filter Patch (0.2–0.5 micron, thick plastic) – Look for durable bags with breathable filters | These bags protect the substrate while letting mycelium breathe, which helps colonization stay clean | View trusted option → Filter Patch Grow Bags |
| Coco Coir Brick (pure, no additives) – Avoid coir with fertilizers or salts, since that can slow growth | It supports moisture retention and structure, especially in mixed or indoor substrates | See my go-to coir → Coco Coir Brick |
| Hardwood Sawdust Pellets (100% hardwood) – Choose pellets sold for smoking or heating, not blended woods | They expand evenly with water and form a reliable sawdust mushroom substrate | Find quality pellets → Hardwood Pellets |
| Wheat Bran or Soy Hulls (food or feed grade) – Store dry and airtight, since moisture causes spoilage | Supplements raise nutrient levels in sawdust substrates and increase total yields | My preferred supplement → Bran / Soy Hulls |
| Digital Kitchen Scale (gram accuracy) – A small, accurate scale works better than large bulky ones | It keeps substrate ratios consistent, which really helps repeat good results | Check this scale → Digital Scale |
| Heat-Resistant Bucket (5-gallon or larger) – Make sure it’s rated for hot water | It simplifies straw, cardboard, and compost pasteurization | See a solid bucket → Heat-Safe Bucket |
| Fine-Mist Spray Bottle – Choose a nozzle that creates mist, not streams | It helps maintain surface moisture without soaking the substrate | My everyday spray bottle → Fine Mist Bottle |
| Disposable Gloves + Alcohol Spray (bulk pack) – Buying in bulk usually saves money | Clean handling during mixing and spawning reduces contamination risk | Starter hygiene kit → Gloves & Alcohol |
So, with just these tools, in a way, most growers can handle straw, sawdust, coffee grounds, and mixed substrates without overcomplicating things, and that simplicity often leads to better, more repeatable harvests.
I also have another beginner-friendly article you might enjoy: “How to Grow Mushrooms at Home (U.S. Edition 2025): 6 Easy Steps to Indoor Farming for Fresh, Organic Harvests.”
It breaks down mushroom growing into simple, practical steps—perfect for anyone who wants fresh, organic mushrooms without a garden or fancy equipment.
I always enjoy sharing insightful articles from other trusted websites on the same topic—especially when they’re genuinely worth reading. One such piece is from Epic Gardening, titled “11 Best Mushroom Growing Supplies for Home Growers,” where you’ll find practical recommendations and tools that make home mushroom growing easier and more successful.
What Makes a Good Mushroom Substrate?
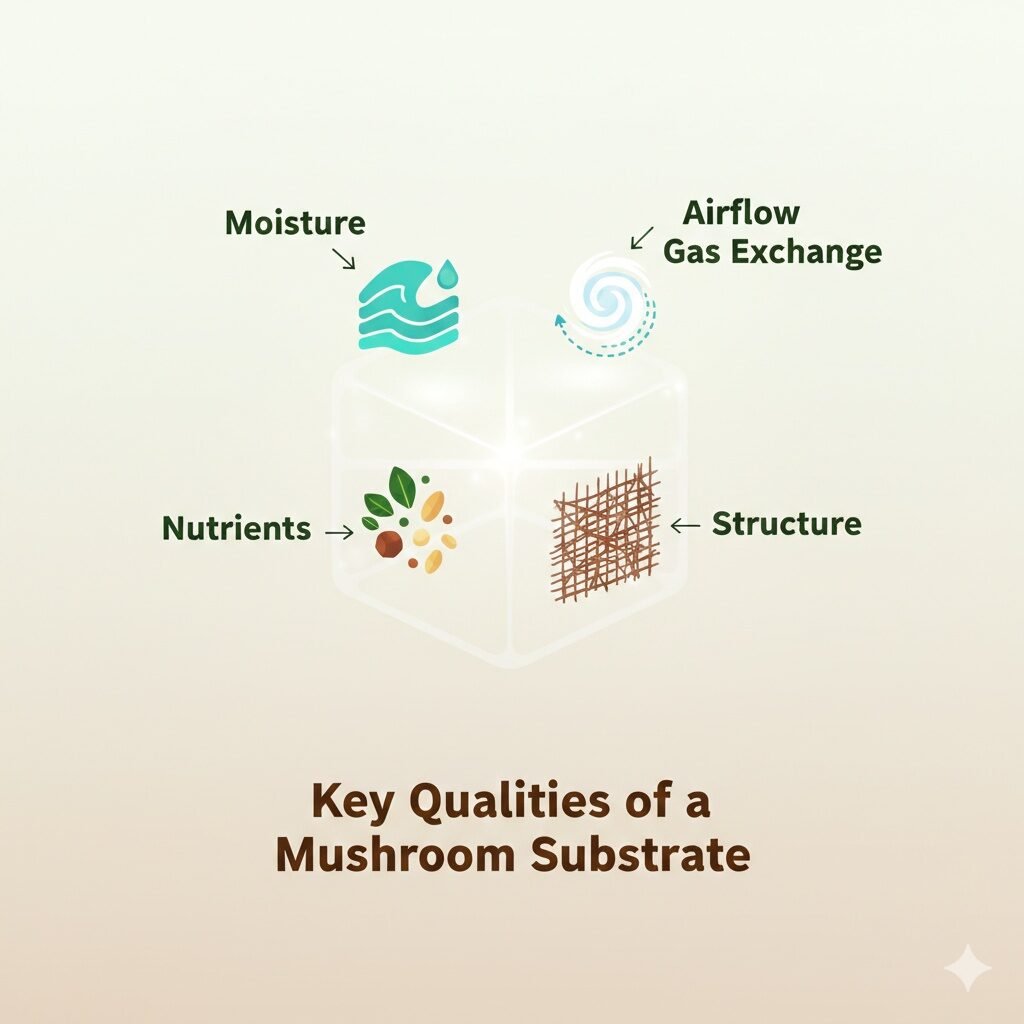
So, a good mushroom substrate tends to be more than just “stuff mushrooms grow on,” that is, it balances food, air, and water in a way mycelium likes. Nutrient content, for example, gives mushrooms the raw material to build stems and caps, yet too many nutrients can, in a way, invite molds and bacteria to the party. Moisture retention matters nearly as much, since mycelium usually wants a damp feel without water pooling at the bottom. Aeration, basically, keeps oxygen moving through the substrate, and that airflow helps avoid sour smells and slow growth. pH balance, typically leaning slightly acidic to neutral, supports steady colonization, and contamination resistance often comes from proper prep rather than the material alone.
Structure versus nutrients, in fact, plays out in every grow. Straw, for instance, brings lots of air gaps with fewer nutrients, and sawdust brings denser food with tighter structure. The substrate choice, really, influences how fast mushrooms colonize, how even the flushes look, and how long the block or bed keeps producing. Pasteurization versus sterilization, by the way, comes up a lot. Pasteurization uses heat to knock back harmful microbes yet leaves some friendly ones behind, and sterilization aims to wipe everything out, which usually fits richer substrates like sawdust. Beginners often start with pasteurized options since they forgive small mistakes.
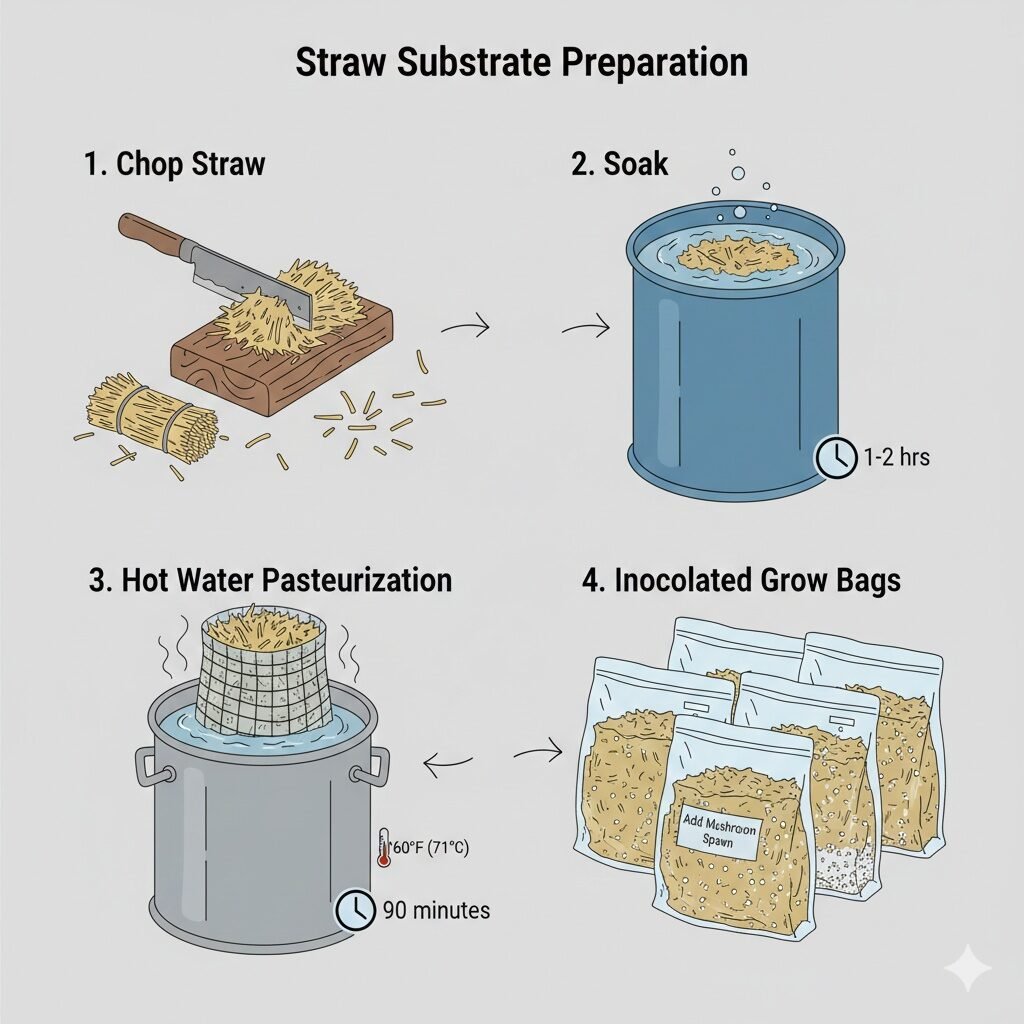
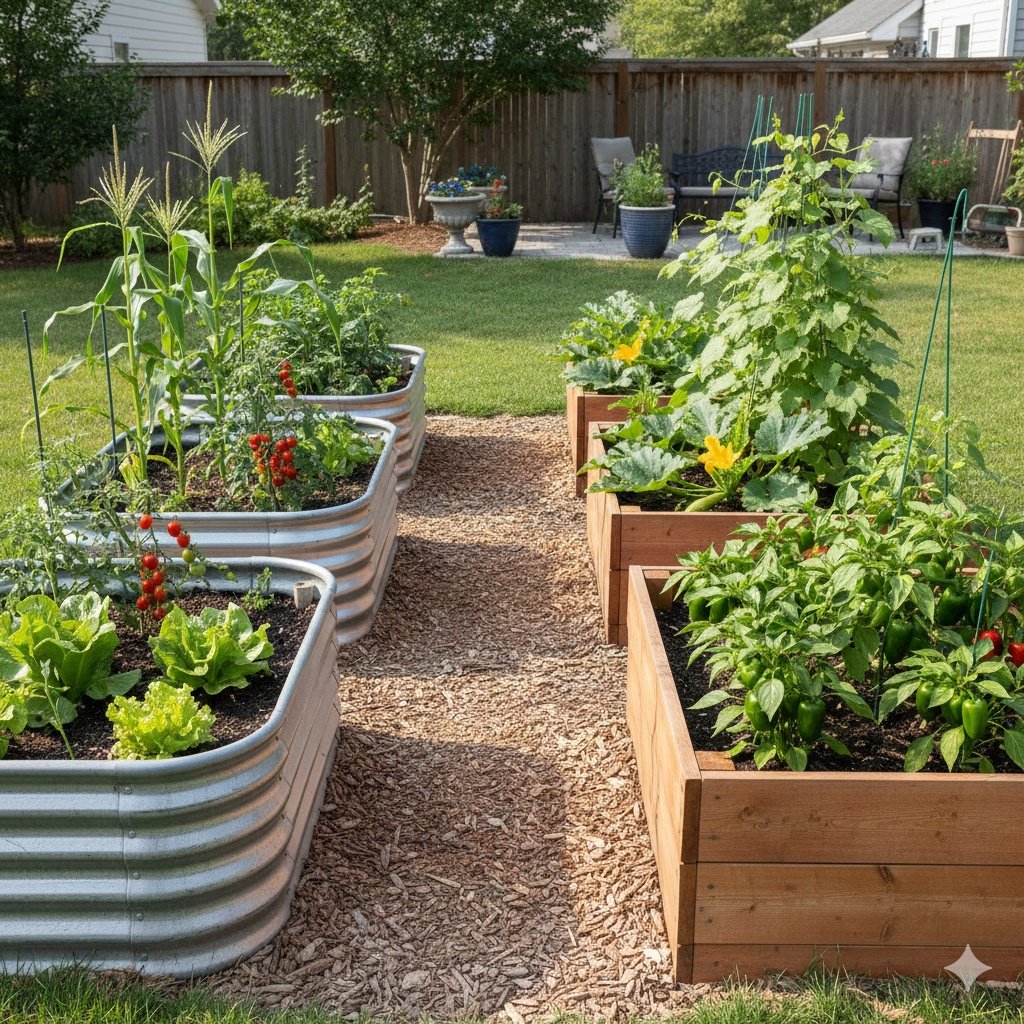
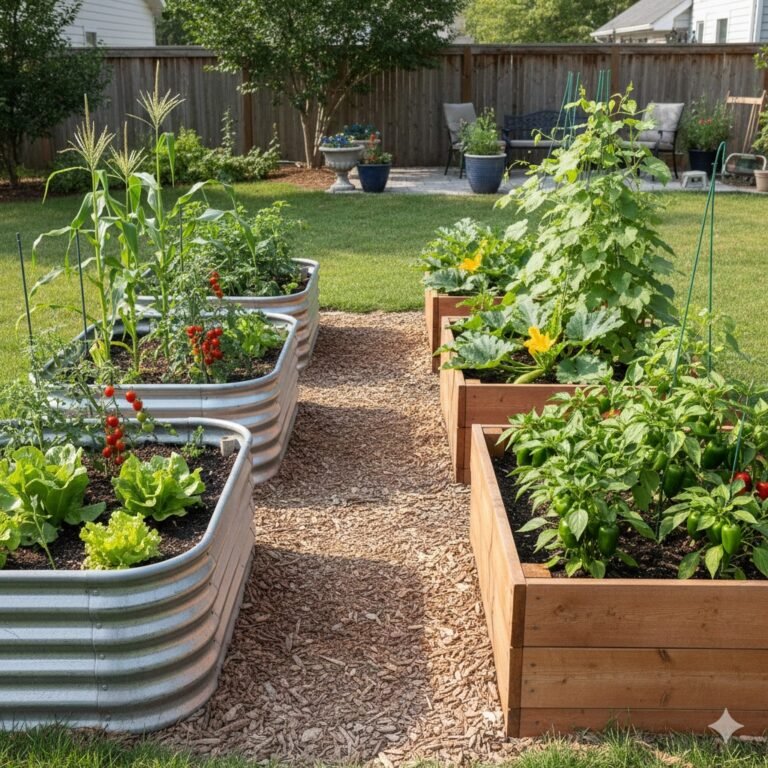
1. Straw Substrate
Straw, that is wheat, rice, or barley straw, stands as one of the most popular mushroom growing substrates for a reason, and that reason tends to be simplicity mixed with speed. Straw comes from agricultural leftovers, and its hollow stems create air pockets that oyster mushrooms, in particular, really like. Oyster species, actually, chew through straw fast, often colonizing a bag or bucket in just a couple of weeks.
The pros feel obvious, in a way. Straw is cheap, easy to find, and forgiving for first-time growers. Colonization moves quickly, yields come fast, and mistakes rarely ruin everything at once. The cons, yet, show up during prep. Straw needs pasteurization to reduce mold risk, and skipping that step often ends in green fuzz and disappointment. Chopping straw into 1–2 inch pieces, soaking it until flexible, then heating it in hot water around 160–170°F for about an hour usually does the trick. After cooling and draining, the straw should feel damp, not dripping.
Yield expectations, typically, sit in a comfortable range. Many growers see mushrooms weighing about 50–100% of the dry straw weight across multiple flushes. Common mistakes, really, include packing straw too tightly, leaving standing water, or using straw that smells musty from the start. Straw bale methods, by the way, exist for outdoor growers, where whole bales get soaked, inoculated, and fruited in gardens, and that approach can be fun for large seasonal grows.
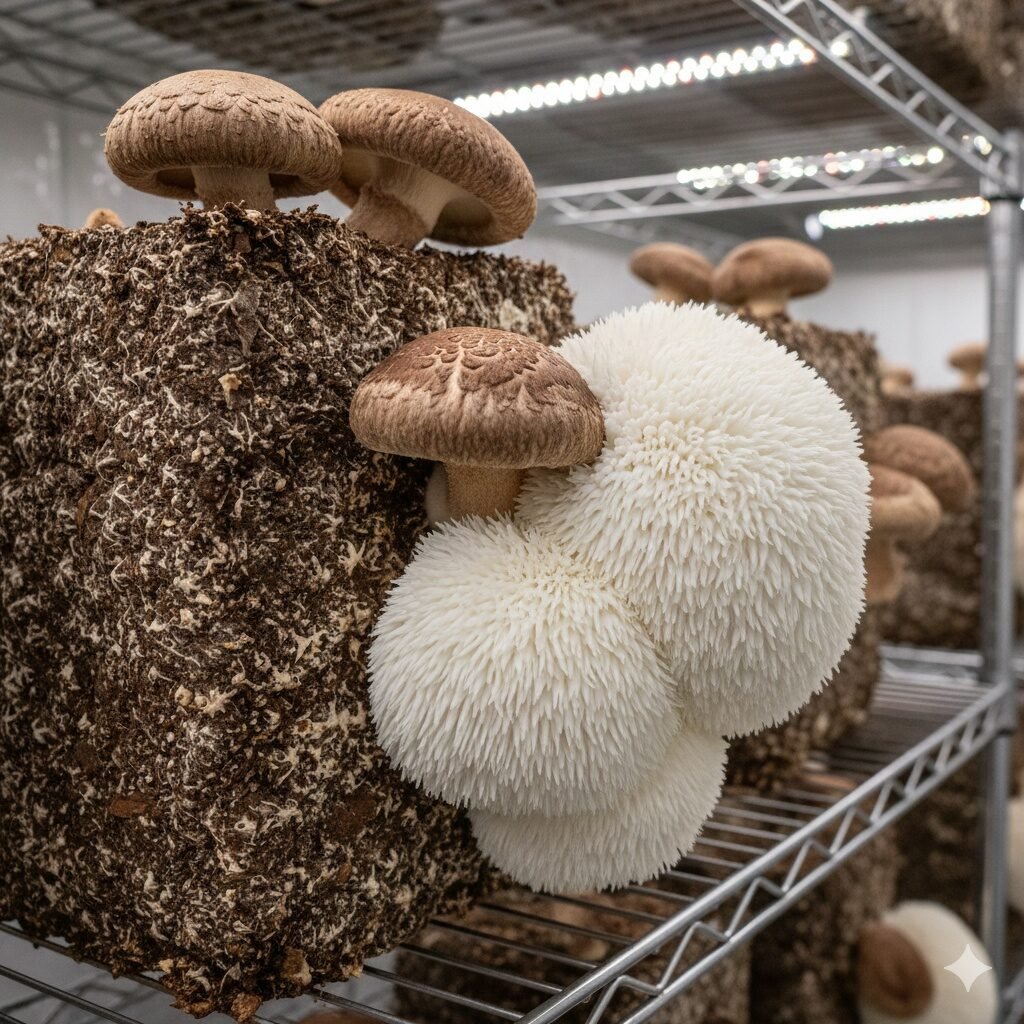
2. Hardwood Sawdust Substrate
Hardwood sawdust, nearly always from oak, maple, or beech, serves as the go-to choice for wood-loving mushrooms, and that includes shiitake, lion’s mane, reishi, and enoki. These species evolved breaking down fallen trees, so sawdust mimics their natural food source in a way straw never quite does. The result, often, shows up as thicker stems, denser caps, and longer-lasting substrate blocks.
The pros here lean toward nutrition and realism. Sawdust offers more complex carbohydrates, and that richness supports higher total yields over time. The cons, still, come with patience and prep. Sawdust colonizes slower than straw, and it usually needs sterilization rather than pasteurization, since competing microbes love nutrient-dense material. Many growers boost sawdust with supplements like wheat bran or soy hulls, usually around 5–20% by dry weight, to push yields higher.
Prep steps, basically, involve mixing dry sawdust with supplements, adding water until the mix holds shape when squeezed, and loading it into filter patch bags or jars. Sterilizing at 15 PSI for 90–120 minutes tends to be standard. Safety notes matter here, since poor sterile technique can waste weeks of waiting. Clean tools, fresh spawn, and sealed containers reduce heartbreak. When done right, sawdust blocks often fruit for months, which makes the slower start feel worth it.
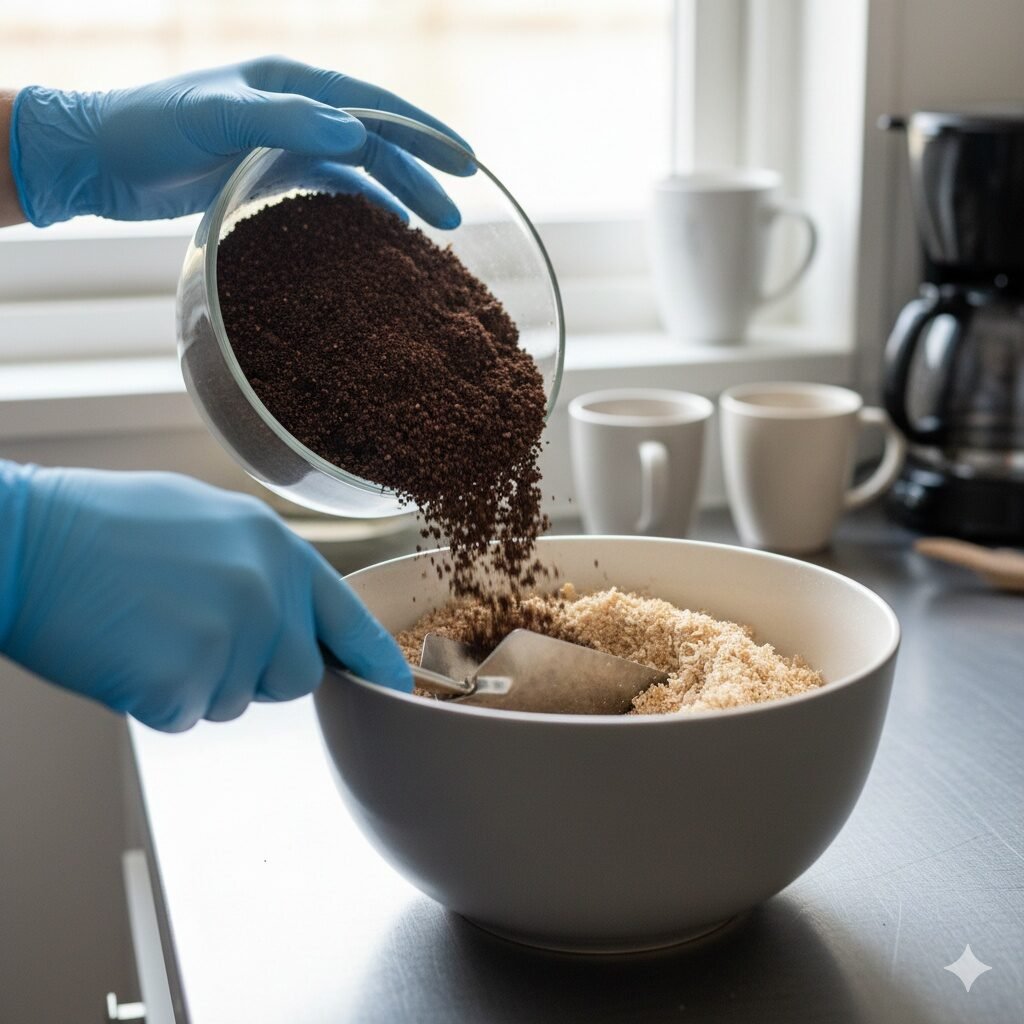
3. Used Coffee Grounds Substrate
Used coffee grounds bring a different vibe to mushroom substrate preparation, and that vibe often fits urban growers with limited space. Coffee grounds contain nitrogen, some minerals, and a fine texture that mycelium can colonize quickly. Oyster mushrooms, in particular, usually handle coffee grounds well.
The pros, in fact, include recycling waste and boosting nutrients without much cost. The cons, though, show up fast if prep slips. Coffee grounds carry a high contamination risk, since they cool slowly and stay moist. Many growers freeze freshly collected grounds or use them within 24 hours to limit mold growth. Pure coffee grounds can work, yet mixing them with straw or sawdust often brings better balance. Ratios around 25–50% coffee grounds with sawdust, for instance, tend to boost yield without overwhelming the substrate.
Moisture control matters a lot here. Grounds should feel fluffy and damp, not muddy. Sterilization or very careful pasteurization helps, and clean handling really pays off. Coffee grounds alone rarely last as long as straw or sawdust mixes, yet they shine for quick, small-scale harvests, especially in kitchens or garages.
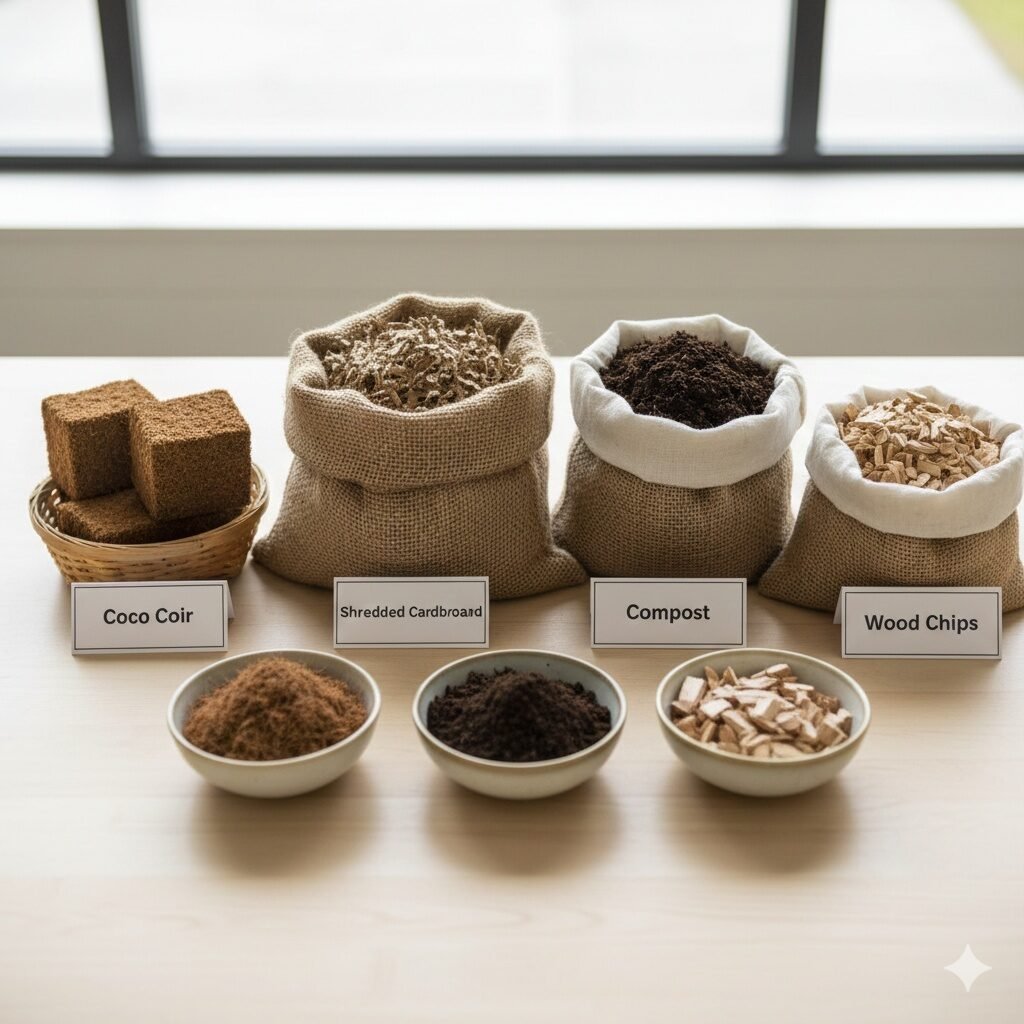
4. Bonus Substrates Worth Trying
1. Coco Coir + Vermiculite Blends
So, coco coir mixed with vermiculite tends to be popular for indoor mushroom grows, that is, mainly for growers who want steady moisture without much fuss. This blend holds water very well, yet still lets air move around the mycelium, which in a way helps reduce stress during colonization. It resists contamination better than many organic materials, which is why beginners often feel comfortable starting here. The downside, actually, is low nutrition, so nutrient-hungry mushrooms usually need supplements like bran to perform well. Prep stays simple: hydrate the coir with hot water, mix in vermiculite evenly, let it cool, and inoculate once moisture feels just a little damp rather than soggy.
2. Compost & Manure Substrates for Button and Portobello Mushrooms
Compost and manure substrates, in fact, usually show up when people grow button or portobello mushrooms, since these species like rich, broken-down material. These substrates get mixed with straw, and that combo gives both food and structure in some respects. The benefit, basically, is strong yields and classic mushroom flavor, which explains why commercial farms rely on them. The drawback, yet, comes from prep effort, since proper pasteurization matters a lot to keep smells and contaminants under control. A simple approach involves soaking the compost-straw mix, heating it to pasteurization range, draining excess water, and letting it cool before spawning.
3. Cardboard & Recycled Paper for Low-Budget Grows
Cardboard and recycled paper, you know, appeal to growers working on tight budgets or experimenting at home. These materials break down easily, hold moisture fairly well, and oysters usually colonize them fast. The big advantage is cost, since boxes and paper scraps often cost nothing. The limitation, almost, sits with nutrition, so yields stay lighter compared to straw or sawdust. Prep stays easy: soak cardboard or paper until soft, tear it into layers, squeeze out extra water, and stack it with spawn between layers for quick results.
4. Wood Chips & Agro Waste Options
Wood chips and agro waste like banana leaves or corncobs, actually, fit outdoor or warm-climate grows best. These materials copy natural forest litter, and local microbes often help balance moisture and breakdown. The upside, in a way, includes low cost and sustainability, especially when materials come from nearby farms. The challenge might be slower colonization and uneven results, since material quality varies. Simple prep usually means soaking the chips or waste, draining well, and inoculating in shaded outdoor beds where rain and airflow help maintain conditions.
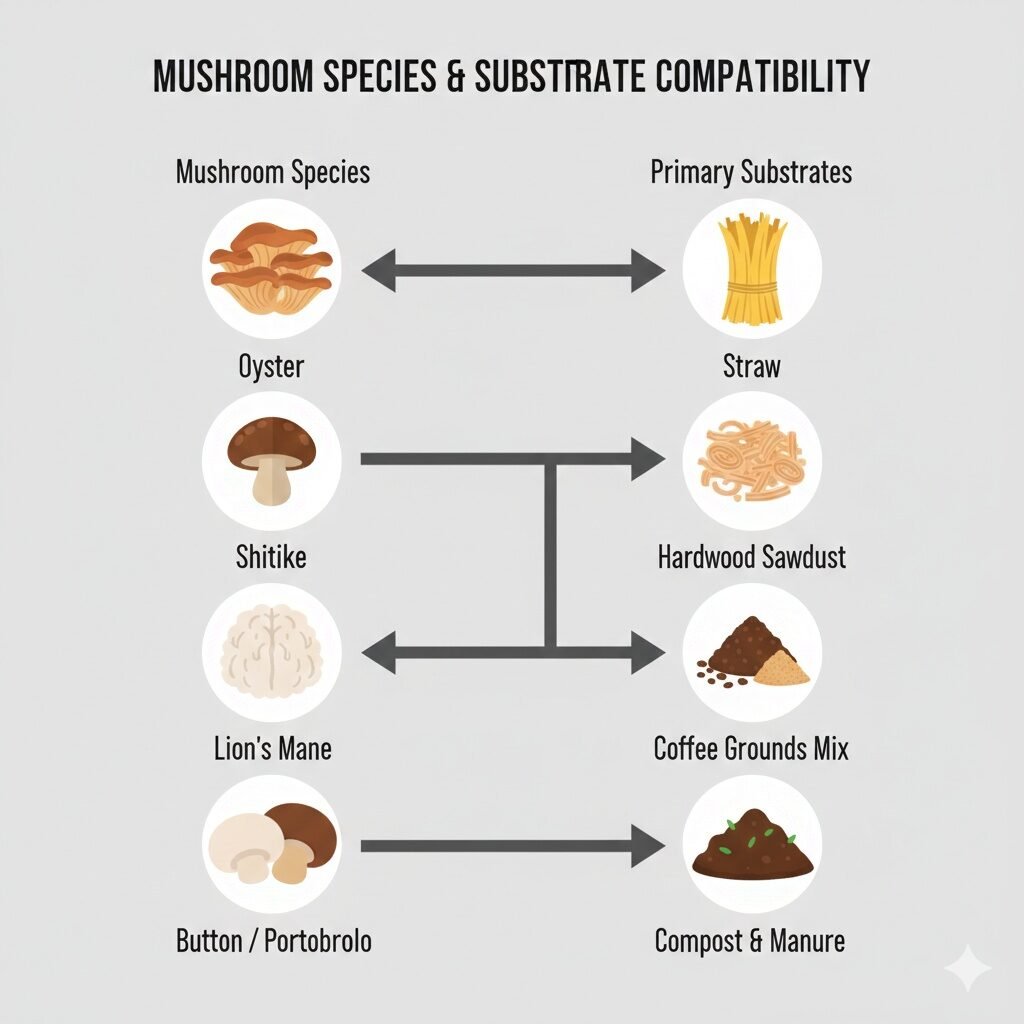
Matching Substrate to Mushroom Species
Choosing the best substrate for growing mushrooms often comes down to matching habits, and that habit match saves time and frustration. Oyster mushrooms, for instance, thrive on straw, sawdust, or coffee mixes, and they forgive mistakes. Shiitake mushrooms prefer hardwood sawdust or logs, and they reward patience with firm, flavorful caps. Lion’s mane leans heavily toward supplemented sawdust, producing dense clusters when nutrition stays balanced. Button and portobello mushrooms rely on compost and manure blends with straw, reflecting their natural environment.
Quick tips help narrow choices. If yield matters most, richer substrates like sawdust mixes usually win. If ease and speed matter, straw or cardboard often feel better. If cost drives decisions, recycled materials like coffee grounds and paper keep expenses low. Matching goals with substrate choice, basically, keeps motivation high.
Common Substrate Mistakes
Substrate mistakes happen, even to experienced growers, and many repeat the same patterns. Too wet substrates suffocate mycelium, and too dry ones stall growth. Poor pasteurization or sterilization opens the door to molds that spread fast. Using the wrong substrate for a species leads to slow or weak fruiting, which feels discouraging after weeks of waiting. Not mixing materials evenly, especially supplements, creates hot spots that contaminate early. Watching moisture, heat, and cleanliness, in fact, solves most problems before they snowball.
Conclusion
This Mushroom Substrate Guide shows how the right growing medium shapes every stage of mushroom growing, from colonization speed to final yield. Straw, sawdust, coffee grounds, and alternative substrates each bring strengths that fit different goals and spaces. Experimentation, careful notes, and small test batches often lead to the best personal setups. By trying a few methods and watching results closely, growers usually find a rhythm that works for them and keeps harvests steady.
So, before jumping into the hands-on steps, this video, in a way, gives a clear visual look at how mushroom substrates actually come together in real life. It walks through the process slowly, showing textures, moisture levels, and mixing methods that are often hard to picture from text alone, and that tends to help beginners feel more confident. Watching this alongside the guide can, in fact, set peoples’ minds back to what the substrate should look like at each stage, especially if you’re working with common materials at home.