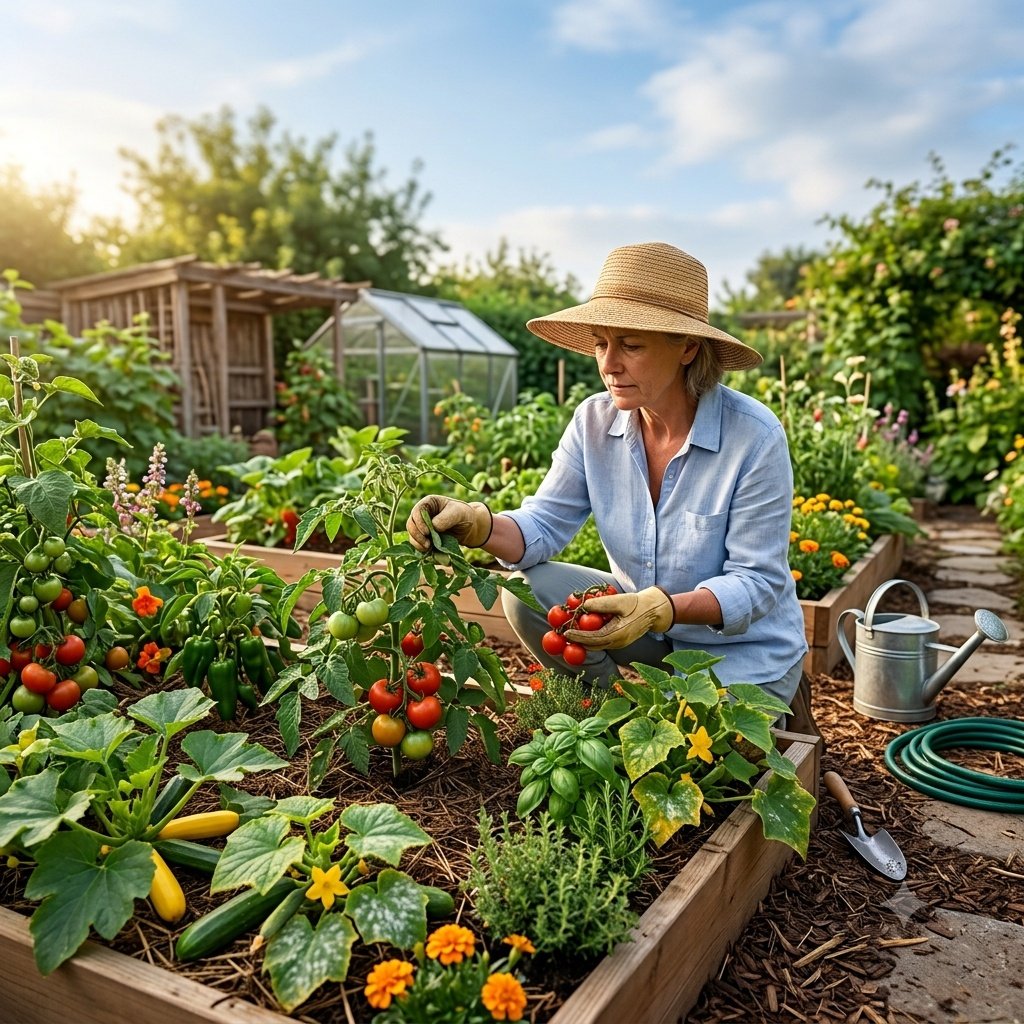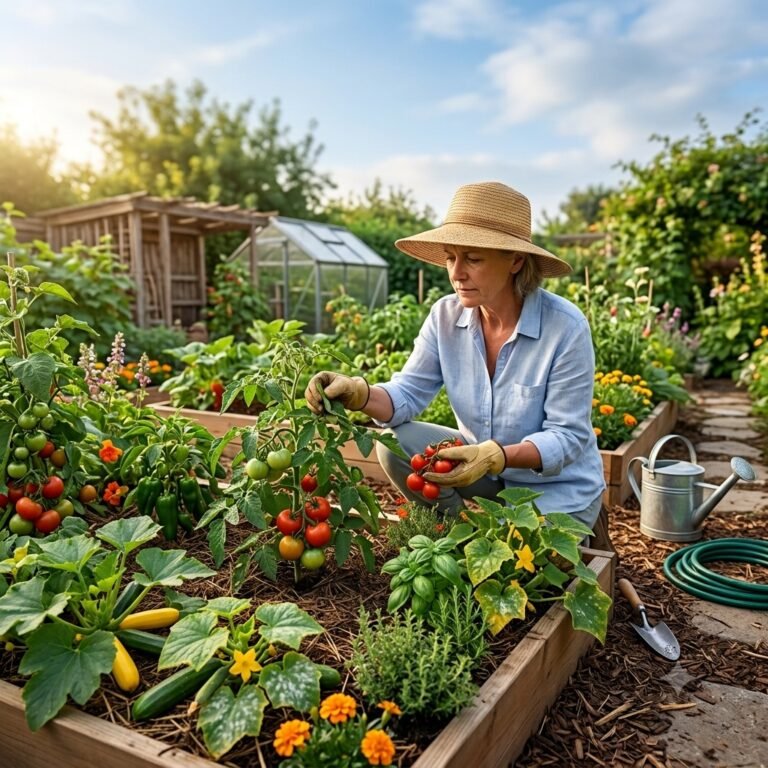
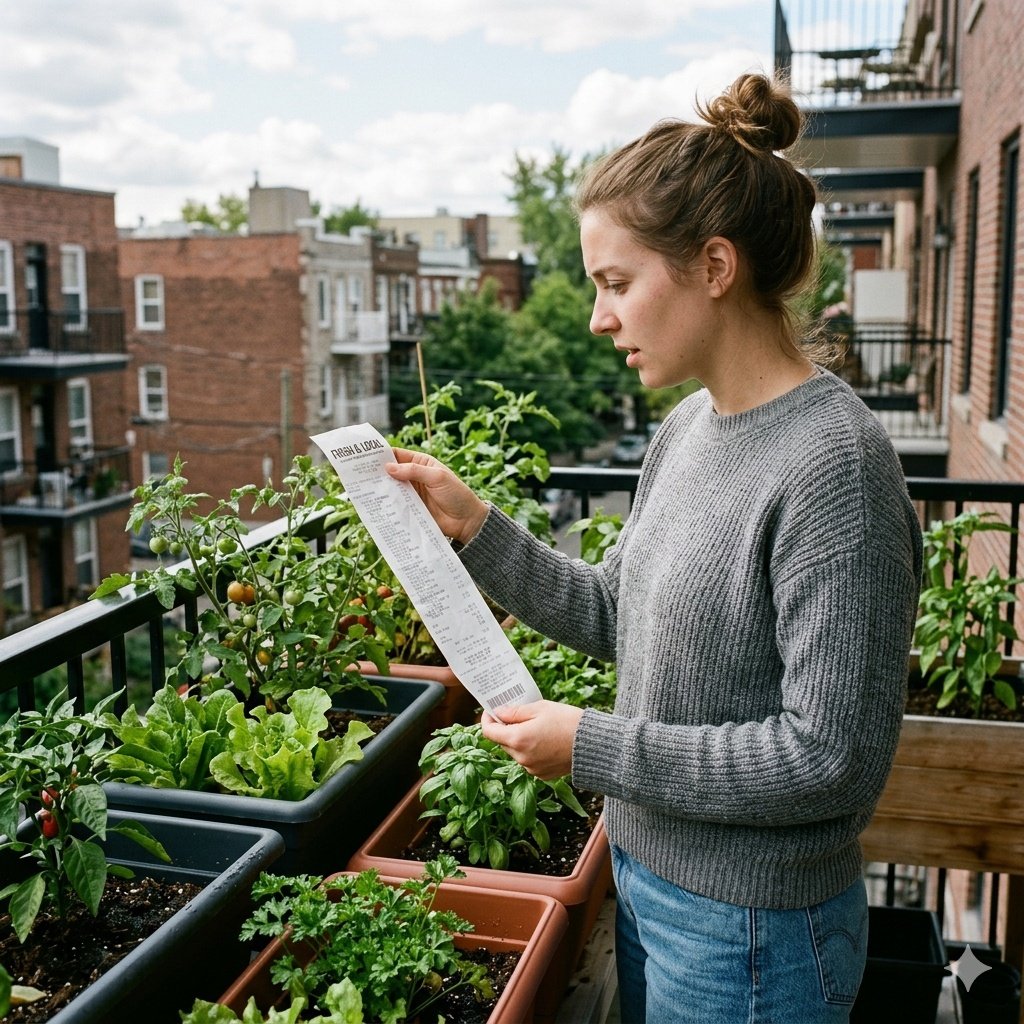
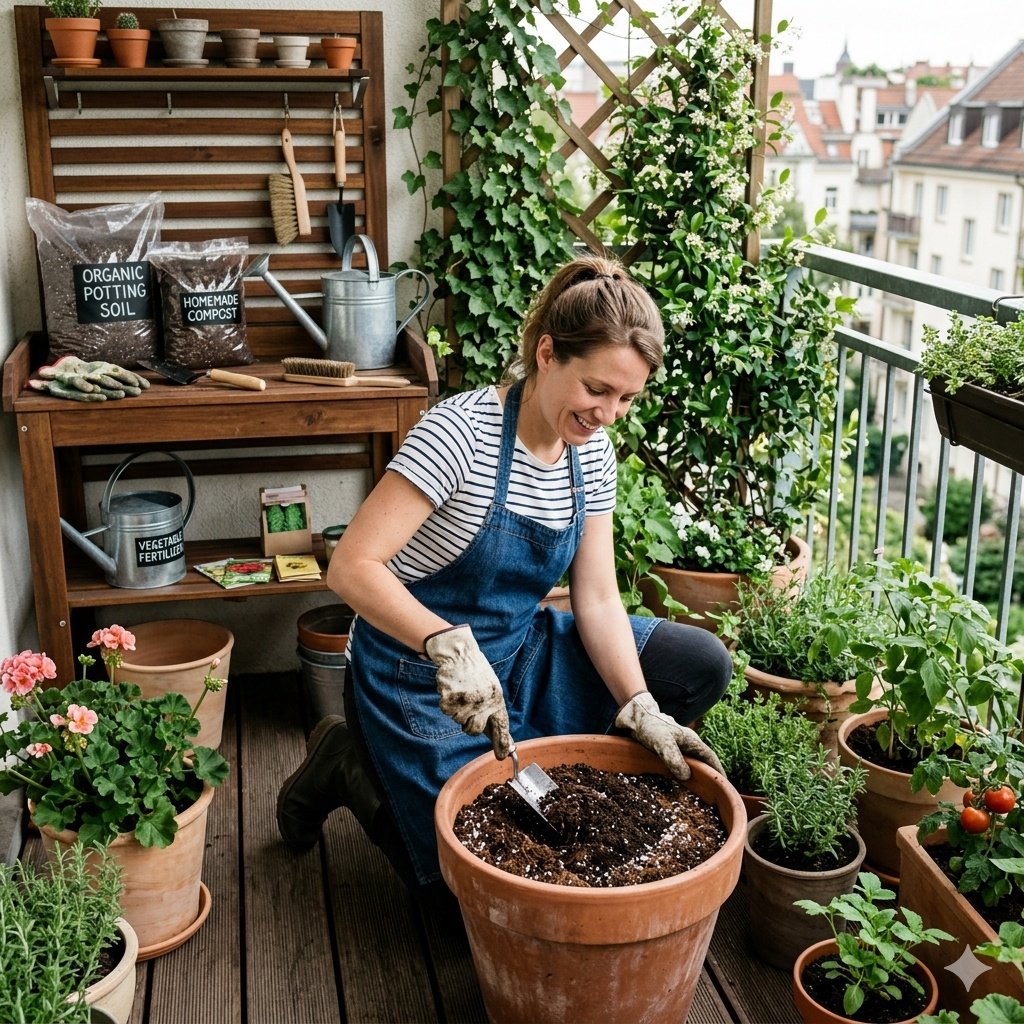
Grocery prices finally pushed me into doing something I’d talked about for years.
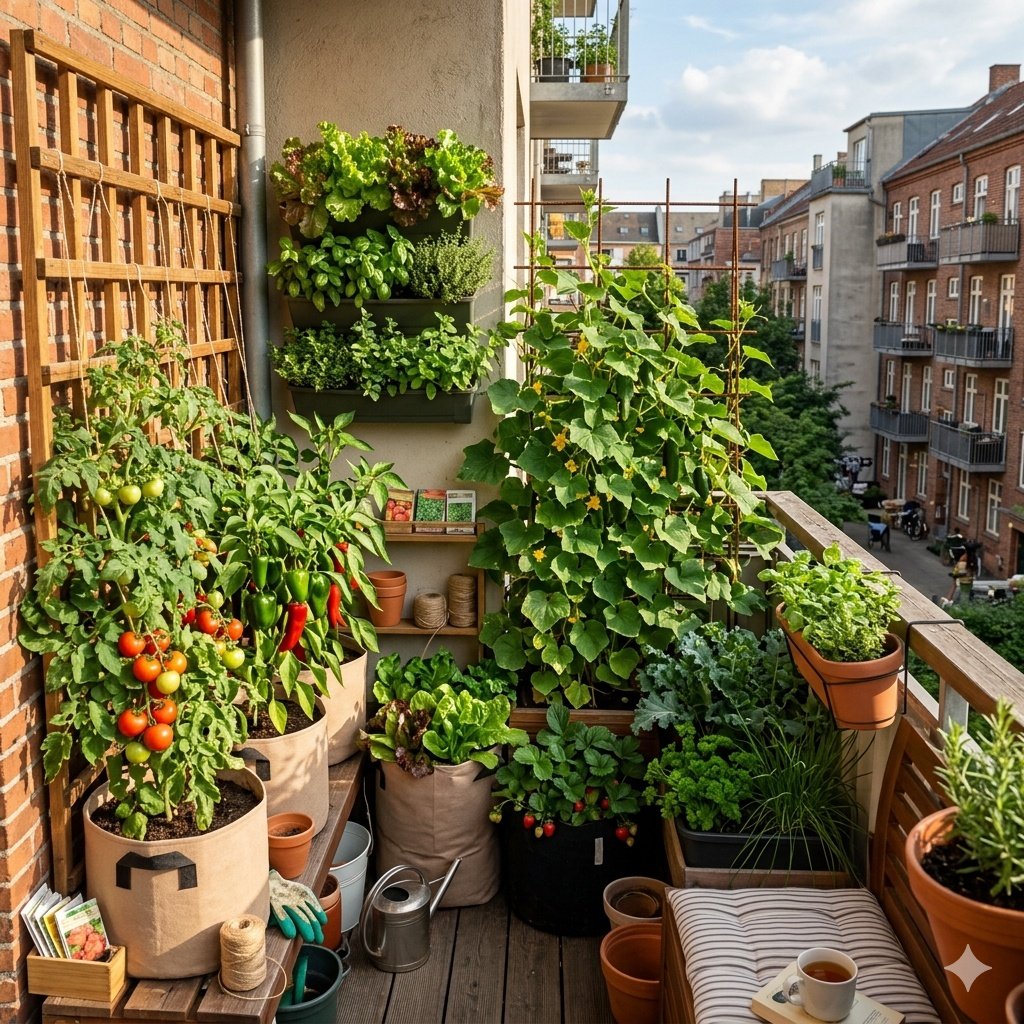
I started growing food on my balcony.
Not a decorative herb pot. Not one lonely tomato plant struggling in the corner. I wanted a real grocery garden in containers — something that could actually cut down my grocery runs and give me fresh food every week.
At first, I honestly thought I’d fail. My balcony wasn’t huge, the sunlight wasn’t perfect, and I’d already killed enough houseplants to lower my confidence. But container gardening turned out to be far more forgiving than I expected.
A few months later, I was harvesting lettuce for salads, clipping herbs while cooking dinner, and carrying bowls of cherry tomatoes into the kitchen like I’d discovered a hidden life upgrade.
Not everything worked. Some plants struggled. A cucumber vine completely took over one corner like it was paying rent. I also underestimated how fast containers dry out in summer. Still, the amount of food I grew surprised me.
This guide covers the exact setup I used, the containers that worked best, the vegetables worth growing, watering systems, fertilizers, tools, and the mistakes I won’t repeat next season.
And yes — this can absolutely work on a small balcony or patio.
Why I Started a Grocery Garden in Containers
The original reason was simple: groceries kept getting expensive.
Fresh herbs felt overpriced. Salad greens spoiled too quickly. And tomatoes somehow tasted worse while costing more. I figured if I could grow even a small percentage of what I regularly bought, it would be worth trying.
I also liked the idea of stepping outside and grabbing ingredients instead of making another grocery trip.
My space was limited, though. No backyard. No raised beds. Just a modest apartment balcony with decent morning sun and enough room for containers if I planned carefully.
I had plenty of beginner fears:
- Would pests ruin everything?
- Was balcony sunlight enough?
- Would watering become a daily headache?
- Could containers actually produce enough food to matter?
The first few weeks were rough. I overwatered basil, planted lettuce too close together, and picked the wrong tomato variety for my space. But once I learned the basics, things improved quickly.
The unexpected part was how relaxing it became. Checking on plants in the morning turned into a routine I genuinely looked forward to.
My Balcony & Growing Setup
Balcony Size & Sunlight
My balcony is small enough that I had to think vertically from the start. It gets around 6 hours of sunlight during spring and summer, mostly morning to early afternoon light.
That turned out to be enough for herbs, greens, peppers, and cherry tomatoes.
The biggest challenge wasn’t space. It was heat. Containers warm up fast, especially during peak summer afternoons, and plants dry out much faster than people expect.
Why I Chose Containers Instead of Raised Beds
Containers made more sense for apartment living.
I could move them around when weather changed, rotate plants toward better sunlight, and rearrange the layout without much effort. Grow bags especially helped because they were lightweight and easy to store during winter.
It also felt less permanent — important when you rent.
How Much Food I Wanted to Grow
I wasn’t trying to become fully self-sufficient. My goal was realistic:
- Herbs for cooking
- Weekly salad greens
- Tomatoes
- Peppers
- A few cucumbers
- Green onions and spinach
Even one productive corner started making a difference surprisingly fast.
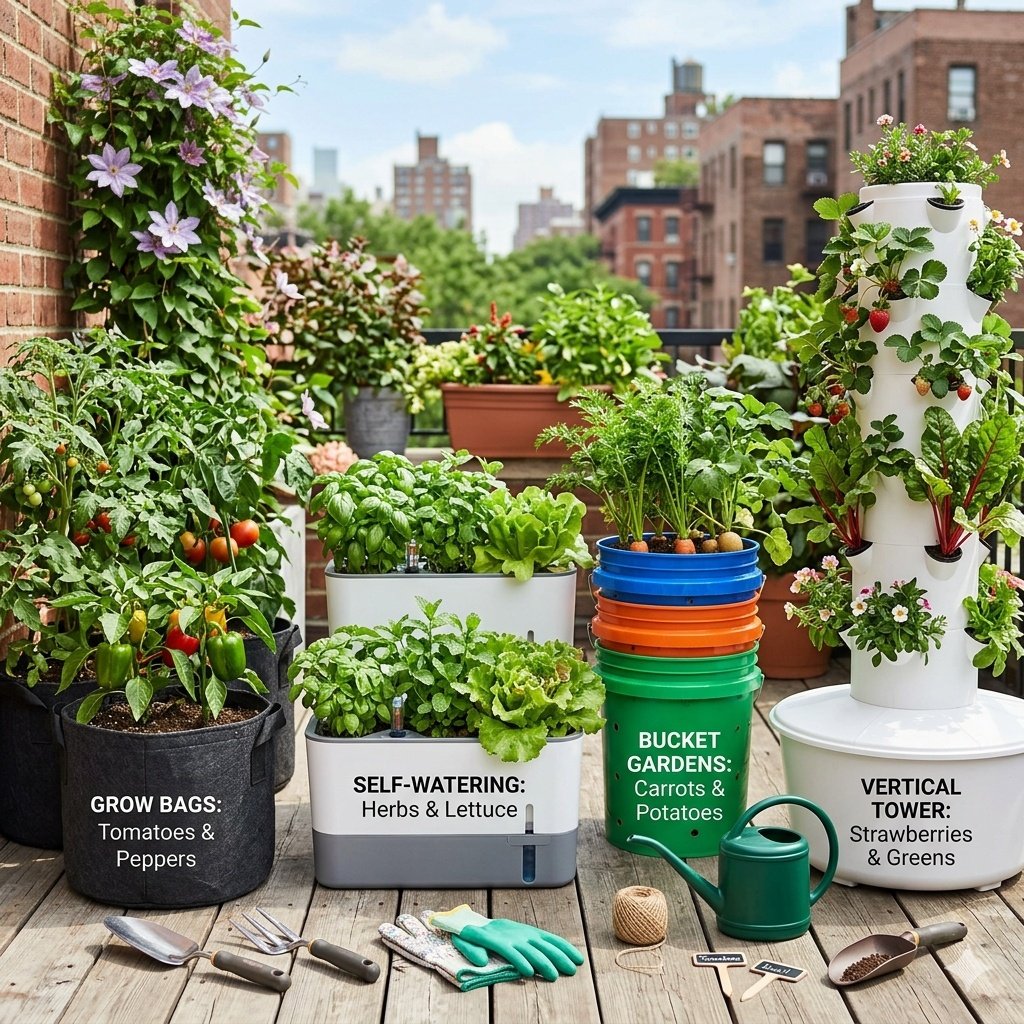
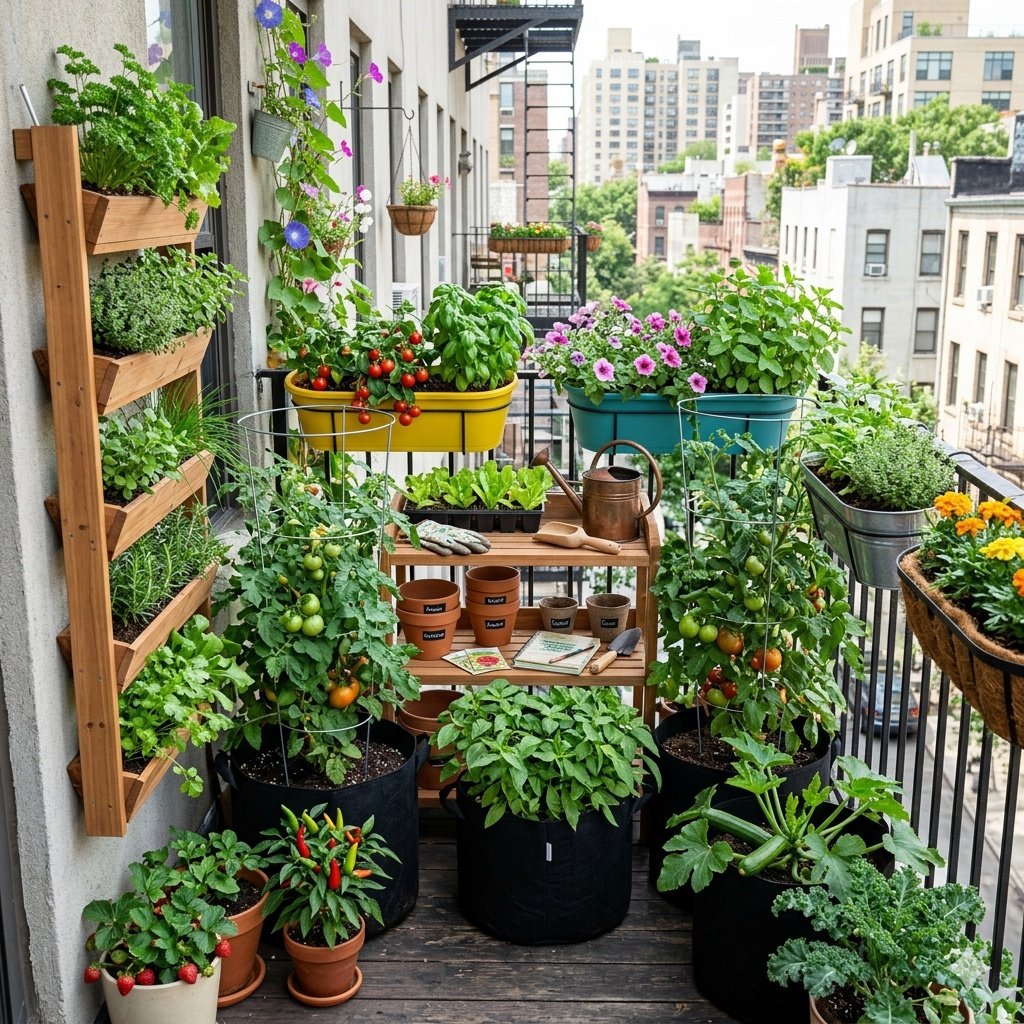
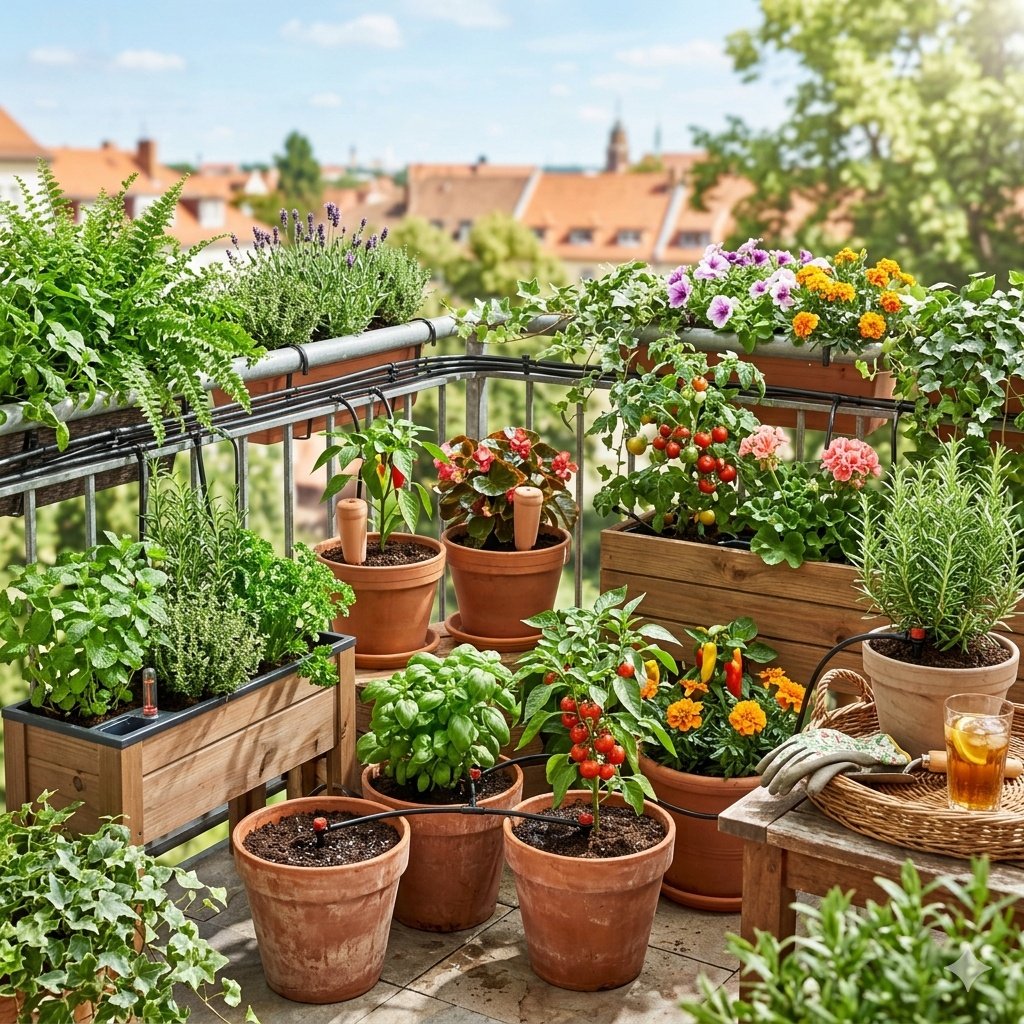
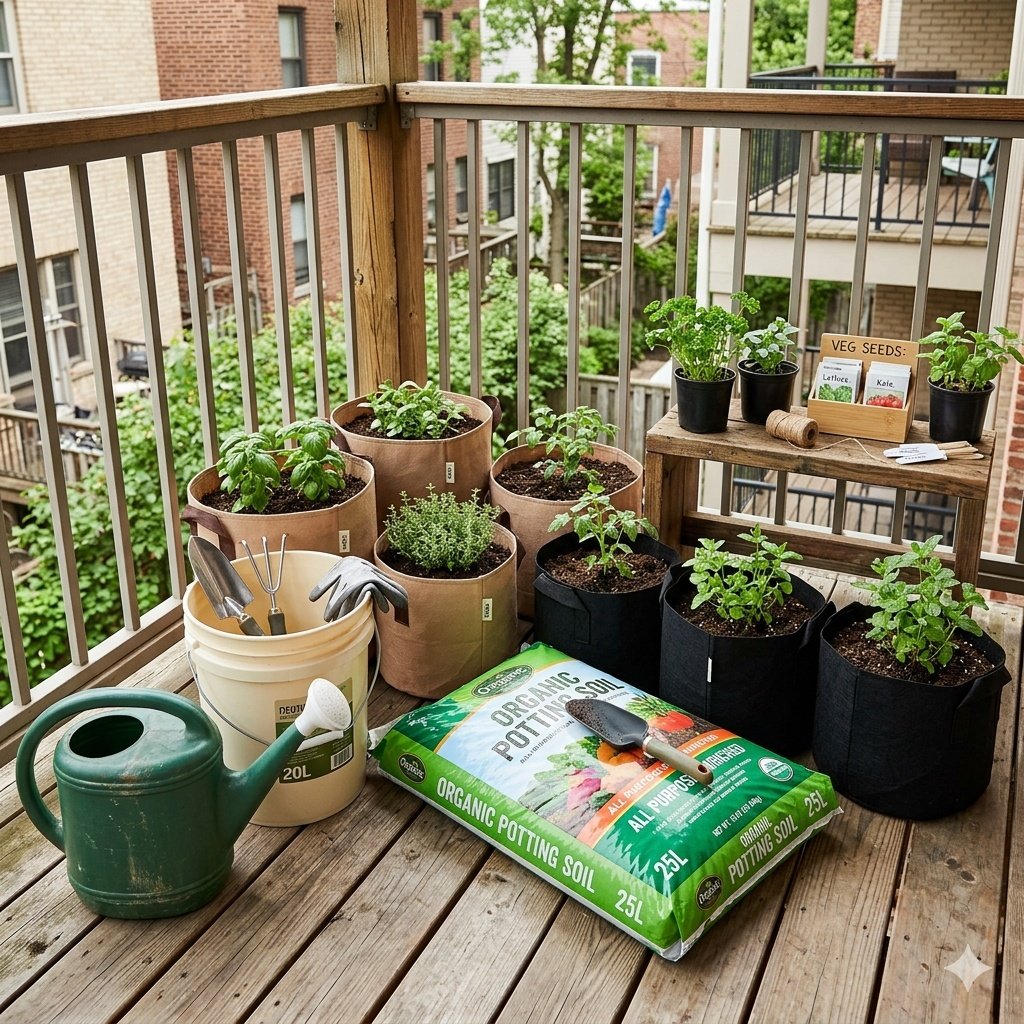
The Exact Containers I Used
Grow Bags
Grow bags became my favorite option almost immediately.
They’re cheap, breathable, lightweight, and surprisingly productive. The airflow around the roots helped prevent soggy soil problems I ran into with plastic pots.
I used:
- 5-gallon grow bags for peppers
- 10-gallon bags for tomatoes
- Smaller bags for herbs
The biggest downside? They dry out quickly in hot weather.
Still worth it.
Self-Watering Planters
These saved several plants during summer heat waves.
Self-watering containers use a water reservoir underneath the soil, which helps plants pull moisture gradually throughout the day. My lettuce and herbs performed noticeably better in these.
They cost more upfront but reduced daily watering stress a lot.
Vertical Planters
Vertical setups helped maximize balcony space without making everything feel crowded.
I used stacked planters for:
- Lettuce
- Spinach
- Strawberries
- Herbs
Leafy greens especially worked well vertically because they don’t need deep root systems.
Buckets & DIY Containers
A few plants grew in simple food-grade buckets with drainage holes drilled into the bottom.
Honestly, they worked fine.
Tomatoes and cucumbers did surprisingly well in them as long as drainage was solid. The only downside was appearance. They weren’t exactly stylish.
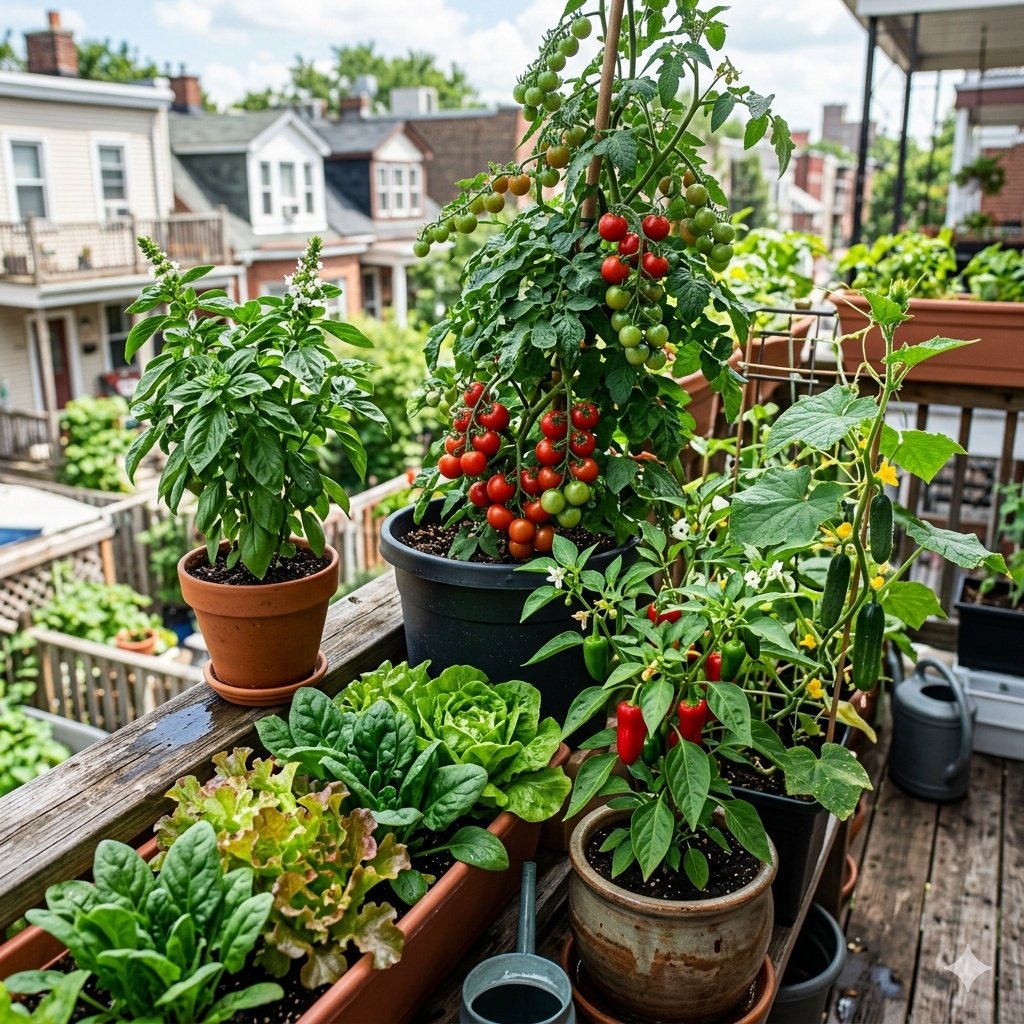
The Vegetables & Herbs That Actually Produced Well
Some plants absolutely earned their space. Others… not so much.
Tomatoes
Cherry tomatoes were the clear winners.
Large slicing tomatoes needed too much space and support for my setup, but compact cherry varieties exploded with fruit once temperatures warmed up.
What worked best:
- 10-gallon grow bags
- Tomato cages plus soft plant ties
- Consistent watering
- Full sun
The biggest mistake beginners make with tomatoes is inconsistent watering. Containers dry fast, and tomato plants hate sudden swings between dry and soaked soil.
I watered daily during hotter weeks.
Estimated harvest:
Several handfuls every week for nearly two months.
Lettuce & Salad Greens
Probably the highest reward crop overall.
Lettuce grows fast, doesn’t require deep containers, and keeps producing if you harvest outer leaves instead of removing the whole plant.
I grew:
- Romaine
- Butter lettuce
- Arugula
- Mixed salad greens
These worked best in shallow rectangular planters and vertical systems.
The trick is succession planting. Instead of planting everything at once, I sowed small batches every two weeks.
That kept salads coming steadily instead of all at once.
Peppers
Peppers were easier than tomatoes and needed less maintenance overall.
Jalapeños and compact bell peppers handled containers really well as long as they had enough warmth and sunlight.
Best setup:
- 5-gallon containers
- Rich potting mix
- Slow-release fertilizer
One thing I learned quickly: peppers hate cold nights. Growth stalled early in the season until temperatures stayed consistently warm.
Cucumbers
These became the balcony drama queens.
Once cucumber vines start growing, they really commit. I used a vertical trellis system to keep them manageable, and that made a huge difference.
Without support, they’d have completely taken over the floor space.
Cucumbers also needed the most water out of everything I grew.
Miss one hot afternoon, and the leaves immediately looked offended.
Herbs
Herbs gave me the biggest day-to-day value.
Basil alone probably paid for itself within weeks. Store-bought herbs are expensive, and fresh-picked versions taste noticeably better.
The most productive herbs were:
- Basil
- Mint
- Parsley
- Cilantro
Mint needs its own container unless you want it invading everything nearby.
Basil loved warm weather but needed regular trimming to stay productive.
Parsley grew slower but lasted much longer into cooler weather.
Green Onions & Spinach
These are beginner-friendly for a reason.
Green onions regrow easily after cutting, and spinach grows quickly during cooler months. Neither needed large containers or complicated care.
If someone wants easy early wins with container gardening, I’d start here.
The Soil, Fertilizers & Compost I Used
The first thing I learned: garden soil doesn’t belong in containers.
I tried it once. Bad idea.
Containers need lightweight potting mix that drains well while still holding enough moisture. Dense soil compacts too easily and suffocates roots.
My mix included:
- Quality potting mix
- Compost
- Perlite for airflow
That combination worked far better than basic cheap soil alone.
For fertilizers, I used a mix of slow-release organic fertilizer and occasional liquid feeding every couple of weeks during peak growth.
Tomatoes and cucumbers especially needed extra nutrients once fruit production started.
I also kept a tiny countertop compost container for vegetable scraps, coffee grounds, and eggshells. Even in a small apartment, composting was manageable with the right setup.
The biggest nutrient mistake beginners make is assuming fresh potting mix will feed plants forever.
Containers run out of nutrients fast.
How I Watered Everything Efficiently
Watering became the most important daily task.
Containers dry out much faster than raised beds because airflow reaches all sides of the soil. During peak summer heat, some plants needed water every day.
Sometimes twice.
The systems that helped most:
- Self-watering planters
- Drip irrigation kit
- Watering spikes
- Mulch on top of soil
A basic drip irrigation setup ended up being worth every dollar. It saved time, kept moisture levels more consistent, and reduced stress during hotter weeks.
I also started checking soil moisture with my finger instead of watering automatically on a schedule.
That prevented overwatering — another common beginner problem.
Leafy greens liked evenly moist soil. Tomatoes preferred deeper watering less frequently. Herbs were generally more forgiving.
After a while, you start recognizing what thirsty plants look like before they fully wilt.
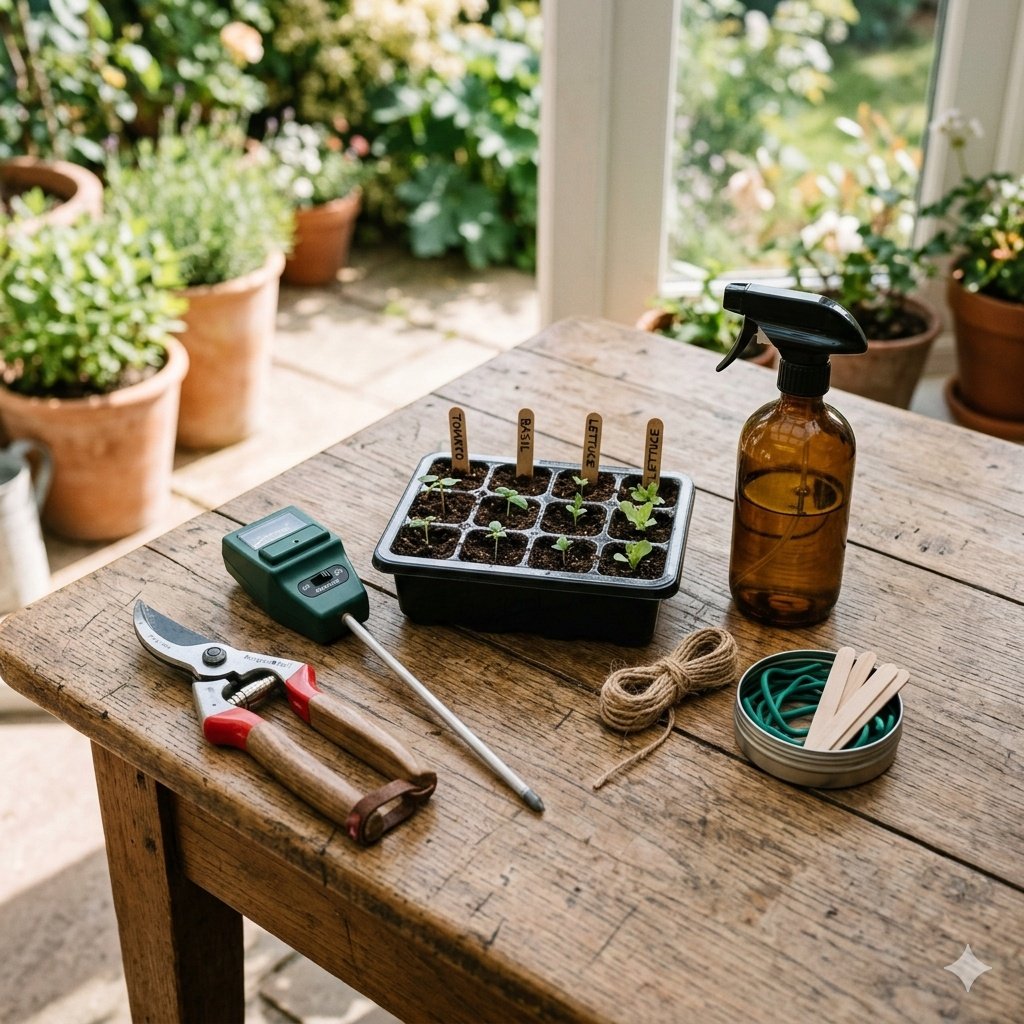
The Gardening Tools That Saved Me Time
Not every gardening tool is necessary.
A few genuinely helped, though.
The most useful:
- Hand pruners
- Moisture meter
- Trellis clips
- Plant ties
- Seed trays
- Small spray bottle
Pruners made harvesting easier and kept herbs productive. Trellis clips prevented tomato vines from collapsing everywhere. A moisture meter helped early on while I learned proper watering habits.
LED grow lights also helped during seed starting season indoors before temperatures warmed up enough outside.
The least necessary tools were the fancy decorative accessories marketed toward beginner gardeners.
Most plants care more about soil quality and sunlight than matching containers.
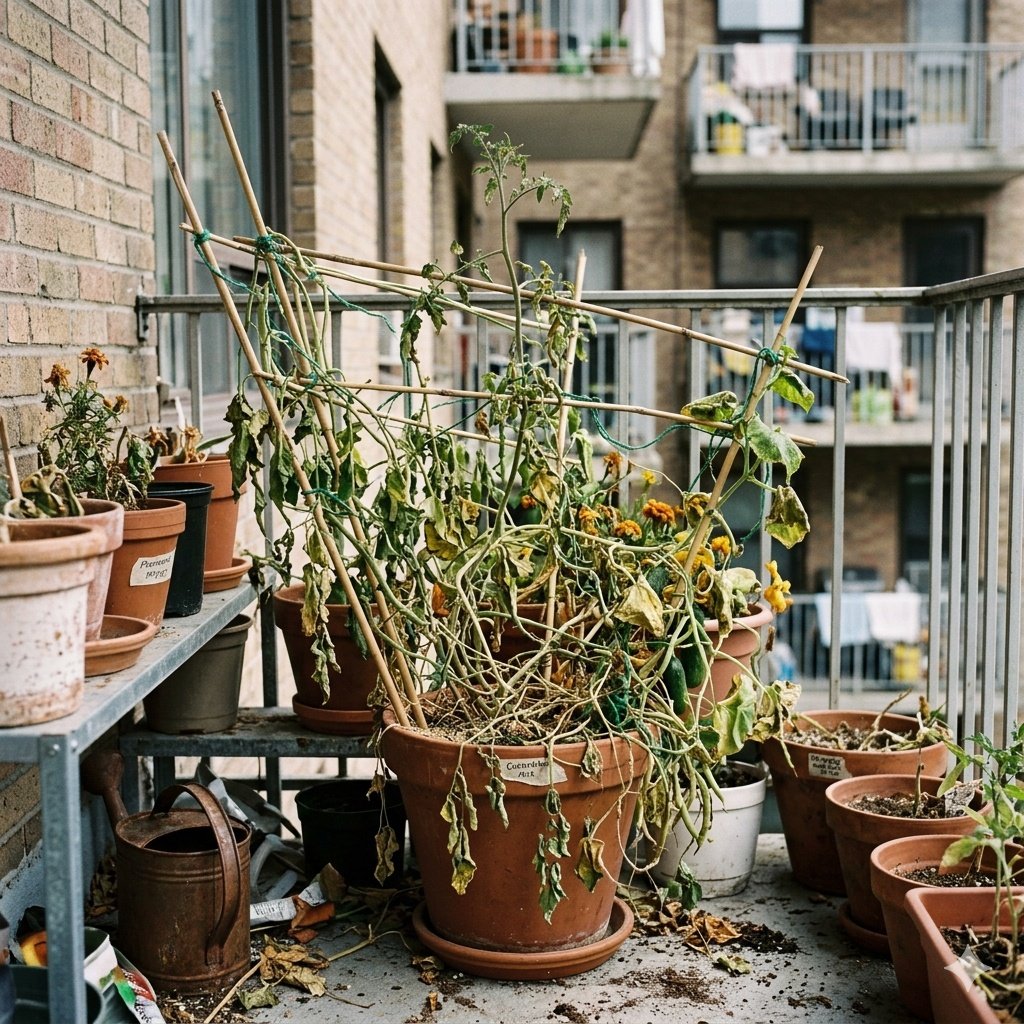
My Biggest Container Gardening Mistakes
I overcrowded everything at first.
When seedlings are tiny, it’s easy to think you have plenty of room. A month later, plants are fighting each other for sunlight and airflow.
I also chose massive tomato varieties that were completely wrong for containers. Compact or dwarf types work much better for balconies.
Drainage caused problems early on too. One decorative planter looked great but trapped too much water, which damaged the roots.
Then there was watering.
I underestimated how quickly summer heat dries containers. Missing even one really hot day stressed some plants badly.
Weak trellises were another mistake. Cucumbers and tomatoes get heavy fast, especially after fruit develops.
And I definitely ignored fertilizer schedules longer than I should have. Plants in containers depend entirely on you for nutrients.
They can’t stretch roots deeper into the ground searching for more.
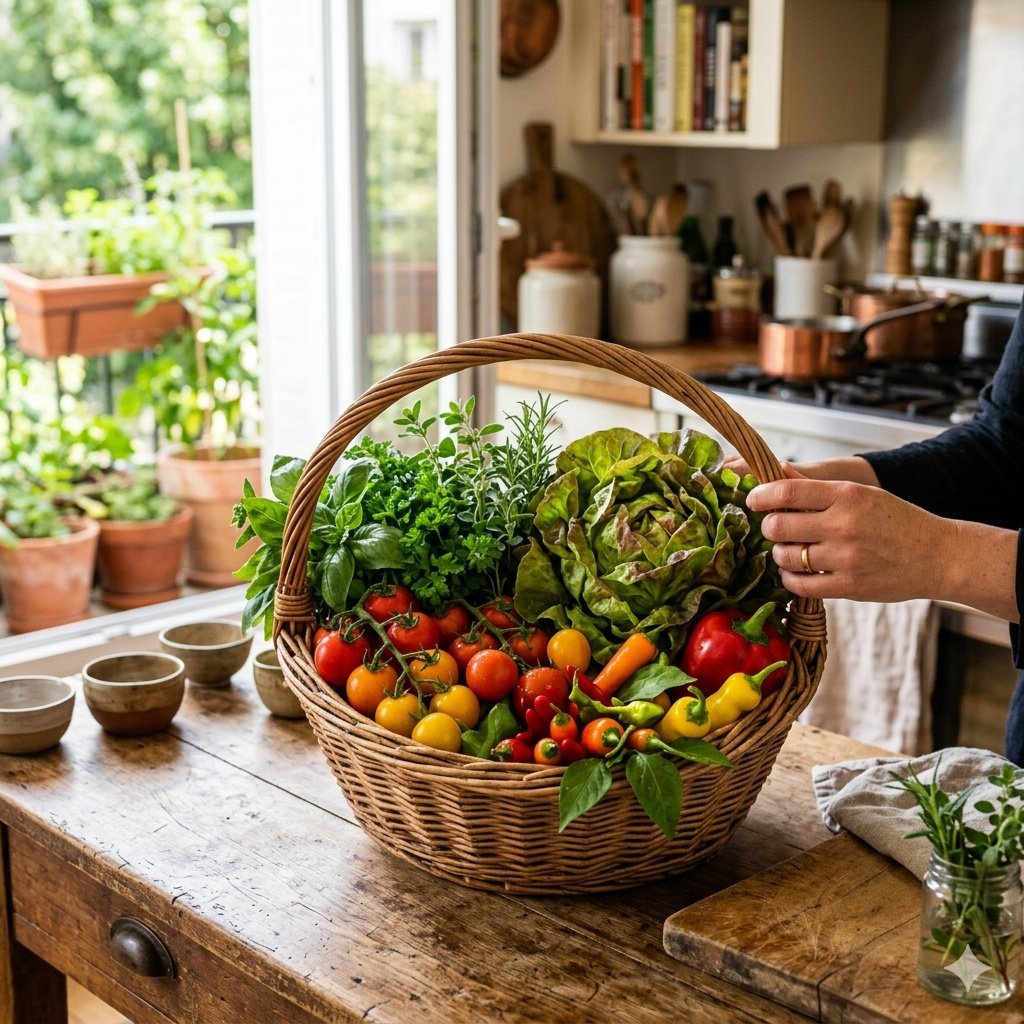
How Much Food I Actually Harvested
Enough to matter.
Not enough to stop grocery shopping completely — but enough to noticeably reduce what I bought each week.
I harvested:
- Salad greens several times weekly
- Constant fresh herbs
- Bowls of cherry tomatoes
- Regular peppers
- More cucumbers than expected
The herbs alone replaced almost all store-bought herbs during the season.
Lettuce became a steady supply instead of an occasional purchase. Tomatoes tasted better than anything from the grocery store, which honestly ruined store tomatoes for me afterward.
The biggest surprise wasn’t the quantity.
It was how satisfying it felt walking outside and grabbing ingredients minutes before cooking.
That part never got old.
How Much the Entire Setup Cost
Container gardening can be surprisingly affordable if you start small. But costs climb fast once you add self-watering systems, grow lights, or premium planters.
I tested a mix of budget and mid-range gear during my first season, and honestly, some of the cheapest solutions worked perfectly fine. The biggest lesson was this: spend more on soil and watering reliability, not decorative containers.
Here’s a realistic breakdown of what a grocery garden in containers might cost in 2026.
Budget Balcony Grocery Garden Setup
This setup works well for beginners who want to grow herbs, lettuce, spinach, green onions, and one or two fruiting plants like peppers or cherry tomatoes.
| Item | Approx Quantity | Estimated Cost |
|---|---|---|
| 5-gallon grow bags | 4 | $20–$28 |
| Basic plastic containers | 3–4 | $18–$30 |
| Potting mix | 3 large bags | $30–$45 |
| Compost | 1 bag | $8–$12 |
| Tomato cage | 1 | $8–$15 |
| Herb seedlings/seeds | 6–8 plants | $15–$25 |
| Vegetable seedlings | 4–5 plants | $20–$35 |
| Watering can | 1 | $12–$20 |
| Hand pruners | 1 | $10–$18 |
| Plant ties & clips | Pack | $8–$12 |
Approx Total:
$150–$240
This setup can still produce:
- Weekly salad greens
- Fresh herbs
- Cherry tomatoes
- Peppers
- Green onions
Honestly, this is enough for most beginners.
Mid-Range Grocery Garden Setup
This is where things started feeling more efficient for me. Better containers, stronger support systems, and improved watering reduced plant stress a lot during summer.
| Item | Approx Quantity | Estimated Cost |
|---|---|---|
| Premium grow bags | 6–8 | $45–$70 |
| Self-watering planters | 2–3 | $60–$120 |
| Vertical planter tower | 1 | $70–$120 |
| High-quality potting mix | 5 bags | $60–$90 |
| Organic fertilizer | 2 types | $25–$40 |
| Trellis system | 2 | $30–$60 |
| Drip irrigation starter kit | 1 | $45–$90 |
| Moisture meter | 1 | $12–$25 |
| Seed trays & starter kit | 1 | $20–$35 |
| Vegetable seedlings/seeds | Multiple varieties | $40–$70 |
Approx Total:
$400–$720
This type of setup usually supports:
- Multiple tomato plants
- Cucumbers
- Peppers
- Continuous lettuce harvests
- Large herb production
- Vertical growing systems
This is the point where grocery savings become more noticeable during peak season.
Premium Urban Container Gardening Setup
This setup is closer to what serious balcony gardeners or long-term hobby growers use. It’s not necessary for beginners, but it creates a much more automated system.
| Item | Approx Quantity | Estimated Cost |
|---|---|---|
| Large self-watering raised containers | 3–5 | $250–$500 |
| Premium vertical growing system | 1–2 | $150–$350 |
| Smart drip irrigation with timer | 1 system | $120–$250 |
| LED grow lights | 2–4 | $80–$250 |
| Balcony shelving/racks | 1–2 | $70–$180 |
| Premium organic soil & compost | Multiple bags | $120–$200 |
| Heavy-duty trellises | Several | $60–$120 |
| Seed starting station | 1 | $60–$140 |
| Gardening tools & accessories | Full setup | $80–$180 |
Approx Total:
$1,000–$2,100+
This level works best for:
- Large balcony food gardens
- Extended growing seasons
- Indoor seed starting
- Higher-yield production
- Gardeners growing food year after year
Where It’s Worth Spending More
Some upgrades genuinely improved plant health and reduced frustration.
Worth the extra money:
- Quality potting mix
- Reliable self-watering systems
- Strong trellises
- Drip irrigation kits
- Large grow bags
Where cheaper options worked fine:
- Buckets instead of designer planters
- DIY plant labels
- Basic hand tools
- Simple shelving
- Seed trays
One thing I wouldn’t cheap out on again is soil. Cheap potting mix dried unevenly, compacted faster, and produced weaker plants overall.
Good soil made a bigger difference than expensive containers ever did.

What I’d Do Differently Next Season
I’d grow more vertically from the beginning.
Balcony space disappears quickly once plants mature, and vertical gardening solves a lot of that problem.
I’d also install drip irrigation earlier instead of waiting until summer heat became exhausting.
Another change? More greens and herbs. Fewer oversized plants.
Large tomatoes were fun but took up huge amounts of space compared to the food they produced. Herbs, lettuce, spinach, and peppers gave me better overall value for the space available.
Succession planting would also improve harvest consistency.
That’s one of the best parts about gardening: every season teaches you something useful for the next one.
Can You Really Grow a Grocery Garden in Containers?
Yes — as long as expectations stay realistic.
A balcony won’t fully replace a supermarket. But container gardening absolutely can reduce grocery costs while giving you fresher food.
The most productive crops for small spaces are usually:
- Herbs
- Lettuce
- Spinach
- Peppers
- Cherry tomatoes
Start small.
Three containers are enough to learn the basics without getting overwhelmed. A few herbs, one tomato plant, and some salad greens can already make a noticeable difference.
Consistency matters far more than perfection.
Related Reads
You might find these helpful as you keep going:
- Metal vs Wood Raised Garden Beds: Which Is Better?
- 17 Full Sun Plants to Grow in May
- 7 Best Fertilizers for Raised Beds (Top Picks + Feeding Guide)
FAQs
What vegetables grow best in containers?
Tomatoes, peppers, lettuce, spinach, cucumbers, green onions, and herbs all grow well in containers with proper sunlight and watering.
How much sunlight does a grocery garden need?
Most vegetables need 6–8 hours of sunlight daily. Leafy greens can handle partial shade better than fruiting plants.
Are grow bags better than plastic pots?
Grow bags provide better airflow and root health, but they dry out faster than plastic containers.
How often should container vegetables be watered?
Usually daily during hot weather. Smaller containers may need water twice a day in peak summer heat.
Can you grow enough food on a balcony?
You can grow enough herbs, greens, and vegetables to reduce grocery purchases, especially during warmer months.
What size containers do vegetables need?
Most vegetables need at least 5 gallons of soil. Tomatoes and cucumbers perform better in 10-gallon containers.
What is the easiest vegetable to grow in containers?
Lettuce is one of the easiest because it grows quickly, needs shallow containers, and can be harvested continuously.
Readability: ~8 Gunning Fog score. Adjustments available on request.
Final Thoughts
Starting a grocery garden in containers ended up changing the way I think about food.
Not because I became fully self-sufficient. I didn’t.
But growing even part of my own food made meals feel different somehow. Fresher. More connected. More intentional.
And it turned out to be much easier than I expected once I stopped overcomplicating everything.
You don’t need a backyard. You don’t need expensive gear. You don’t even need perfect sunlight to start learning.
A few containers, decent soil, regular watering, and beginner-friendly plants can go surprisingly far.
If you’re thinking about trying it, start simple:
- One tomato plant
- A container of herbs
- A tray of lettuce
That’s enough to get hooked.
Watching dinner ingredients grow a few steps from the kitchen never stopped feeling satisfying.